 SharePoint & OneDrive
Approximate time to complete: 10-15 minutes
Approximate time to complete: 5 minutes if Option A, 10-15 minutes if Option B
Before you begin
To connect ATG to SharePoint, you will need to follow the steps below:
- Create an enterprise application in Microsoft Entra
- Configure API permissions for the application
- (Option B only) Configure site-specific permissions using PowerShell
- Create a client secret
- Retrieve credentials to connect SharePoint in ATG
- Configure your SharePoint sites in ATG
1. Create an entreprise application in Microsoft Entra
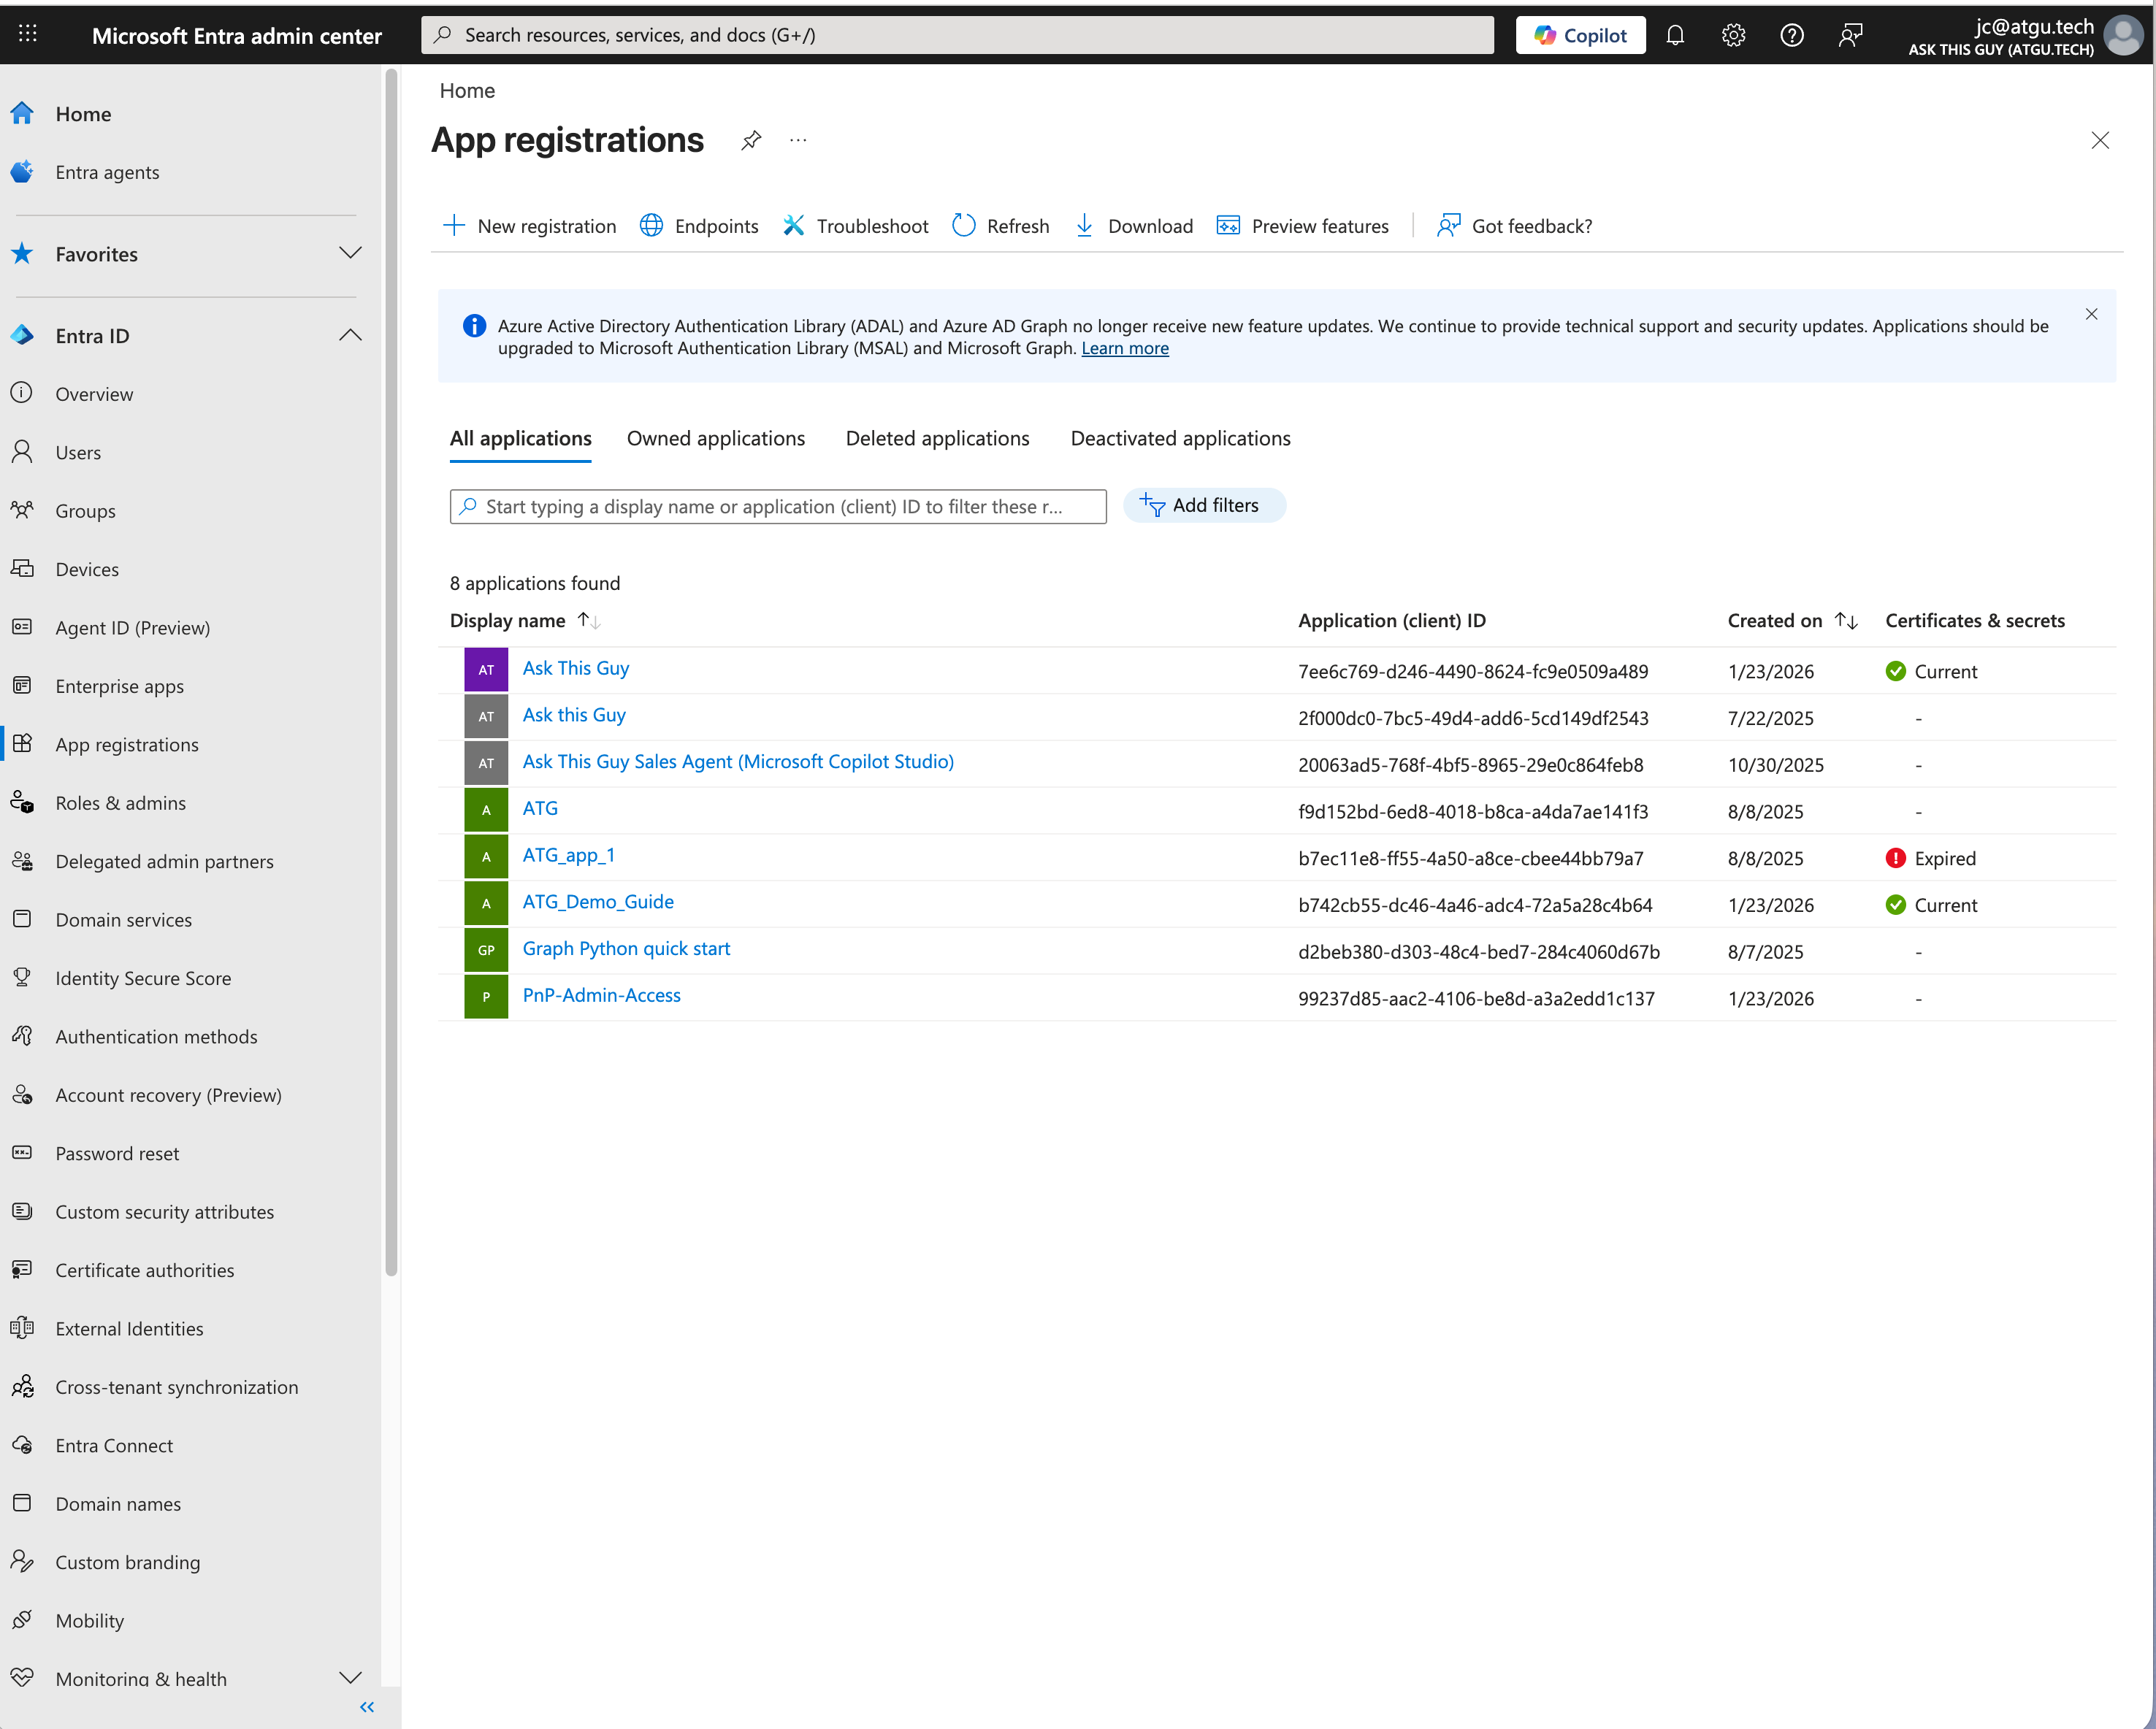
Go to App Registrations menu
Navigate to Microsoft Entra Admin Center, and go to 'App registrations' in the left menu.
 Microsoft Entra Admin Center
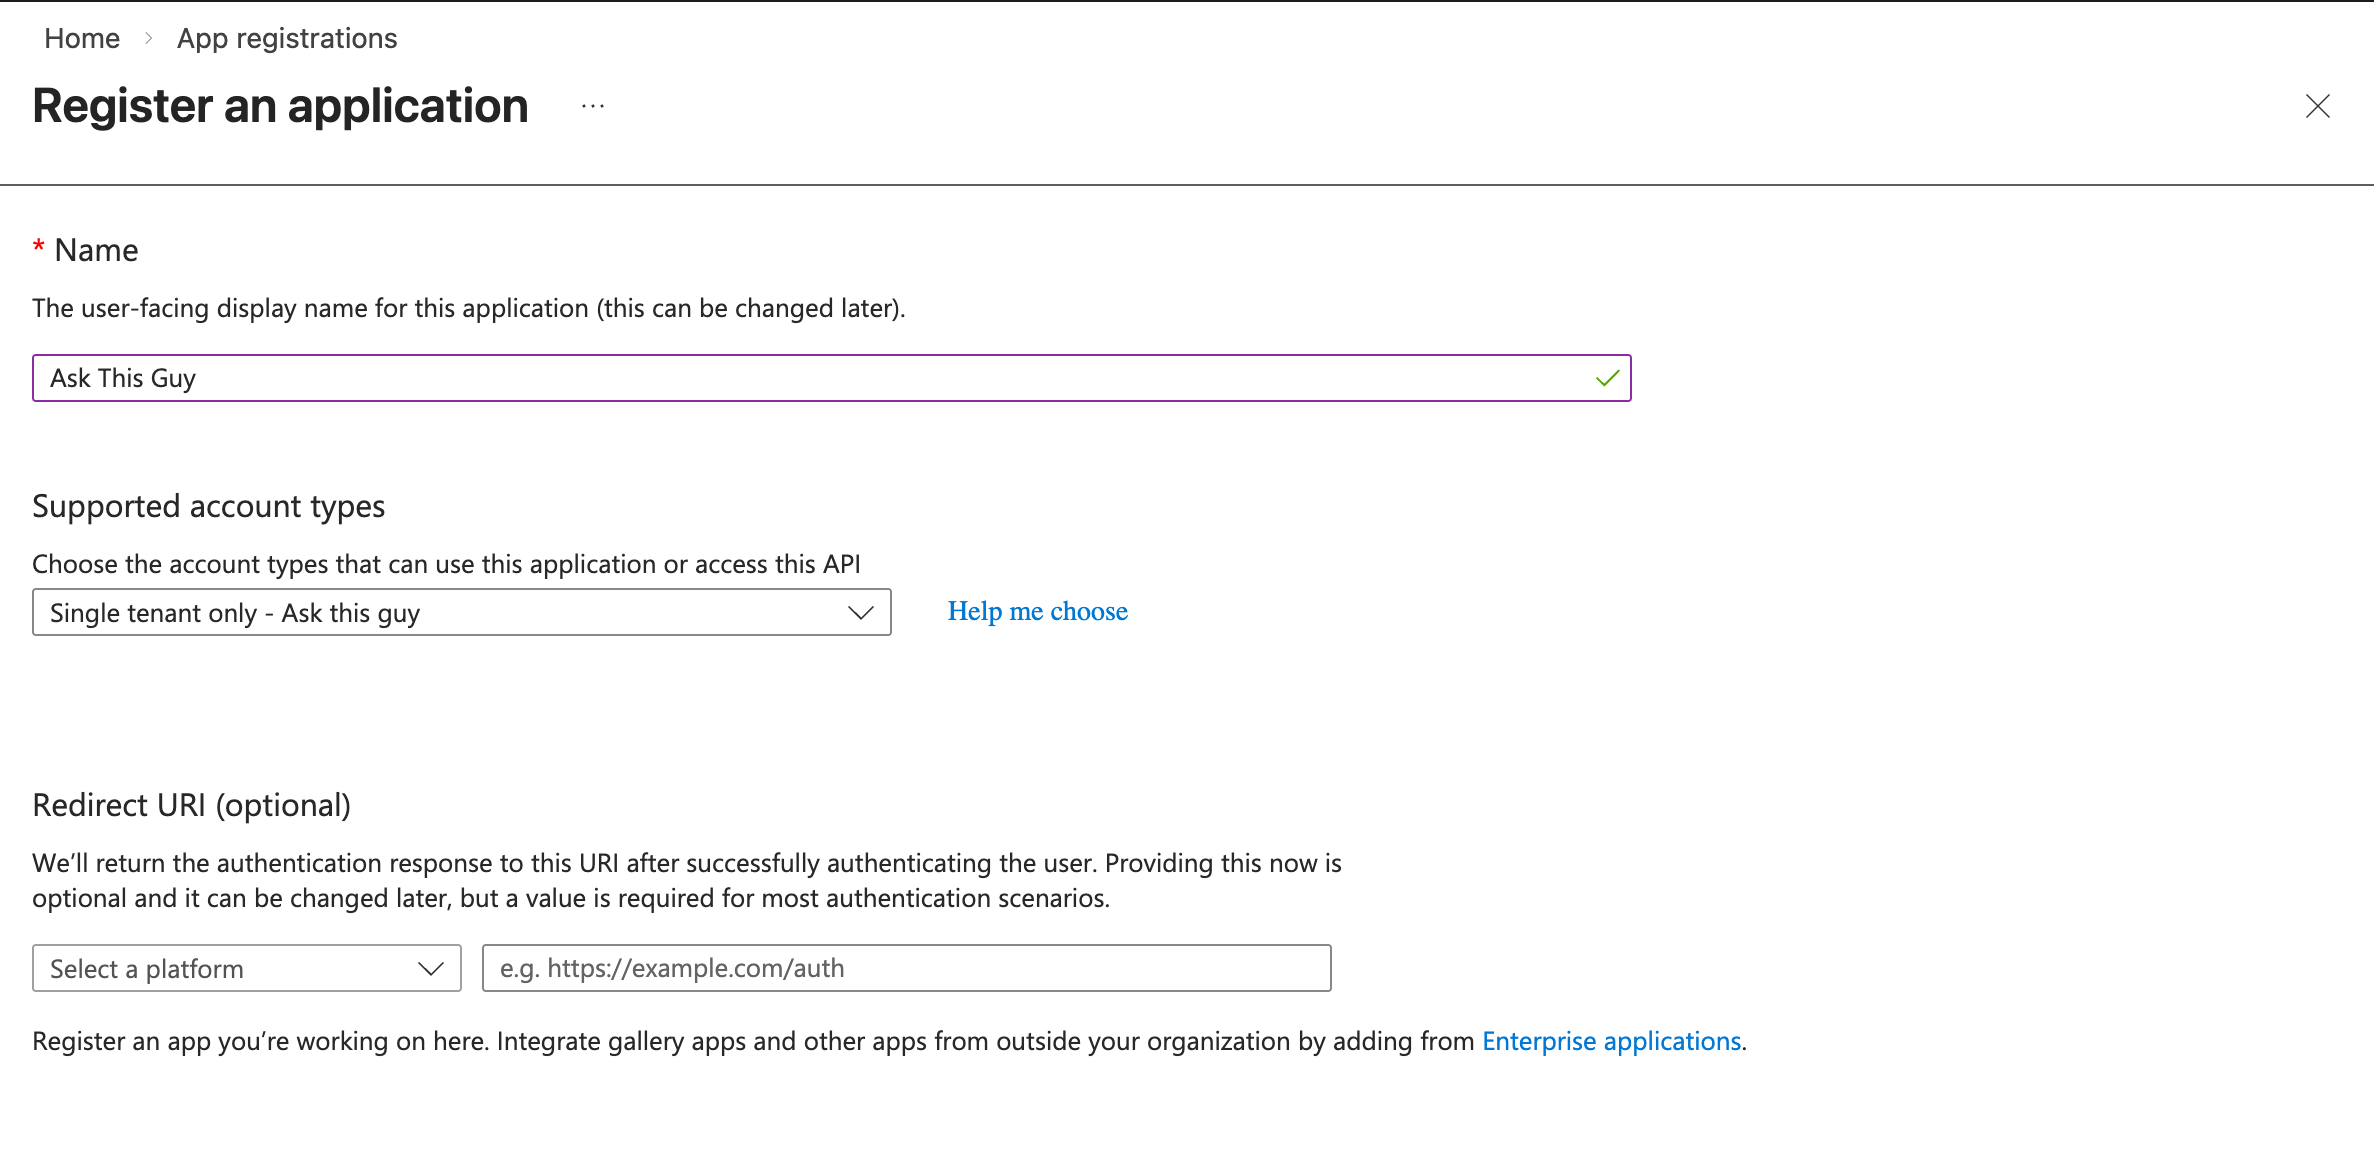
Create a new app registration
Click on "+ New registration" on the top menu. Fill in "Ask This Guy" (or another name if you prefer) as the name, leave the default settings below, and click "Register":
 App registration creation
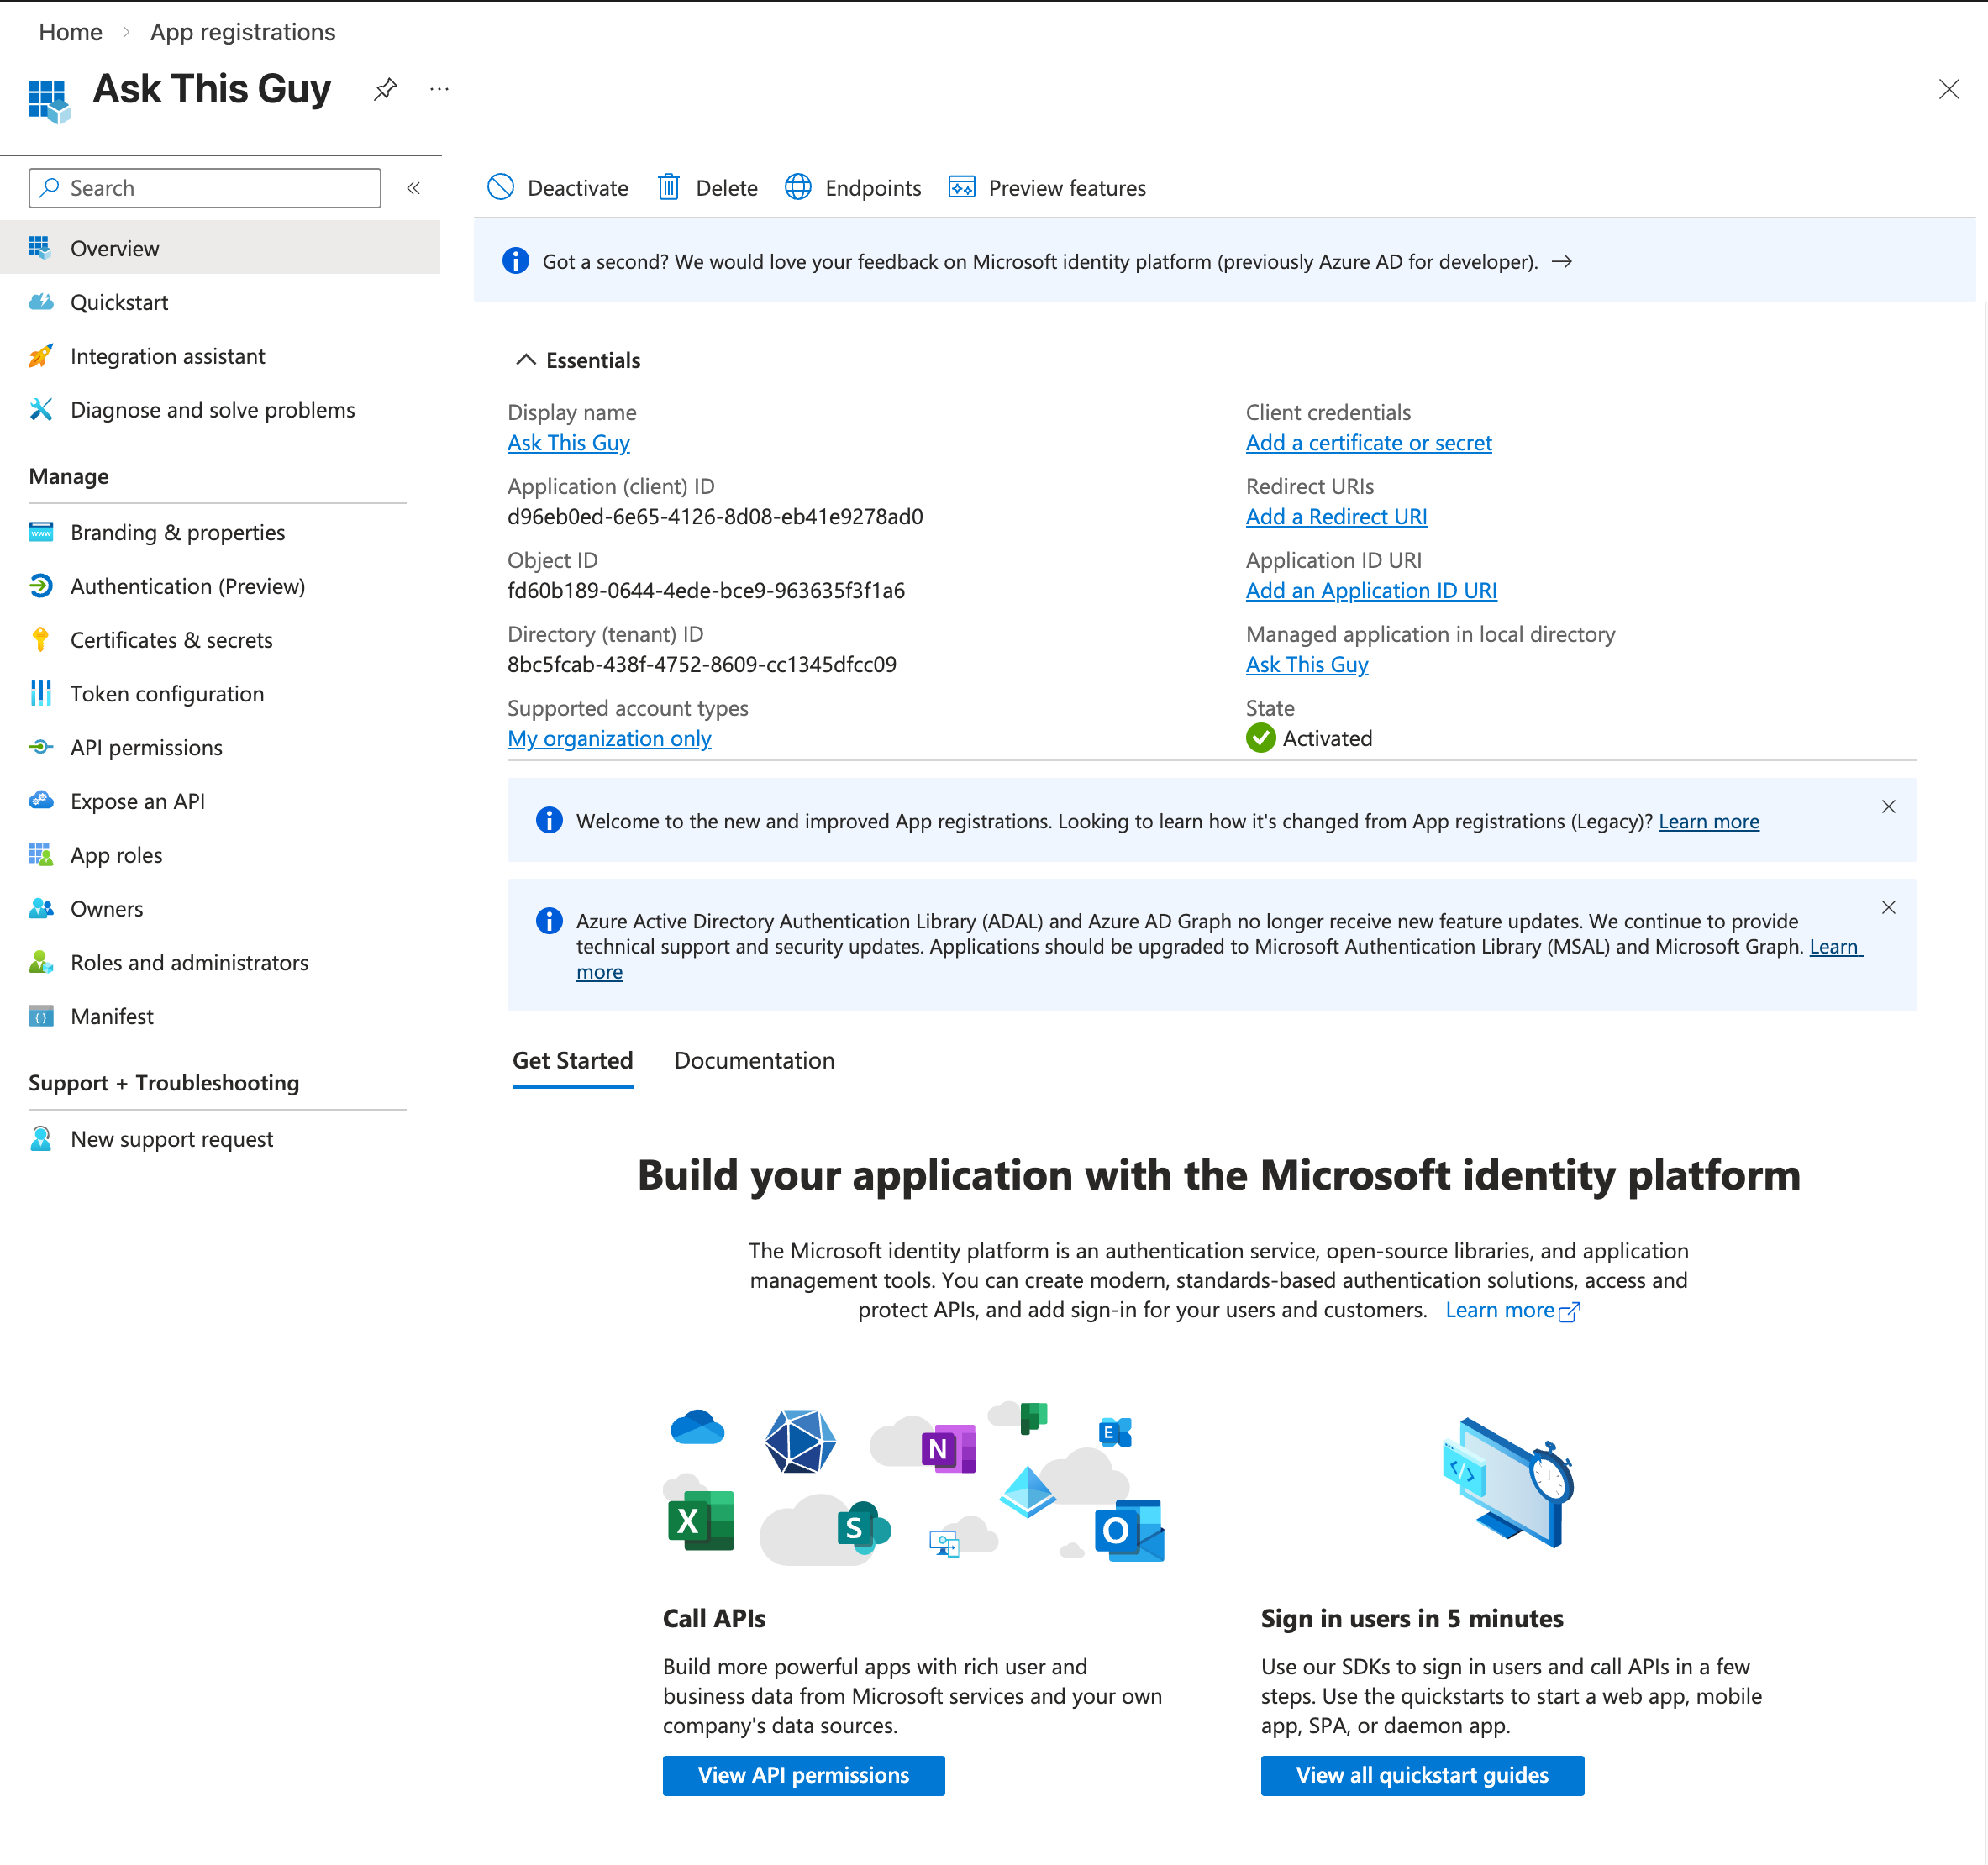
Application overview
After registration, the application management page appears. You will need to note two important values from this page later:
- Application (client) ID
- Directory (tenant) ID
 App registration overview
2. Configure Microsoft Graph API permissions
You have two options for configuring permissions:
Option A: Global permissions for all SharePoint/OneDrive sites.
This configuration is the easiest one: you will grant ATG with reading privileges on all SharePoint sites and enable space discovery. You can configure everything in the ATG Admin Console easily.
Option B: Restricted permissions for specific SharePoint sites
This configuration is for additional security: you will select the sites you want to grand access to ATG. You will need to manually configure the list of authorized sites in the admin console.
Option A: Global permissions for all SharePoint/OneDrive sites
Navigate to "API permissions" and click on "+ Add a permission":
 Add a permission
Click on "Microsoft Graph":
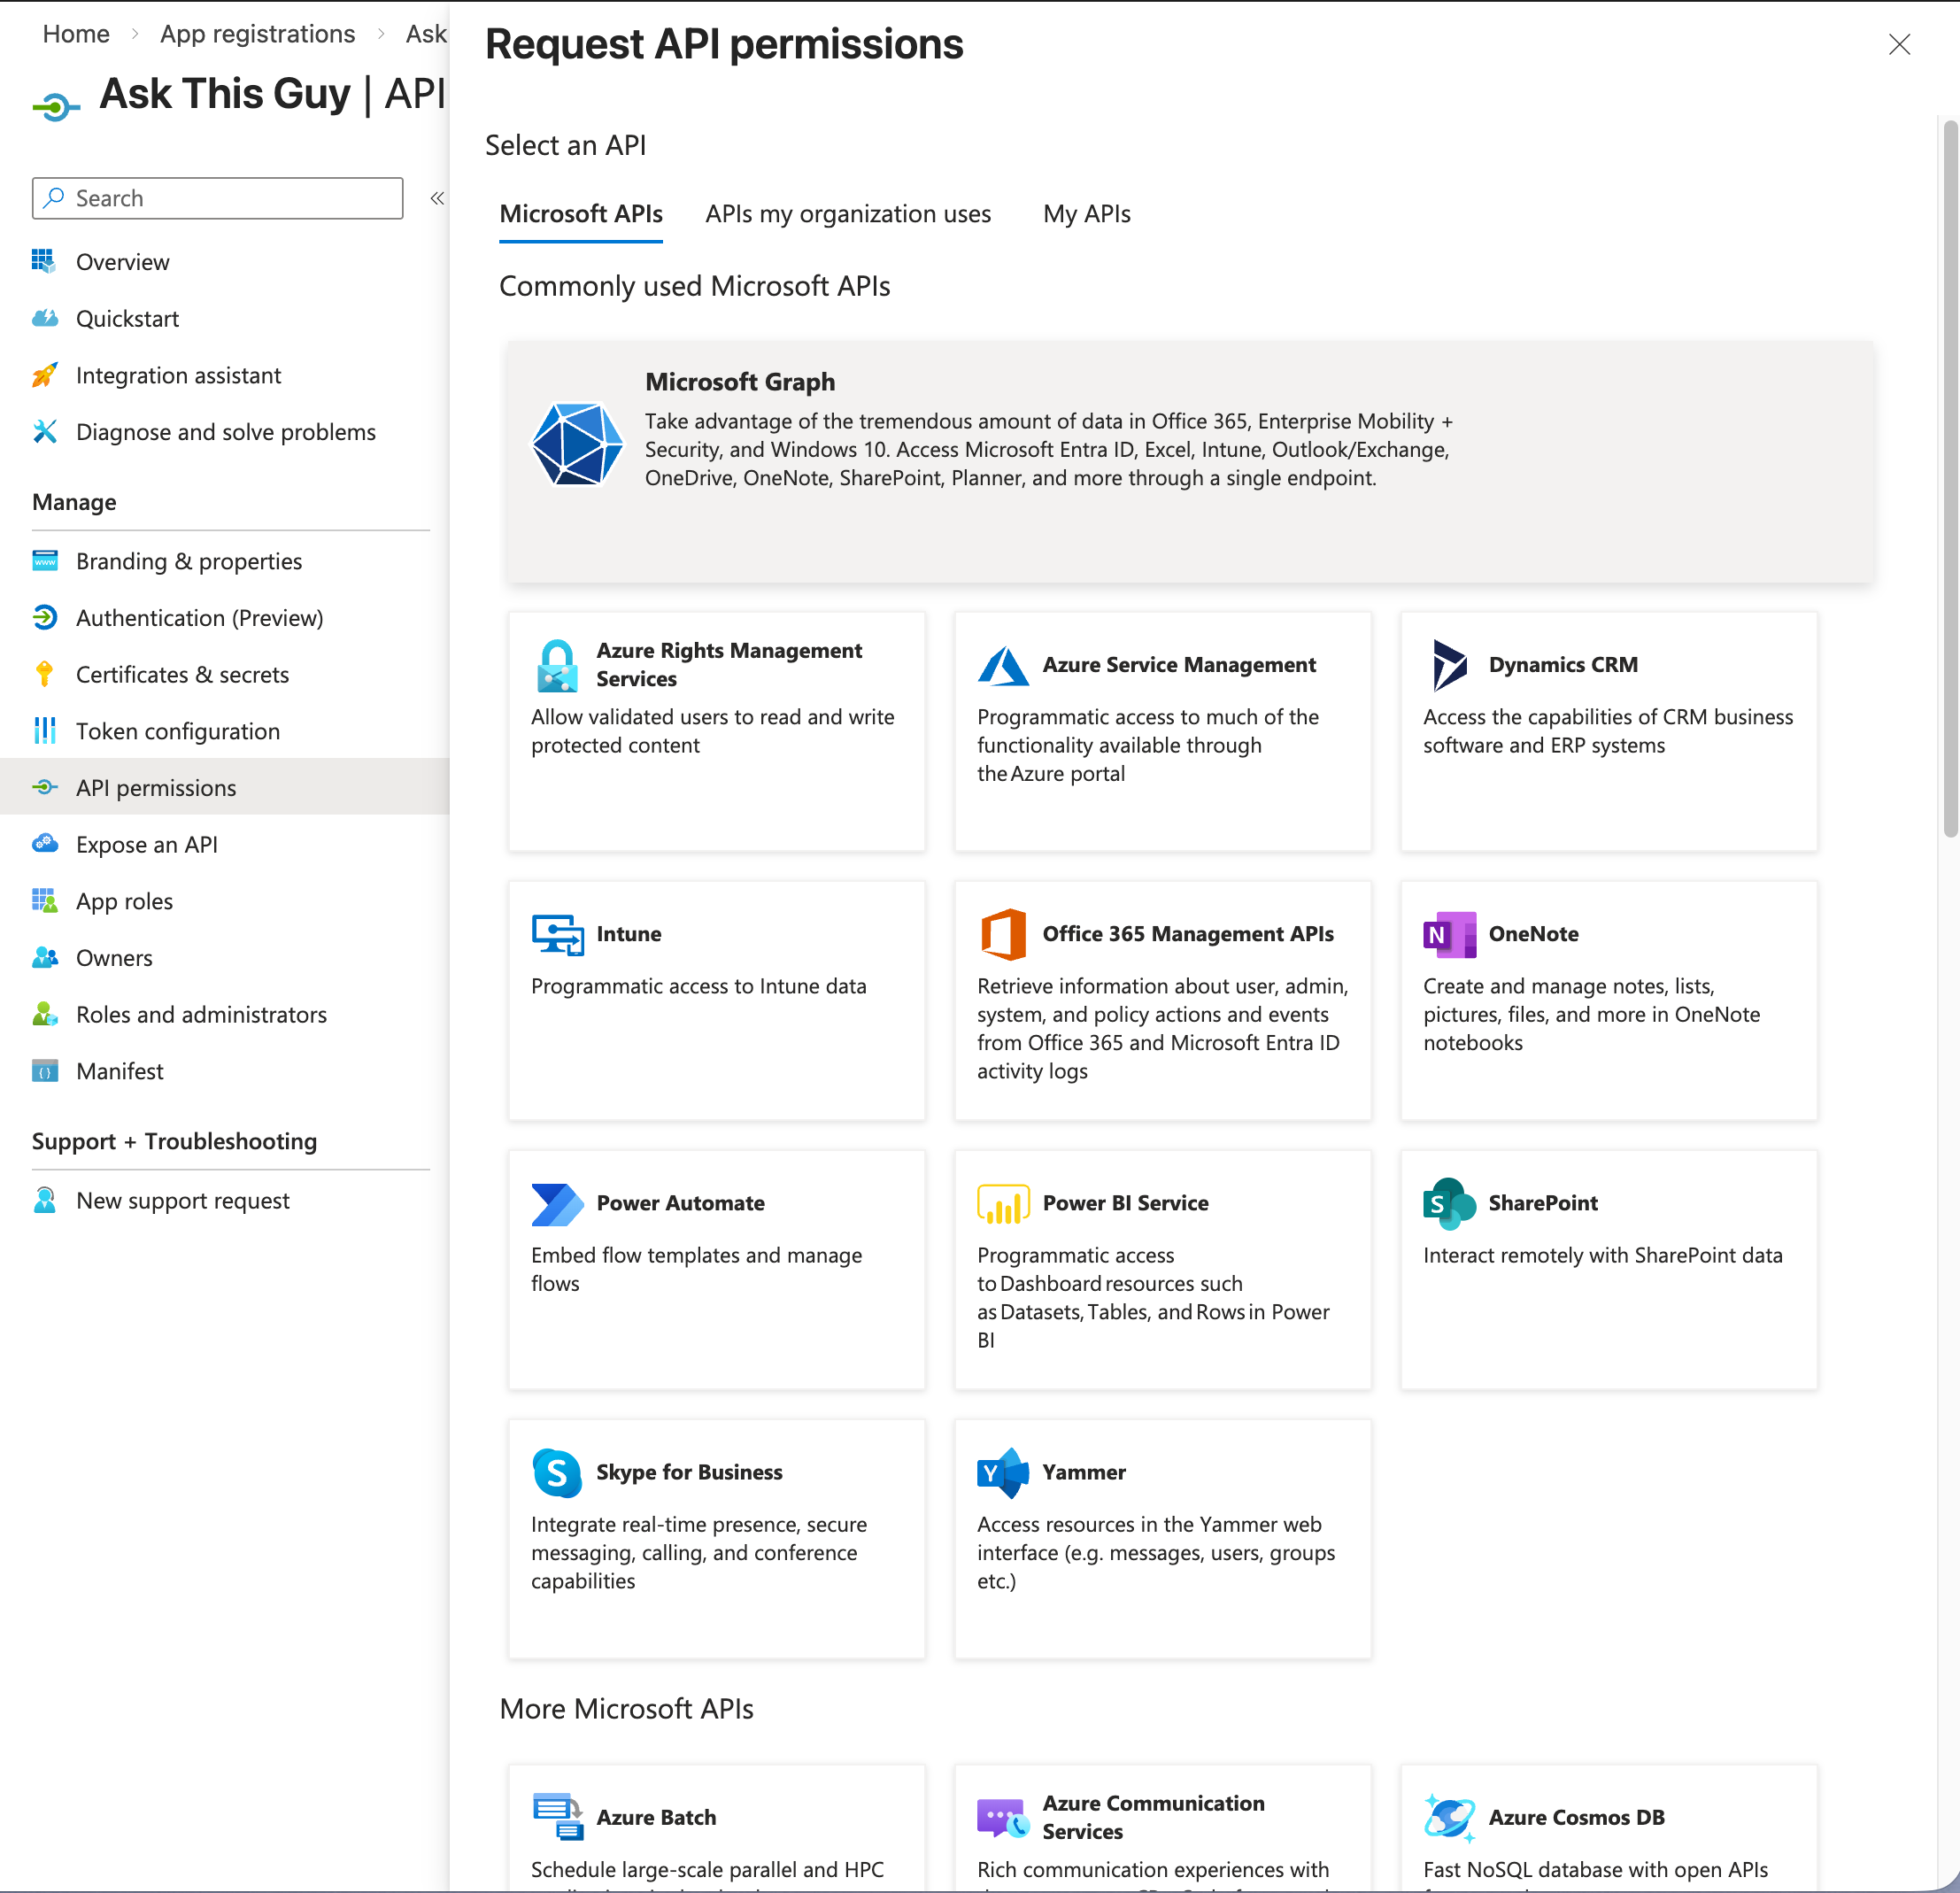 Microsoft Graph
Then click on "Application permissions":
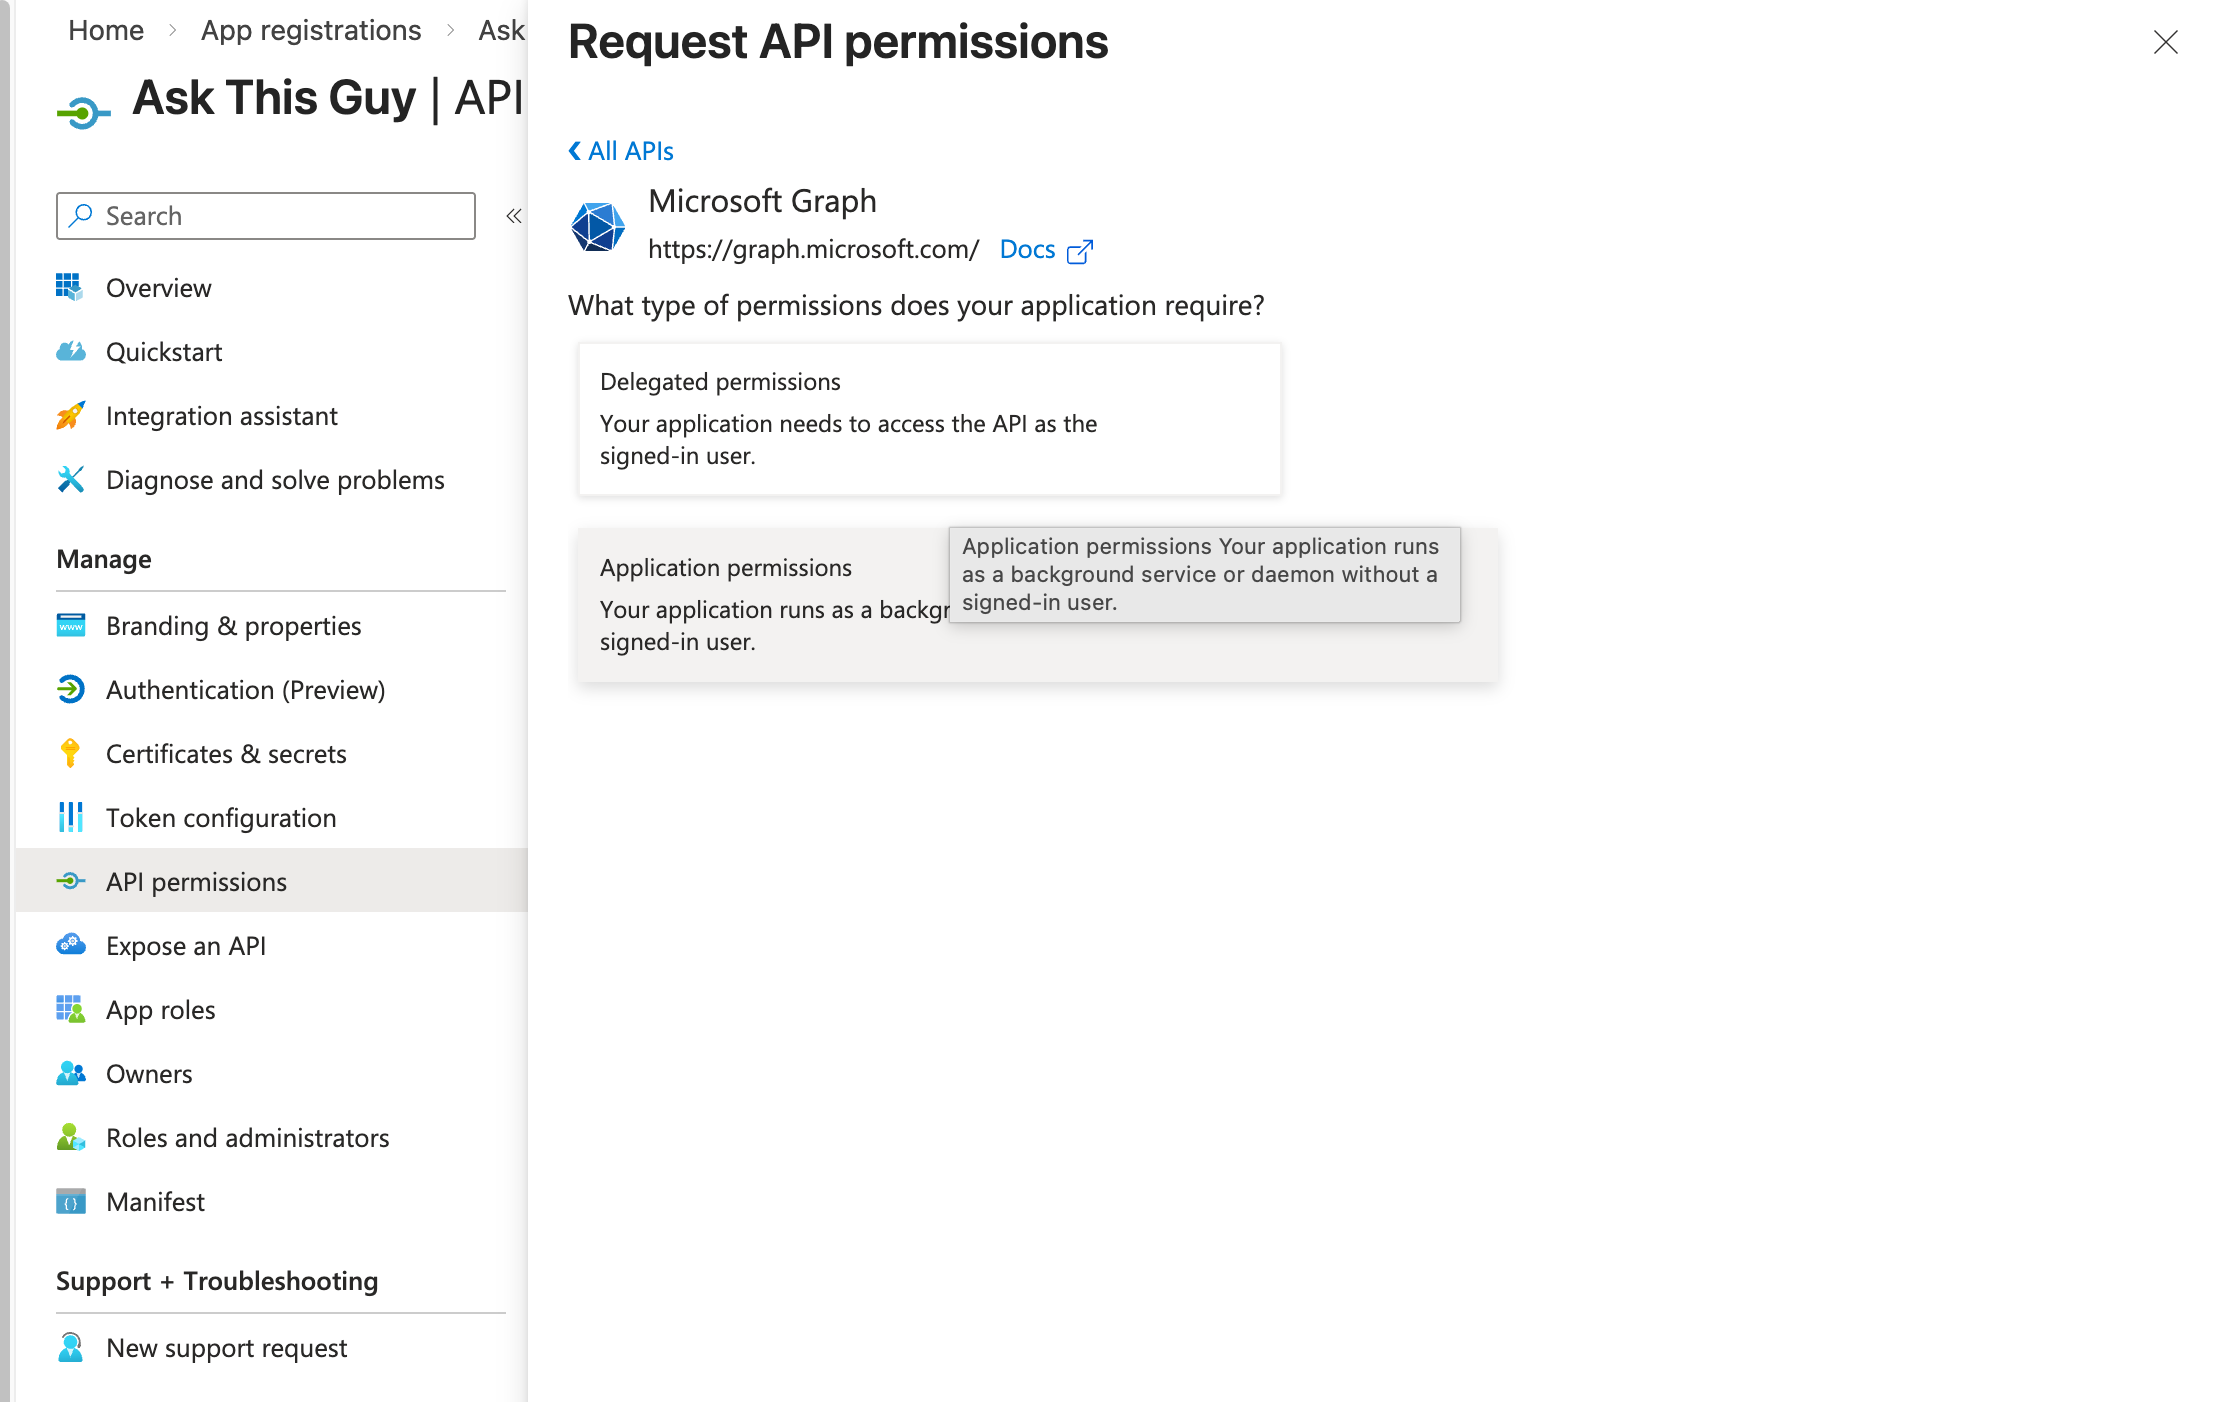 Application permissions
Then, add the following permissions:
- Sites.Read.All
- User.Read.All
- Files.Read.All
and click on "Add permissions":
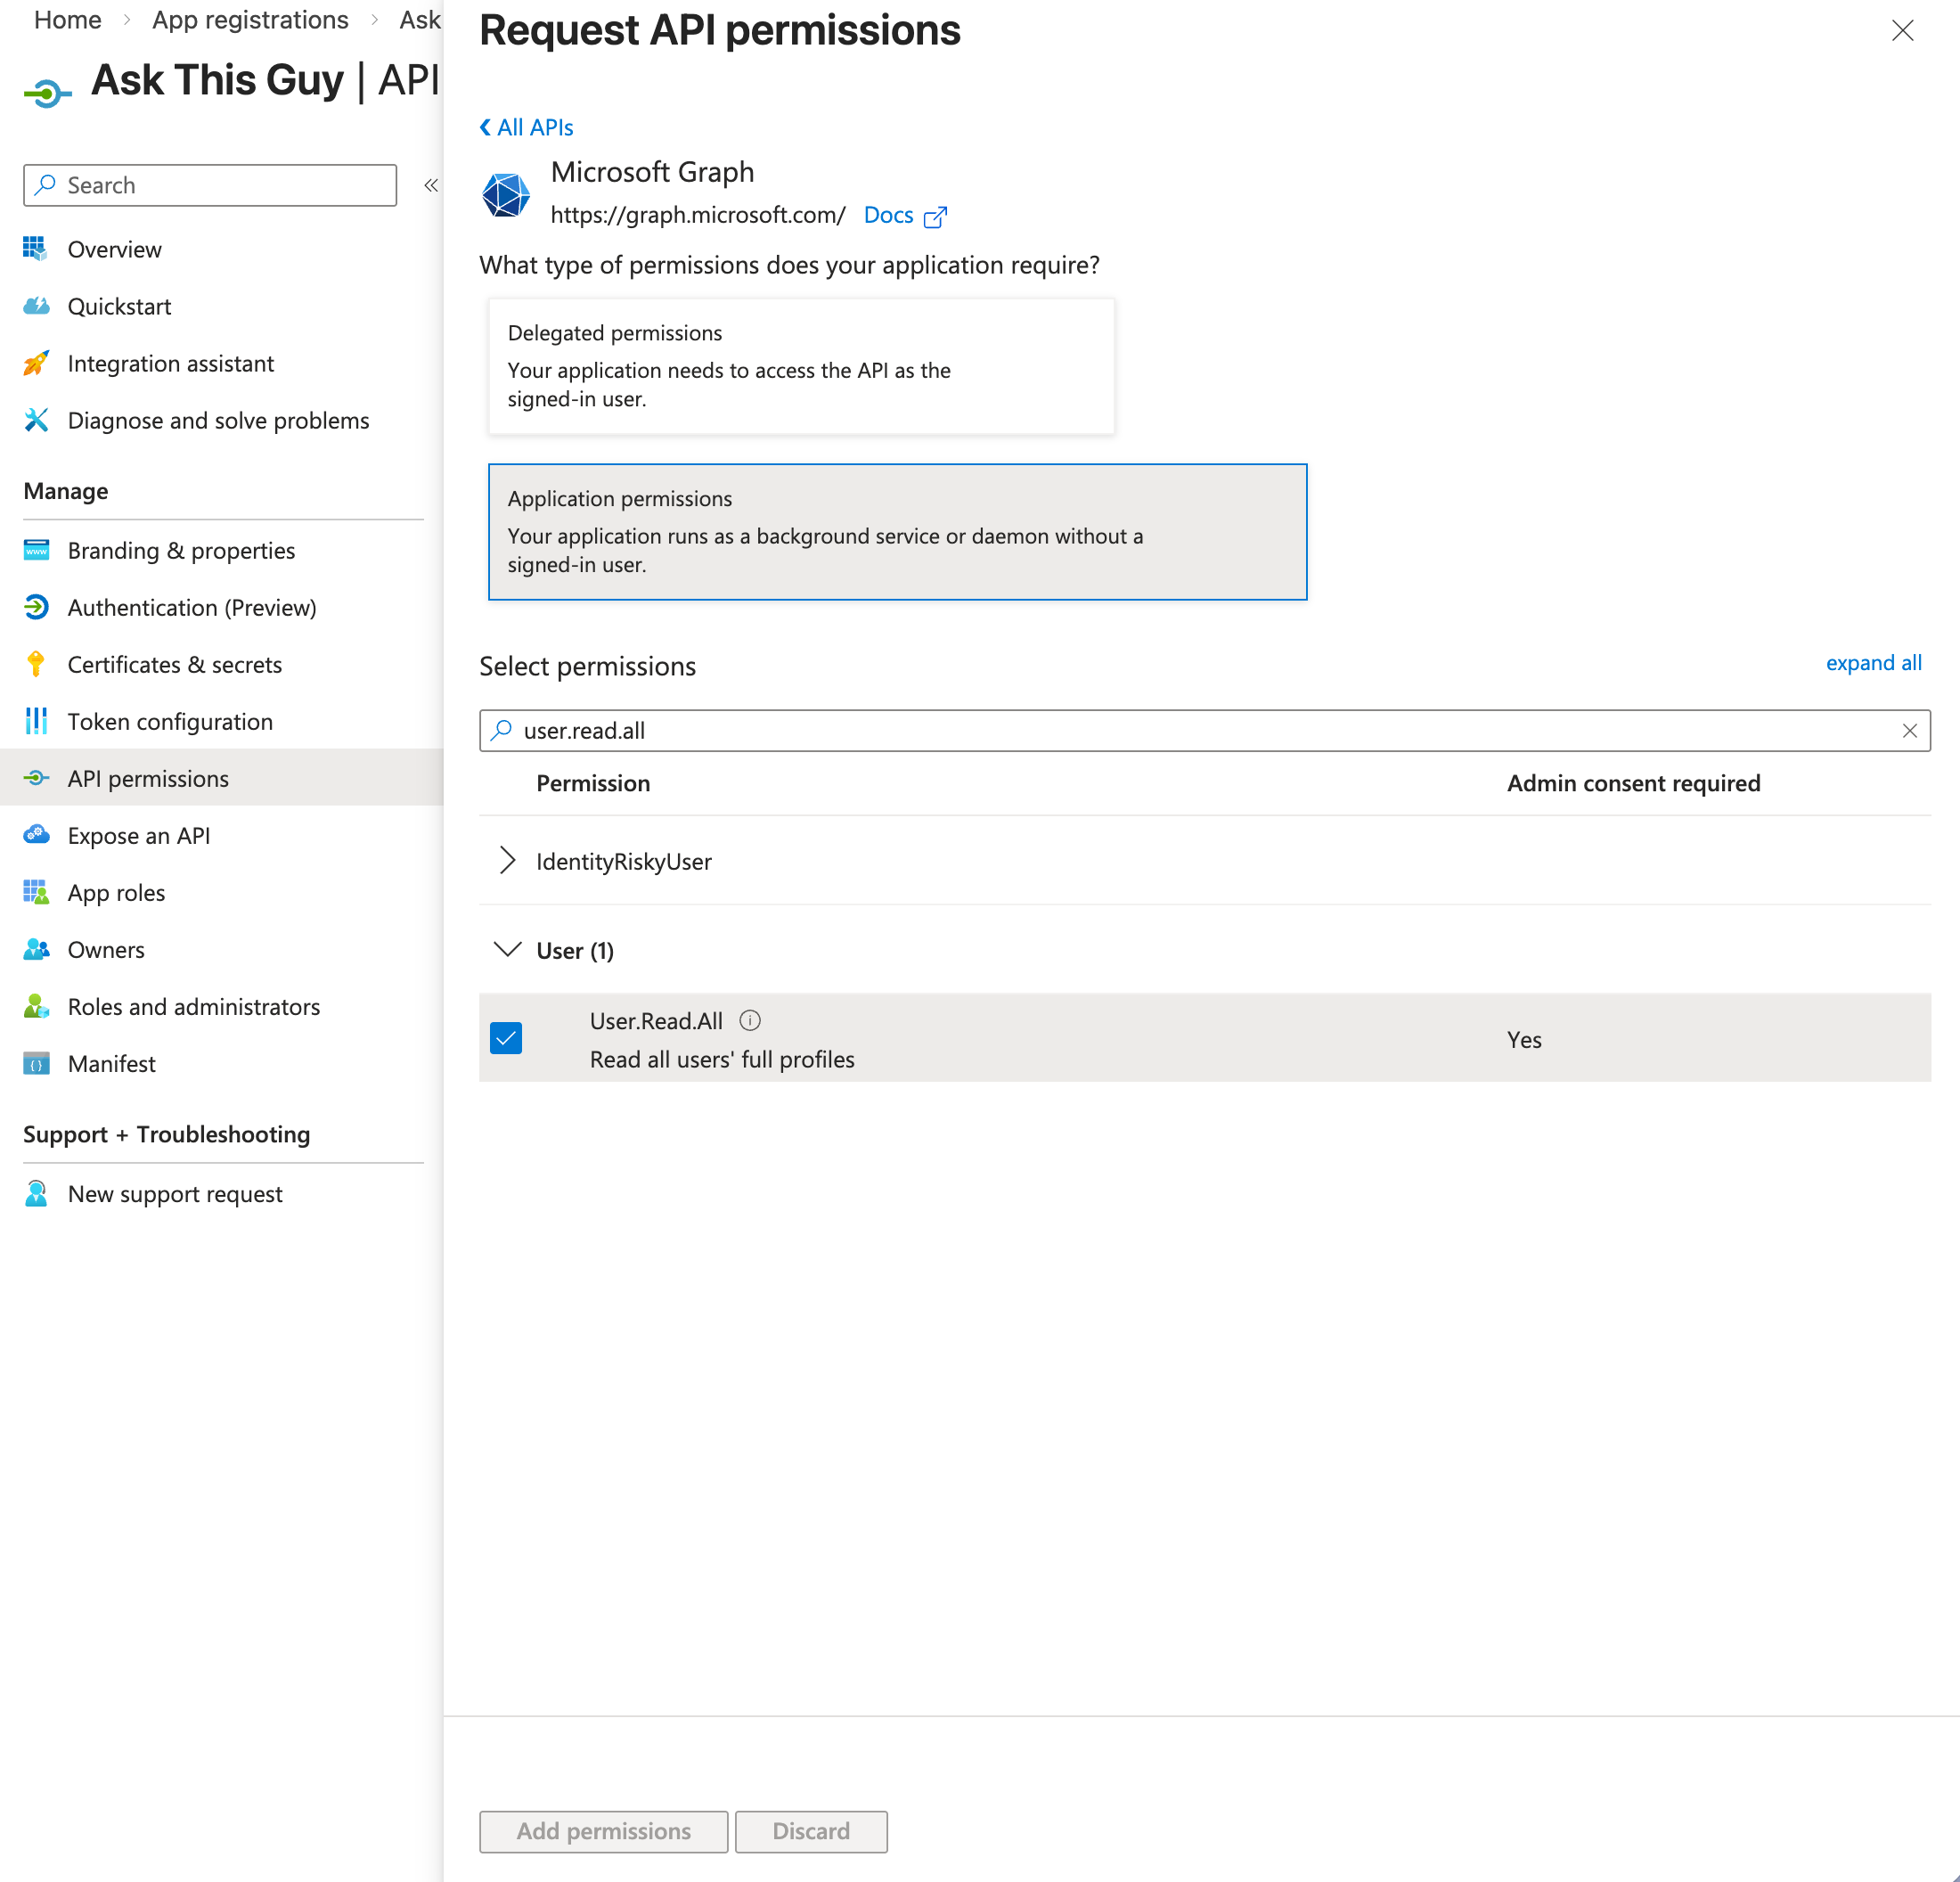 Add permissions
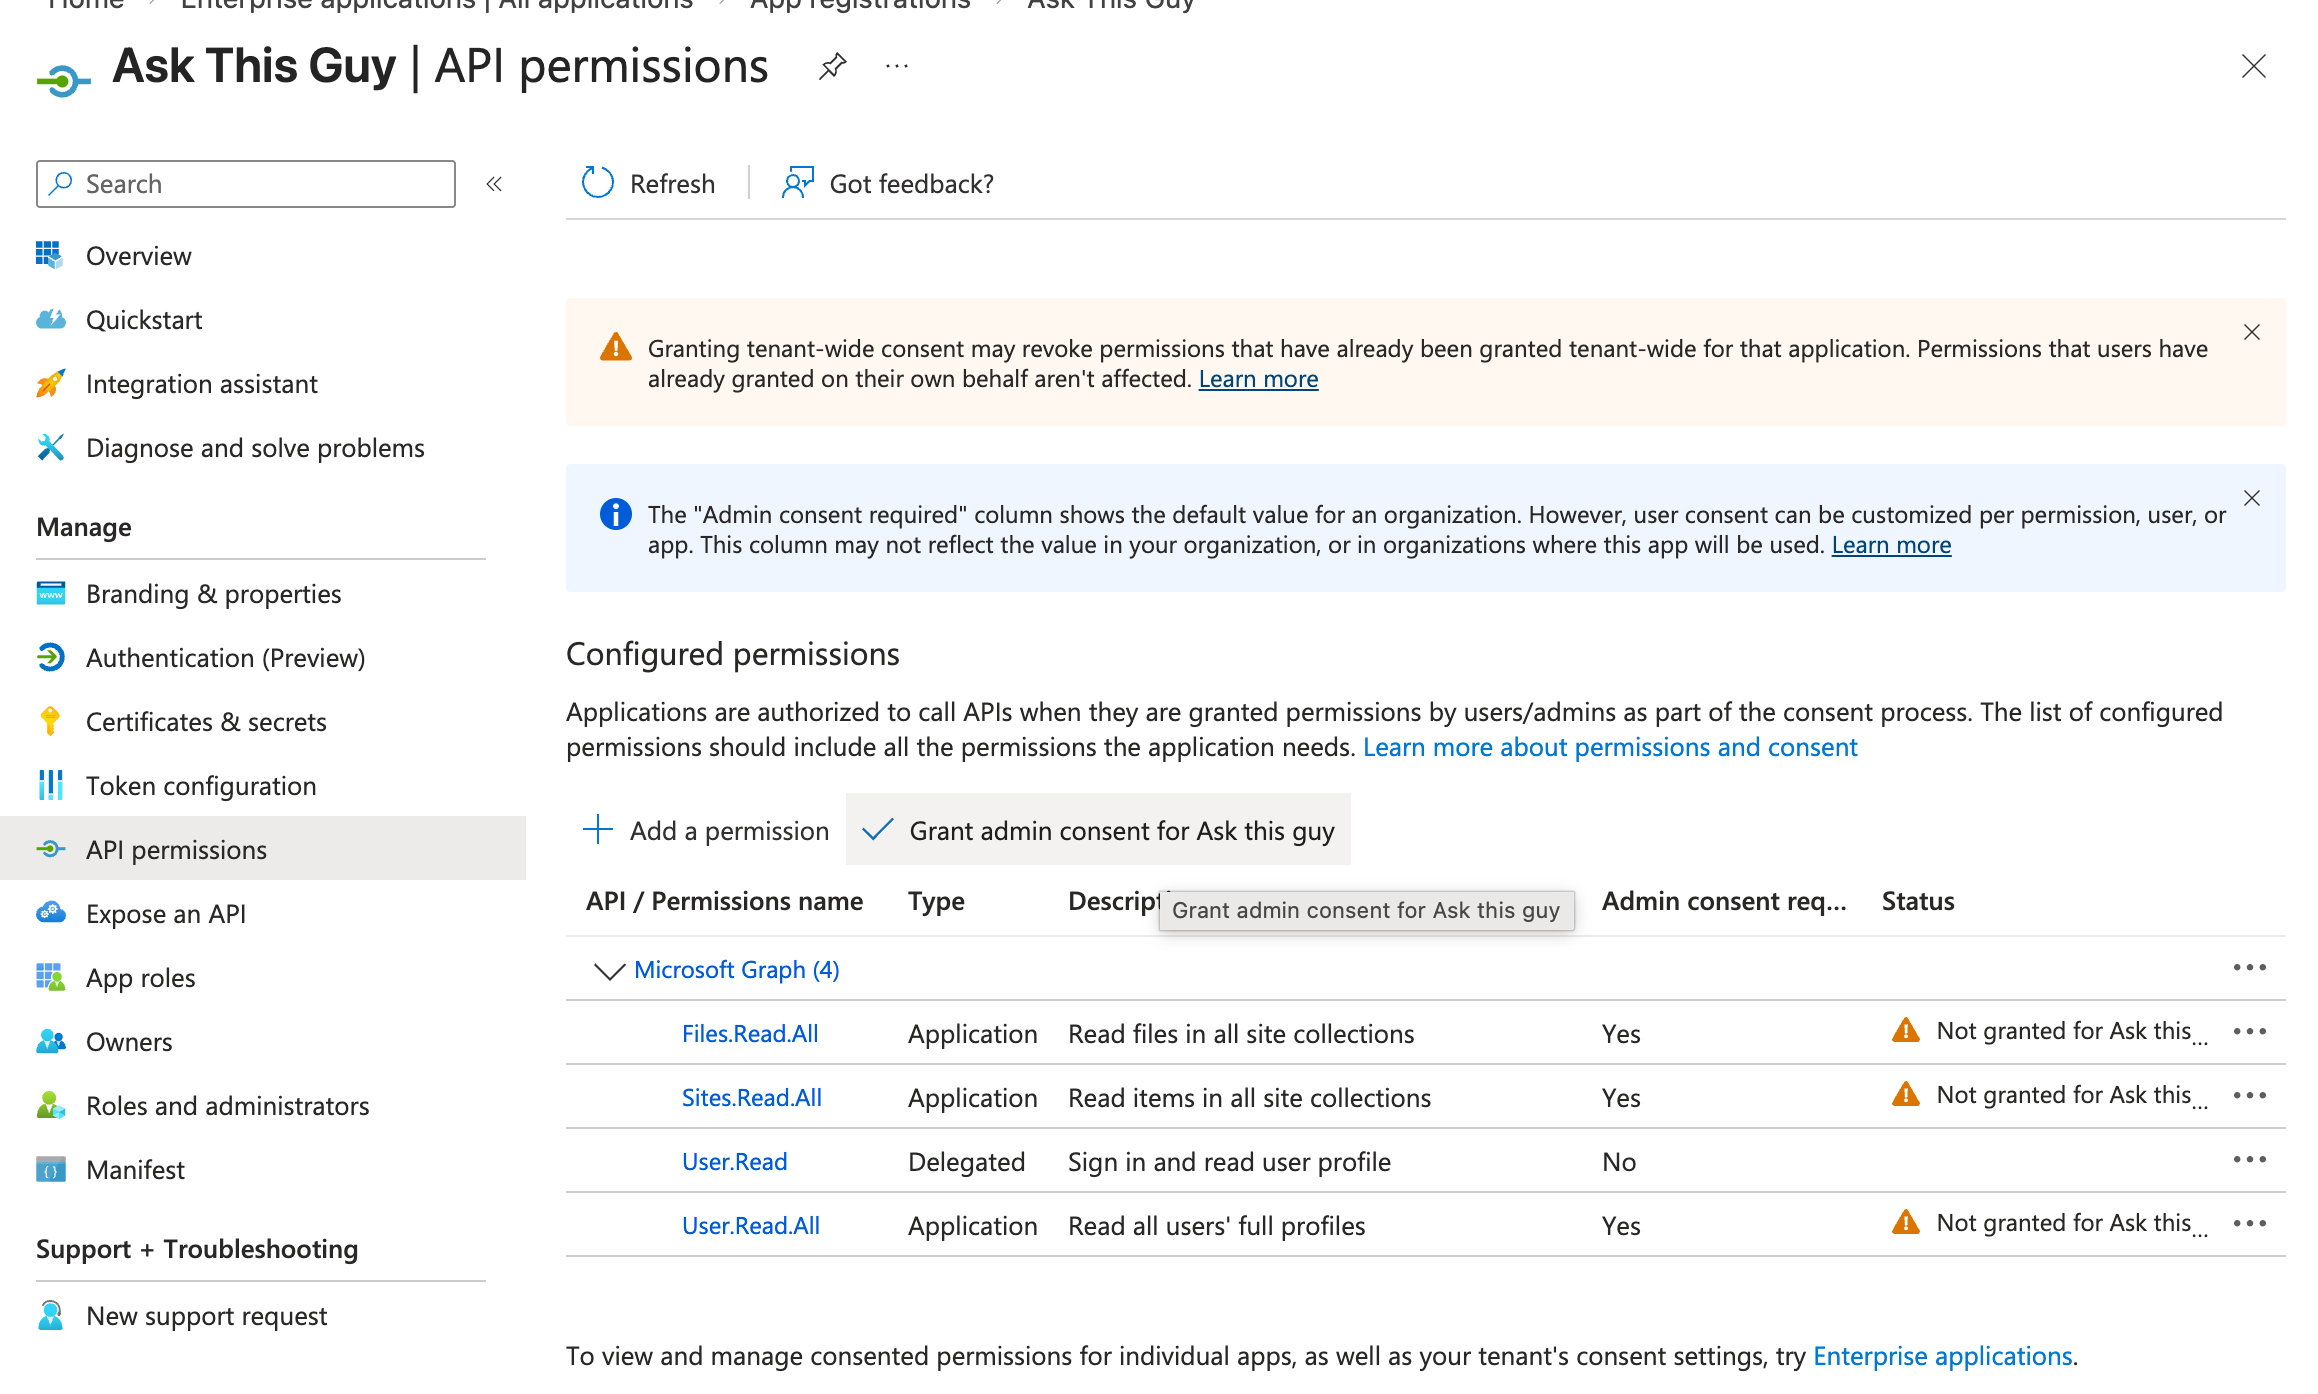
You should now see the permissions on your application, like this:
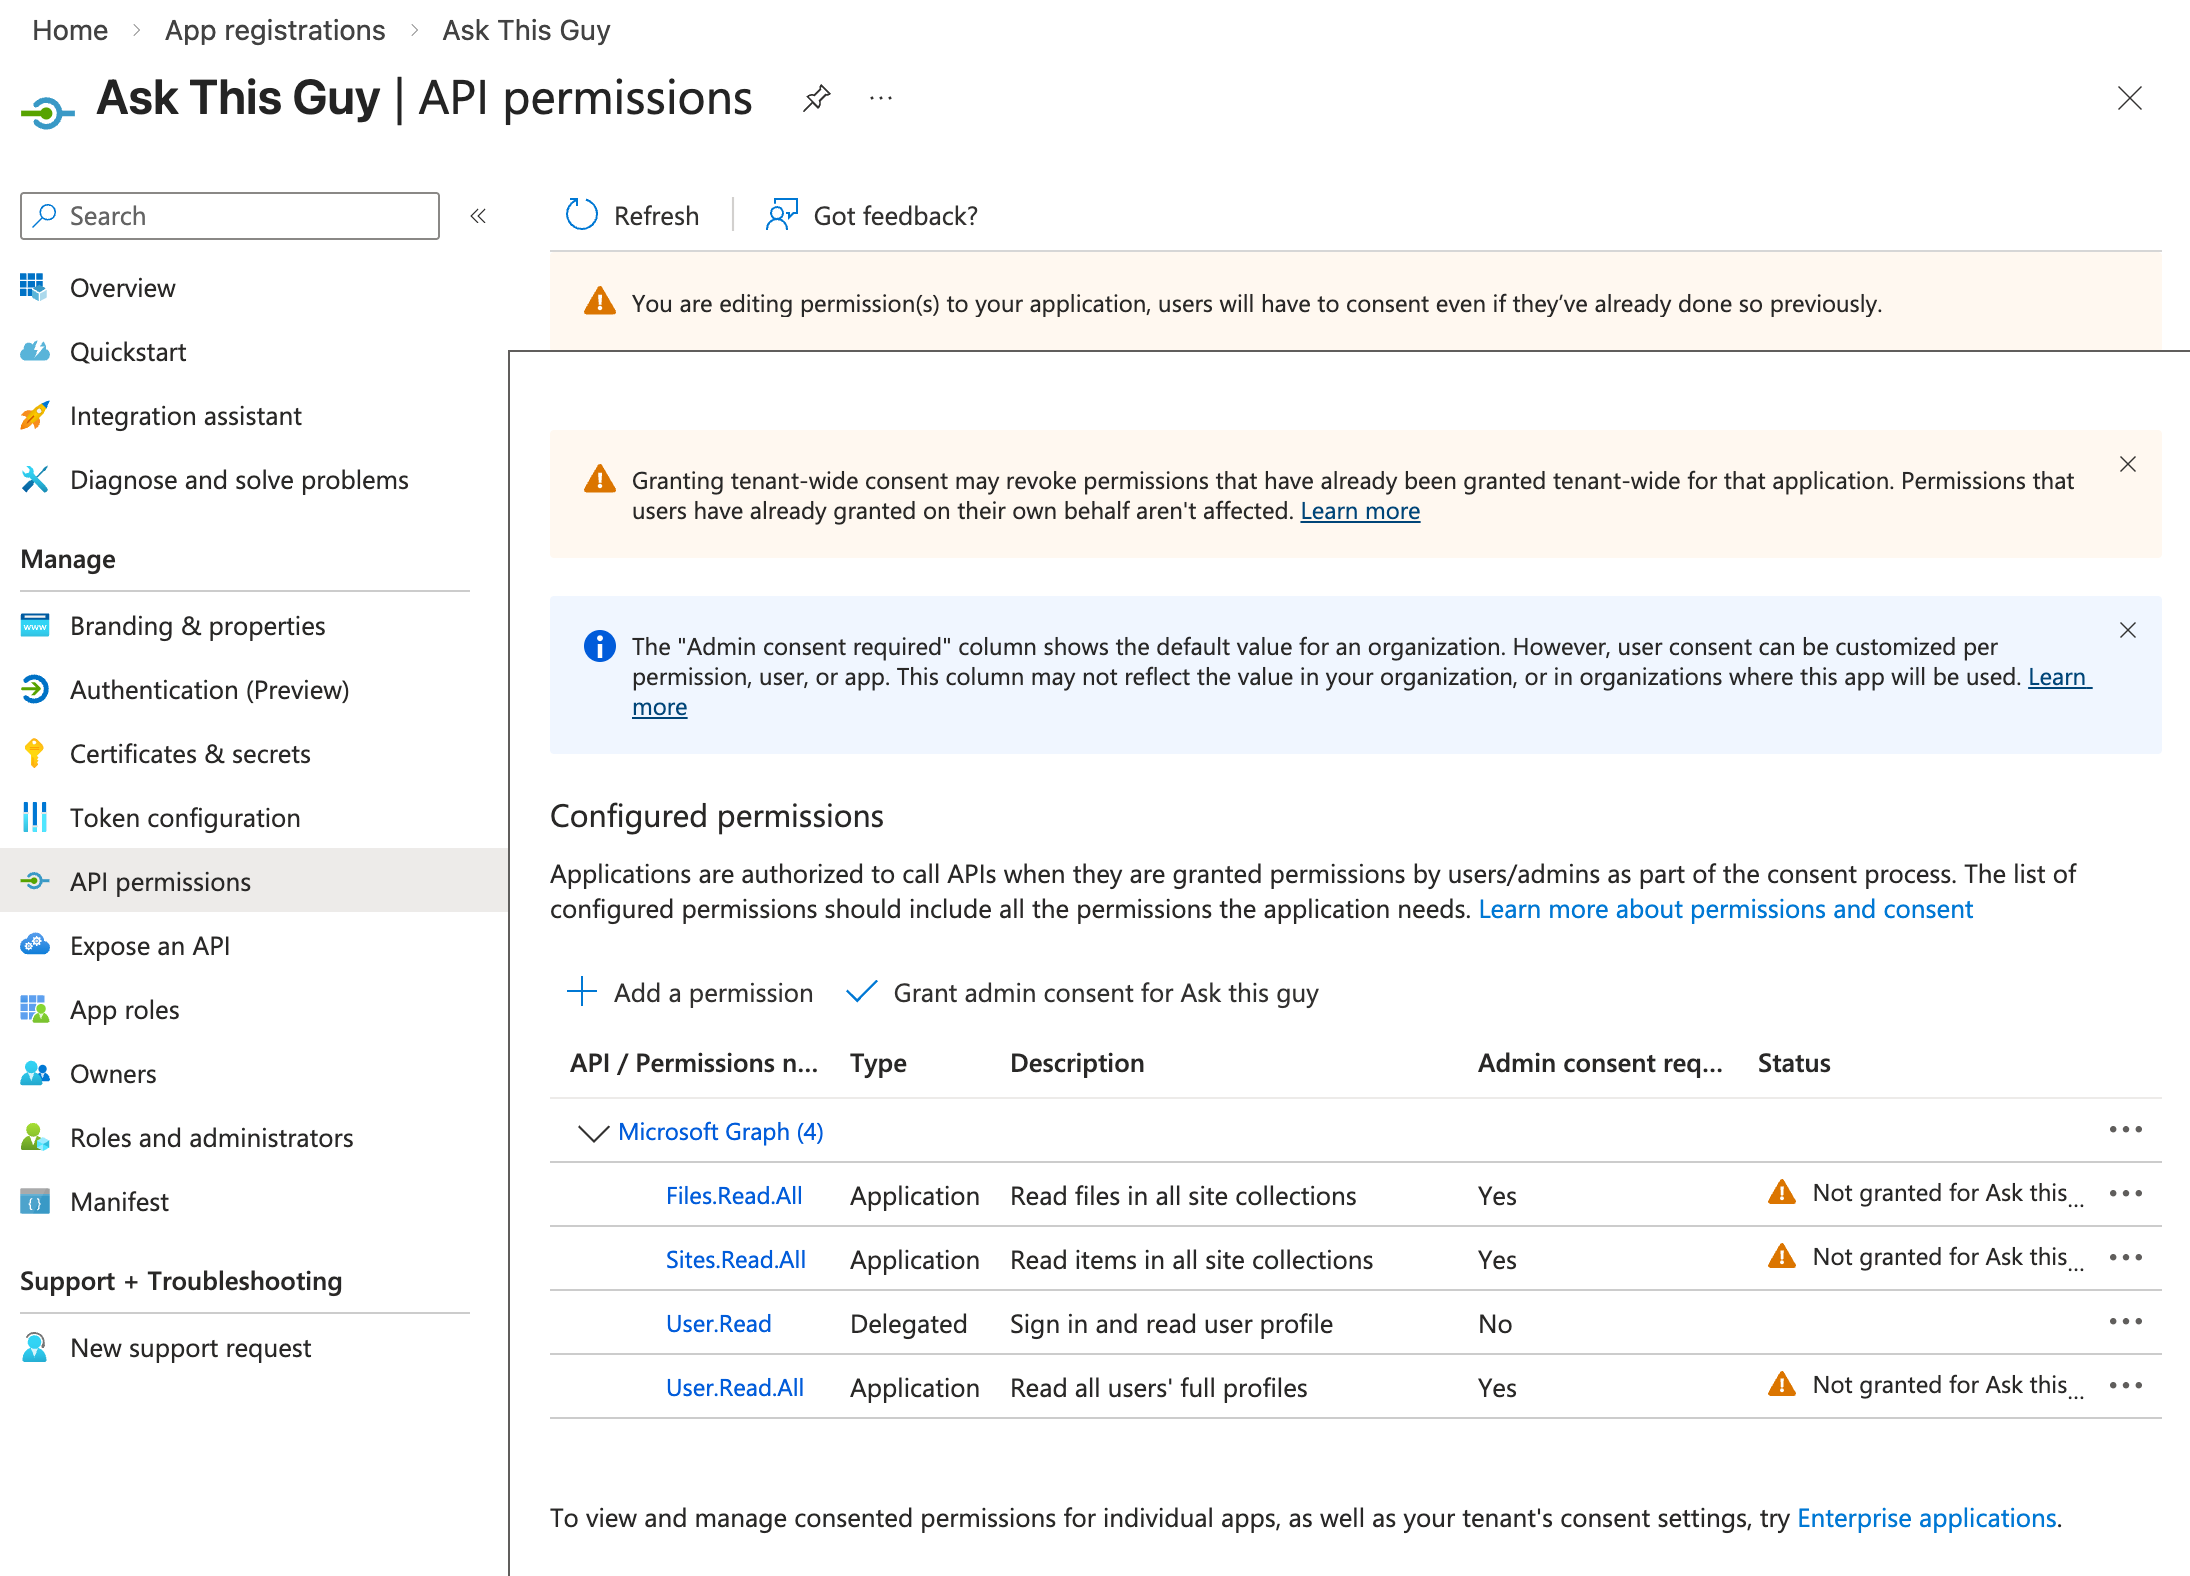 Application permissions
One last step: grant admin consent for the application.
Click on "Grant admin consent for [your organization]"
 Grant admin consent
Confirm when prompted:
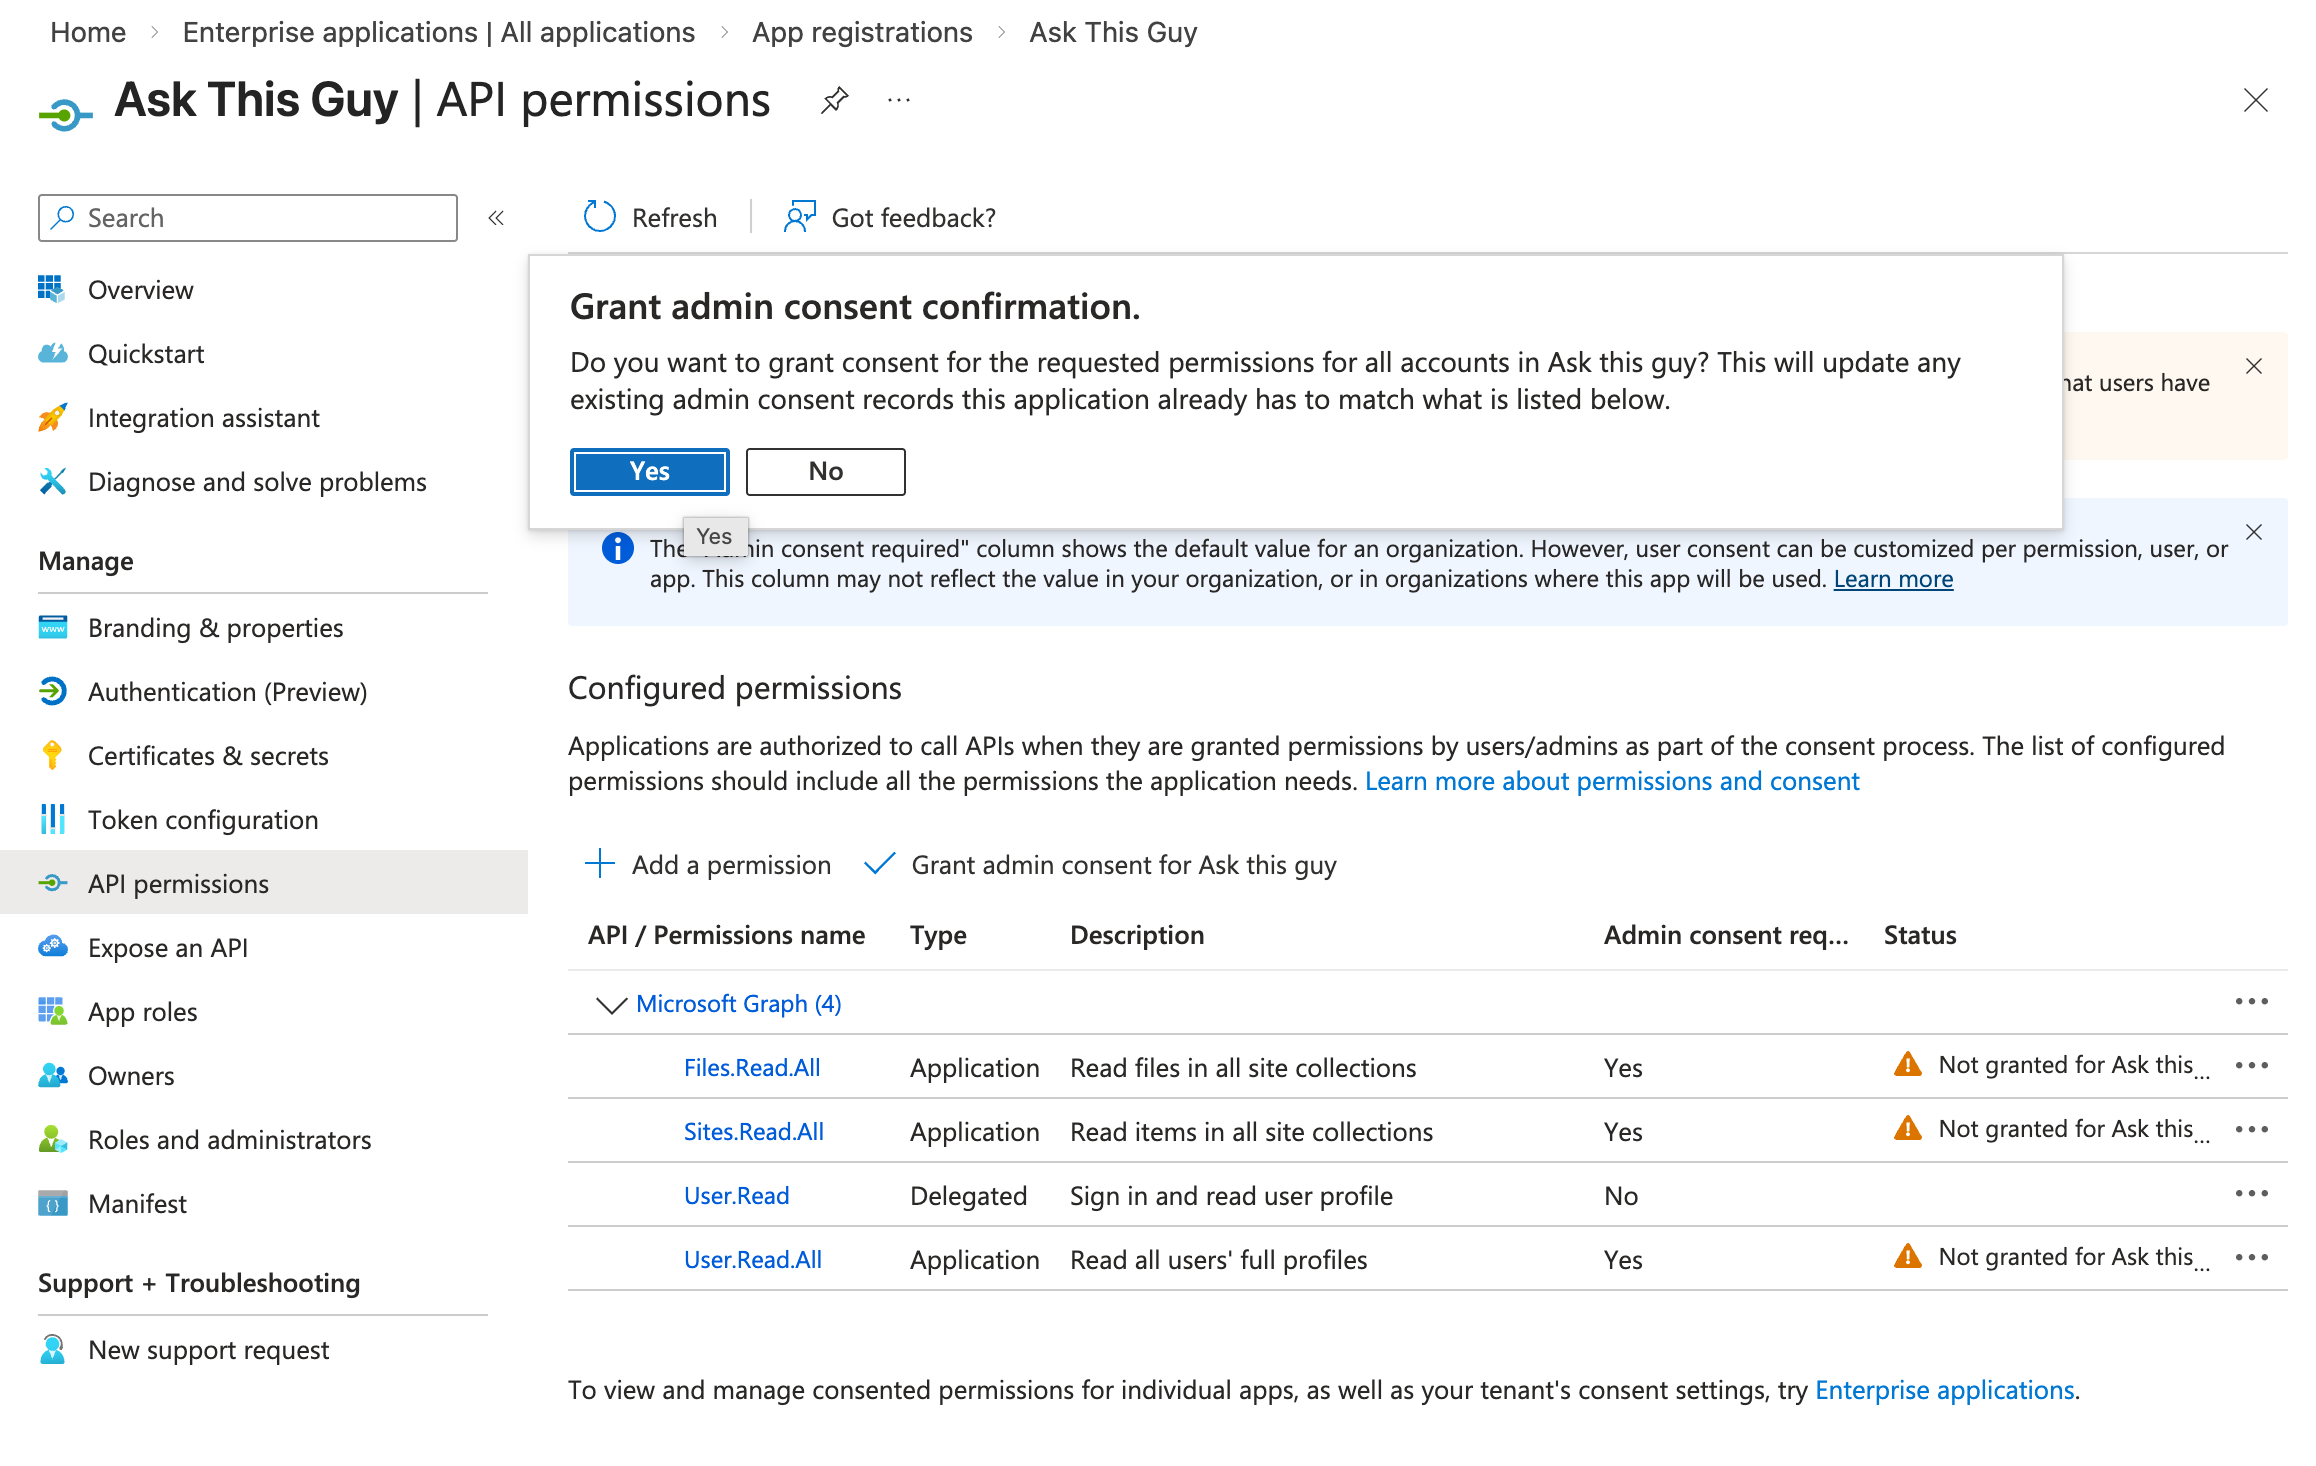 Grant admin consent
You should now see green checks, like this:
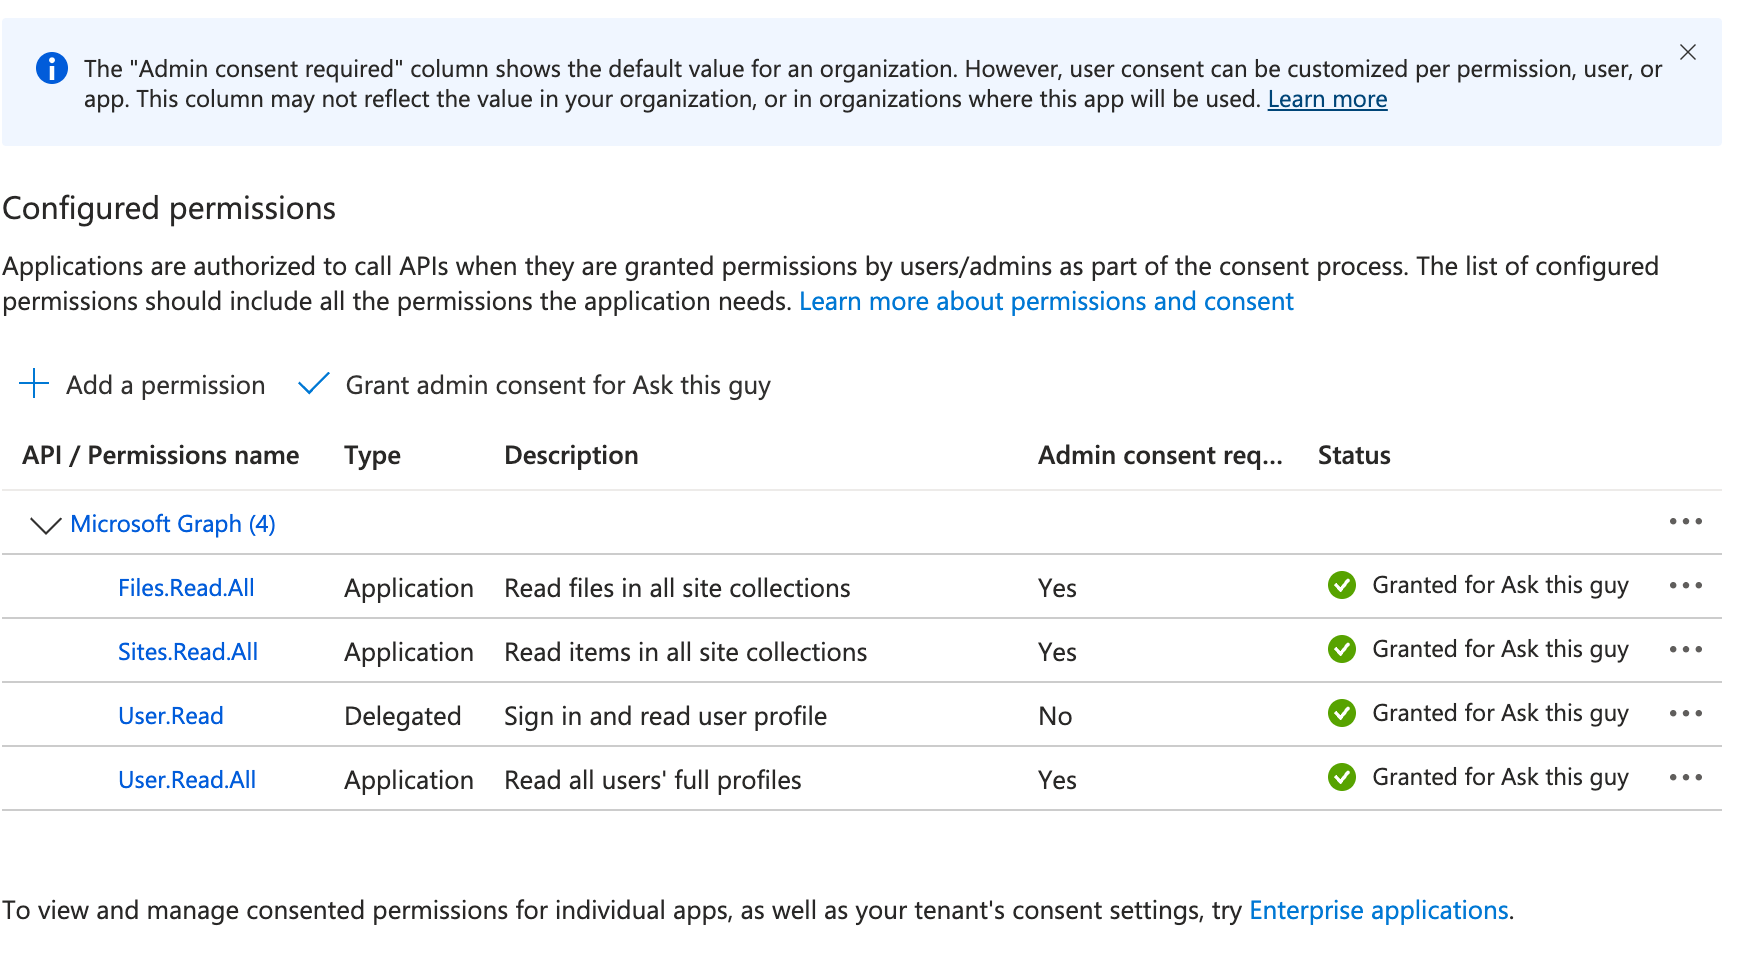 Grant admin consent
That's all!
You can now jump to the 4th step: Create a client secret.
Option B: Restricted permissions for specific SharePoint sites
Navigate to "API permissions" and click on "+ Add a permission":
Add a permission
Click on "Microsoft Graph":
Microsoft Graph
Then click on "Application permissions":
Application permissions
Then, add the following permission:
- Sites.Selected
and click on "Add permissions":
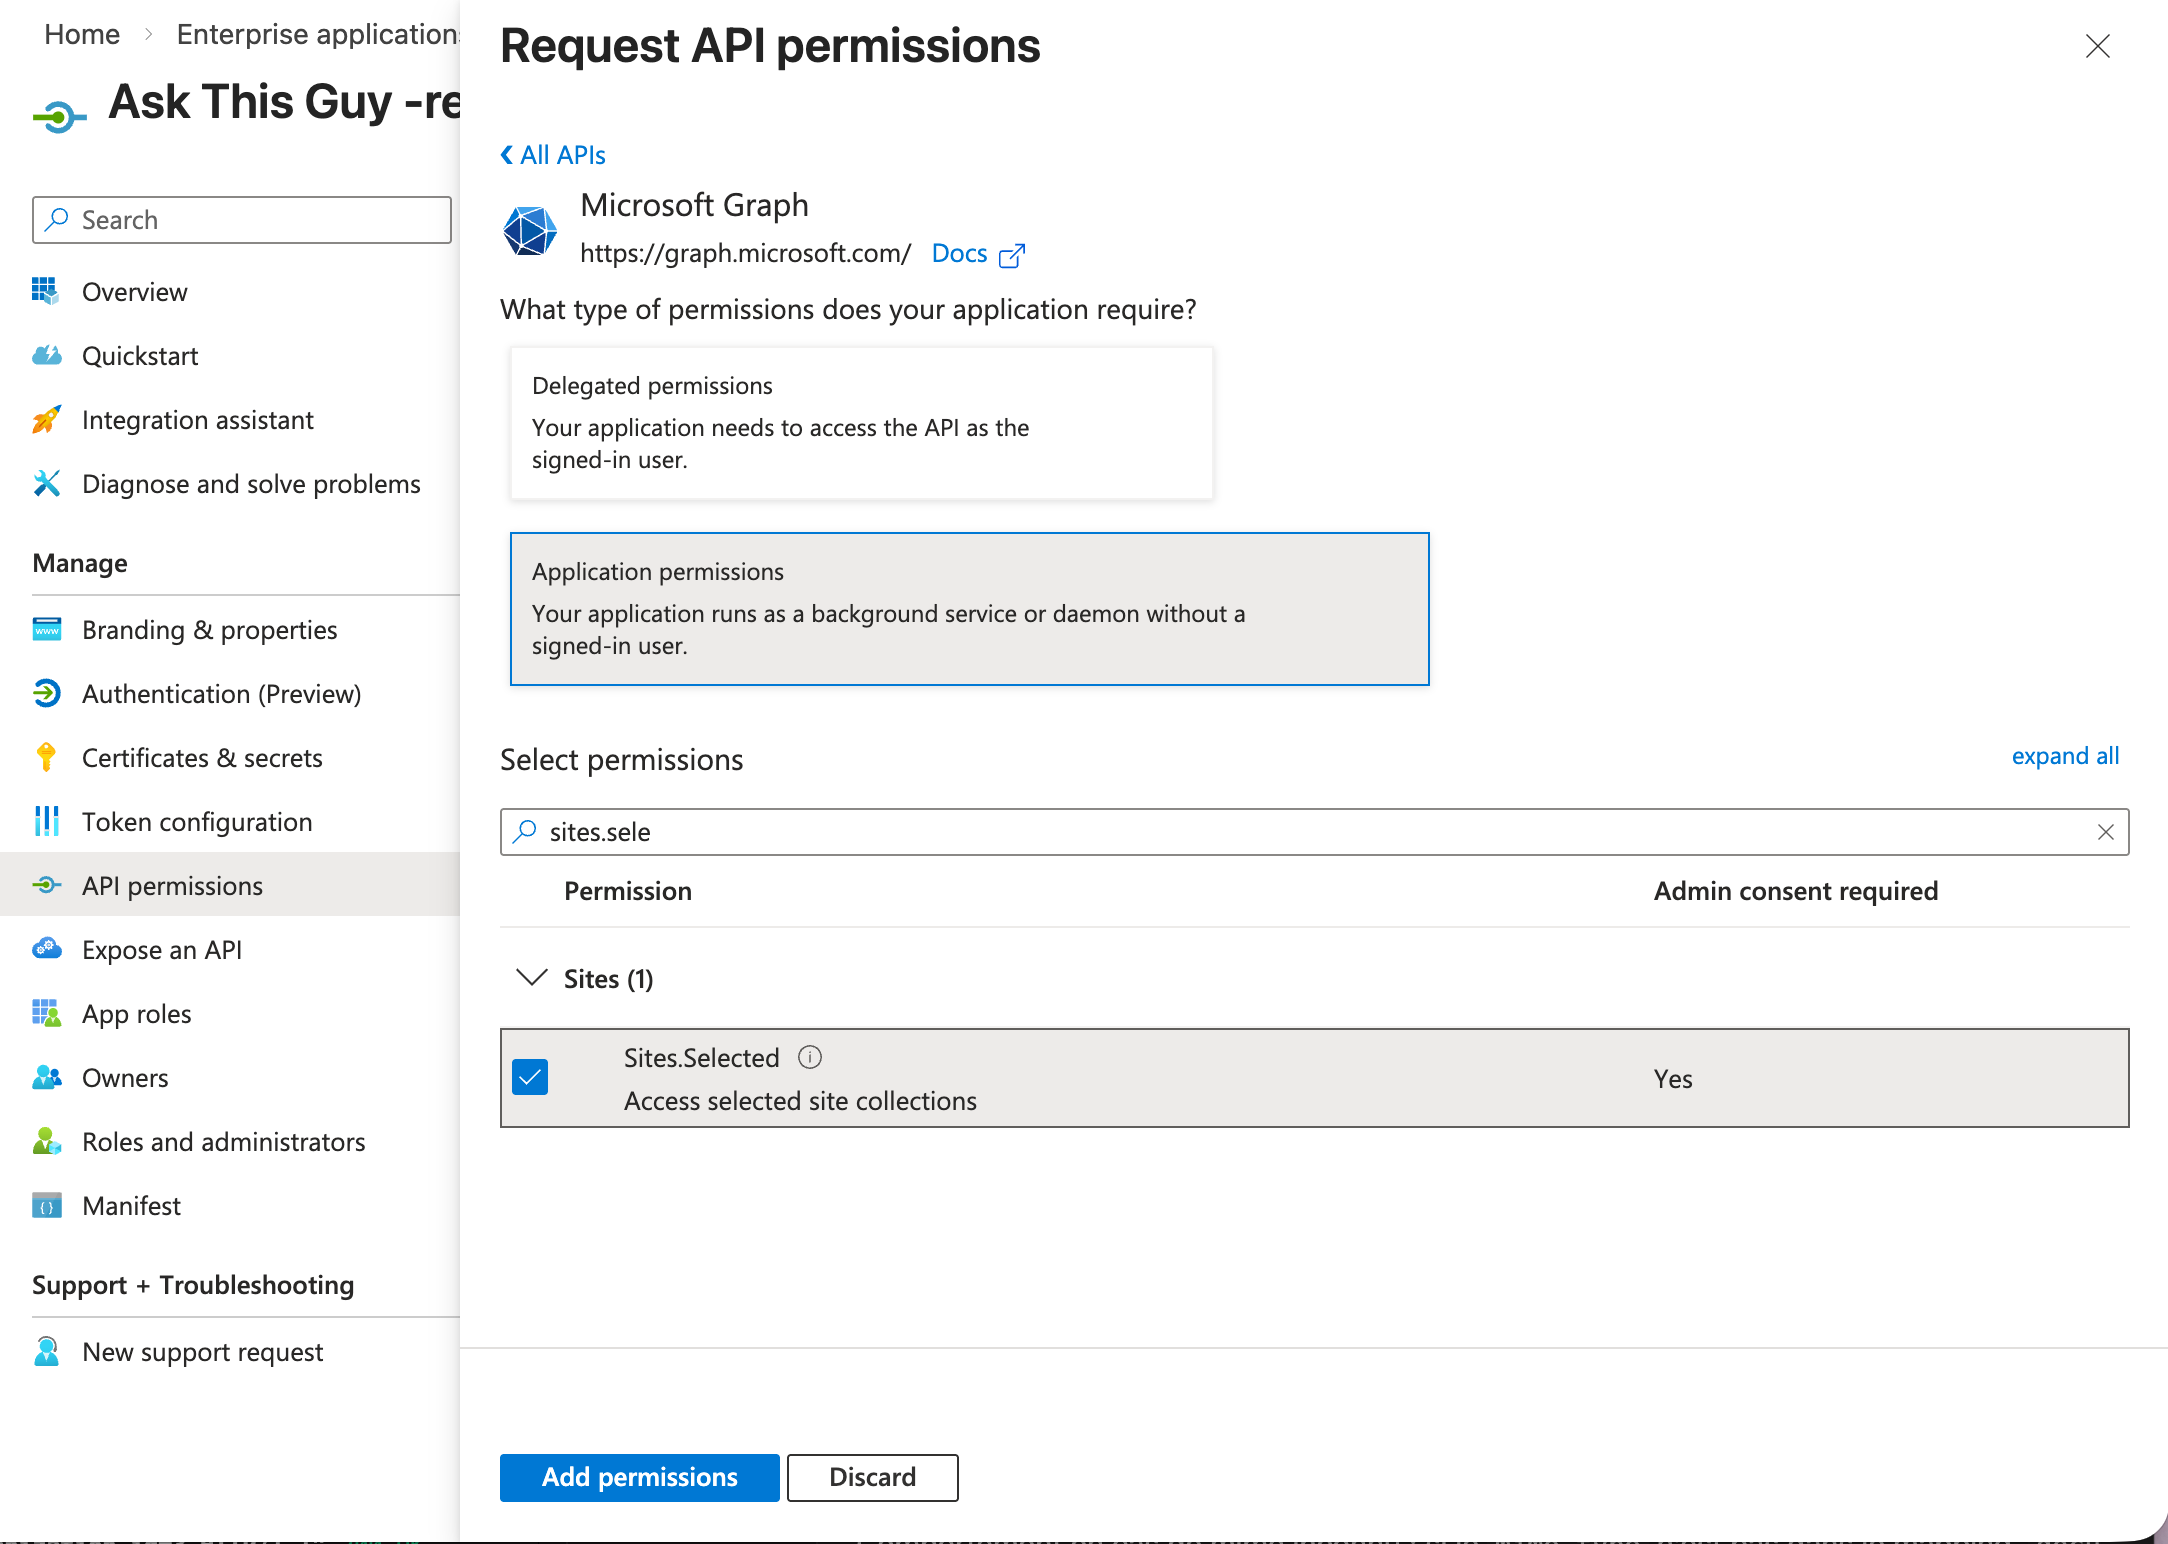 Add permissions
3. Configure site-specific permissions using PowerShell (Option B only)
3.1. Launch PowerShell
On your machine, you will need to have PowerShell installed. If that's not the case, follow this guide to install PowerShell
Then launch it using:
pwsh
3.2 Install PnP PowerShell module
In PowerShell, you will need Microsoft's PnP PowerShell module.
If you don't already have the module installed, simply run the following command:
Install-Module PnP.PowerShell -Scope CurrentUser -Force
3.3 Create a helper app for PowerShell authentication
Return to the Microsoft Entra admin center, in the App Registrations menu, and create a new app registration:
-
Click "+ New registration" and enter the following details:
- Name: "PowerShell Helper App"
- Supported account types: "Single tenant only"
- Redirect URI: select "Pblic client/native (mobile & desktop)" and put
http://localhostas the URI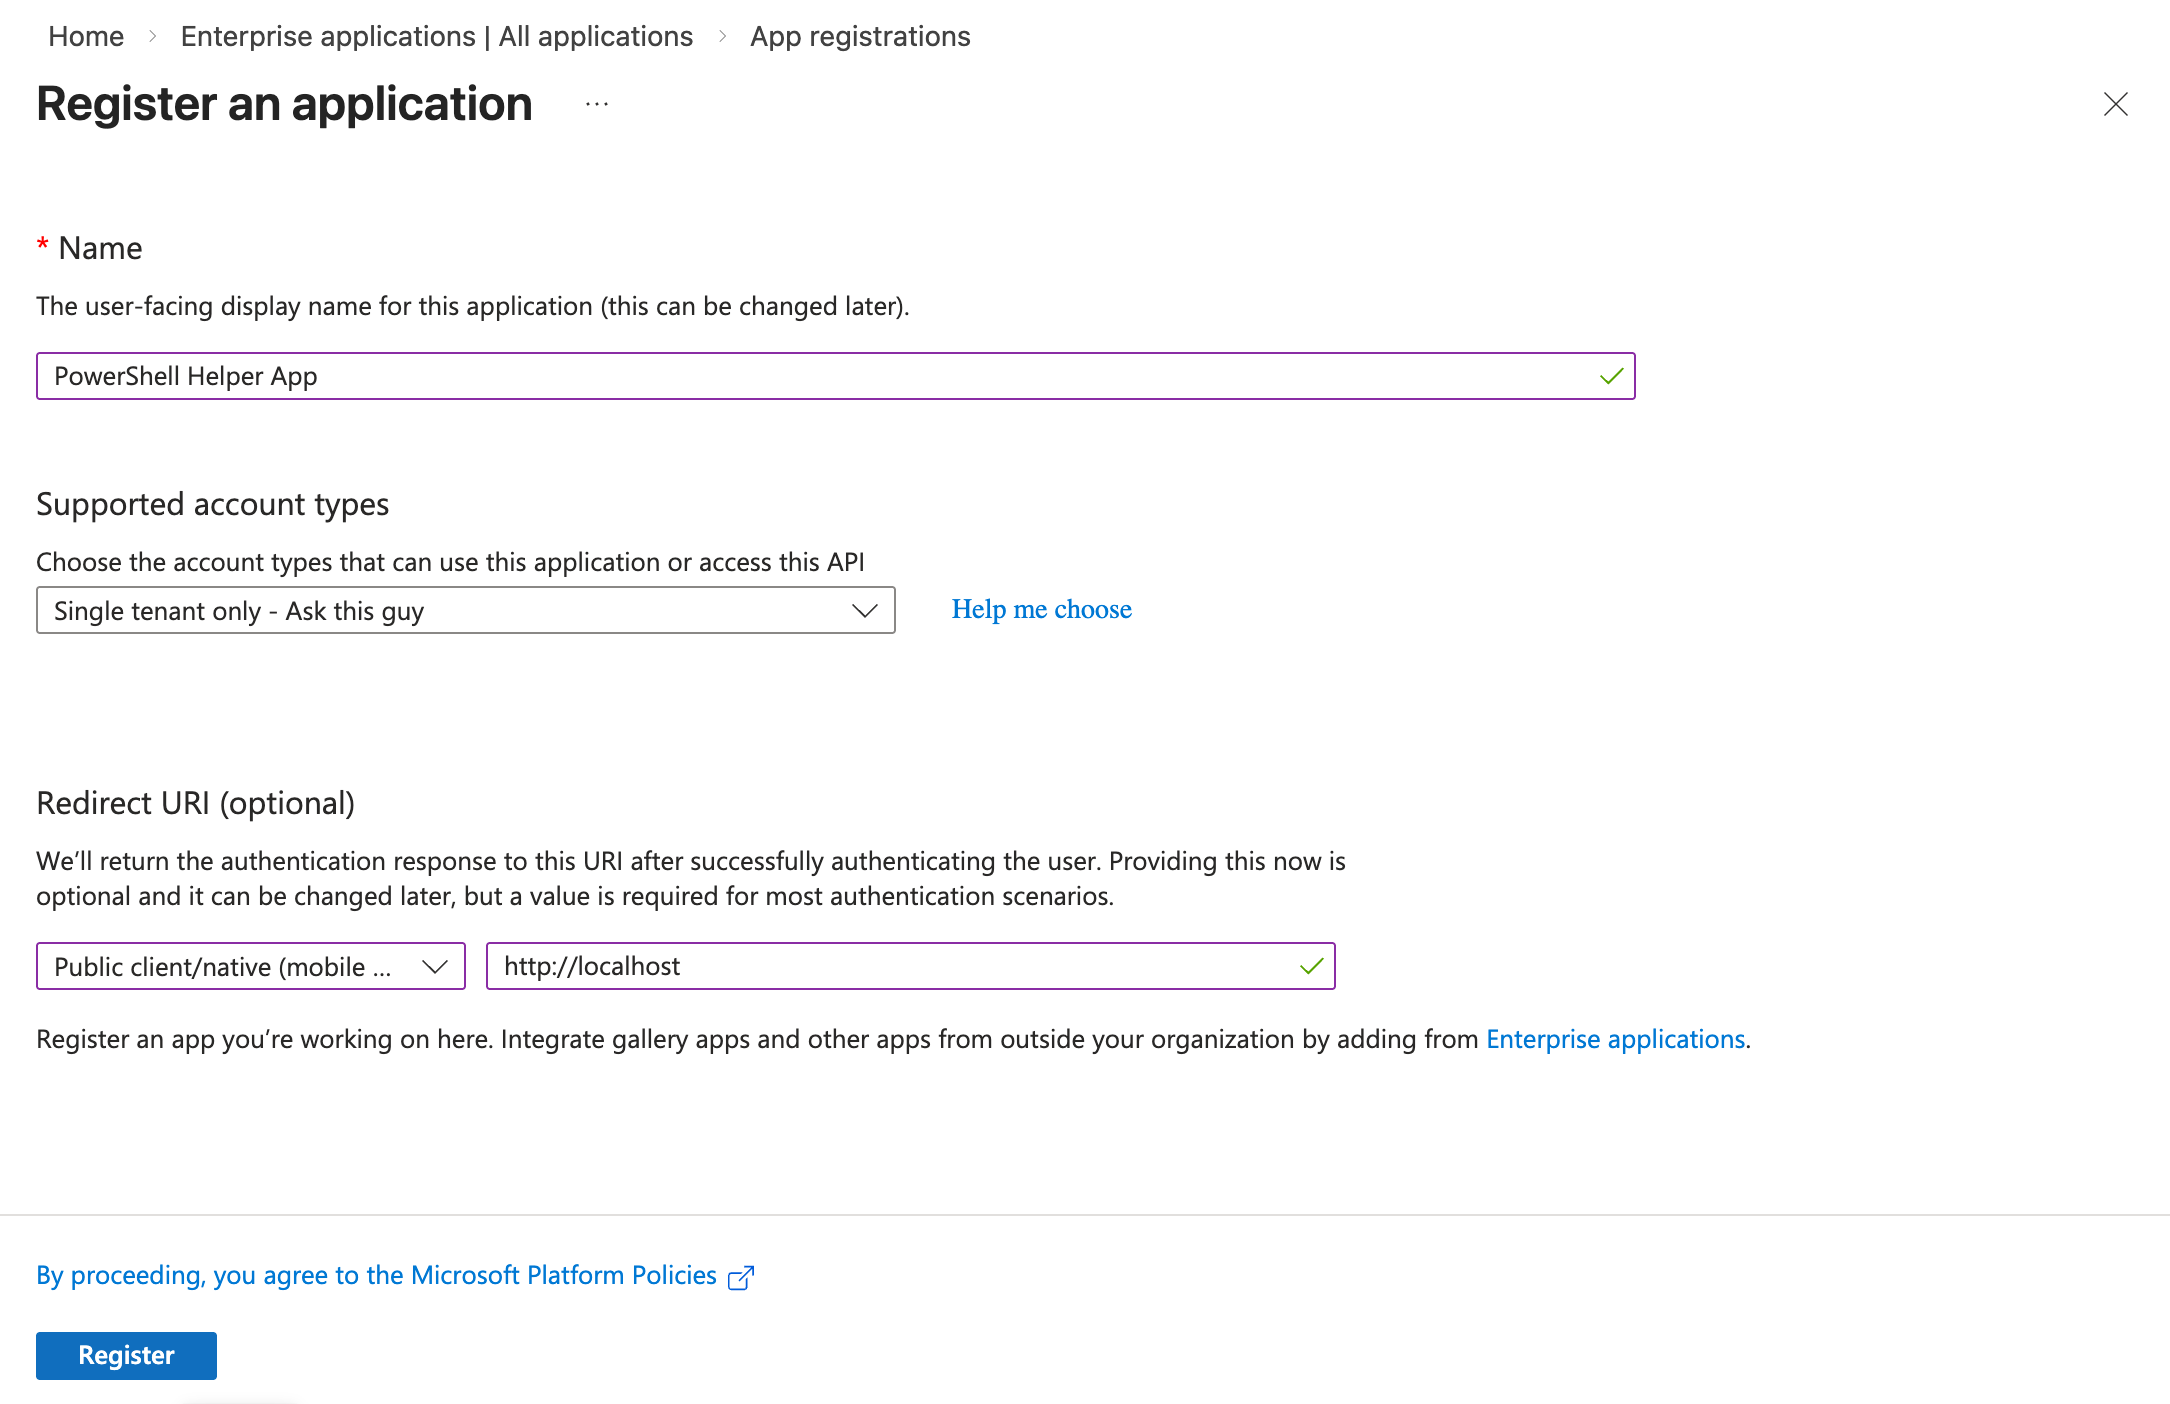 New app registration
-
Click on "Register" Your application should appear in your app registrations list:
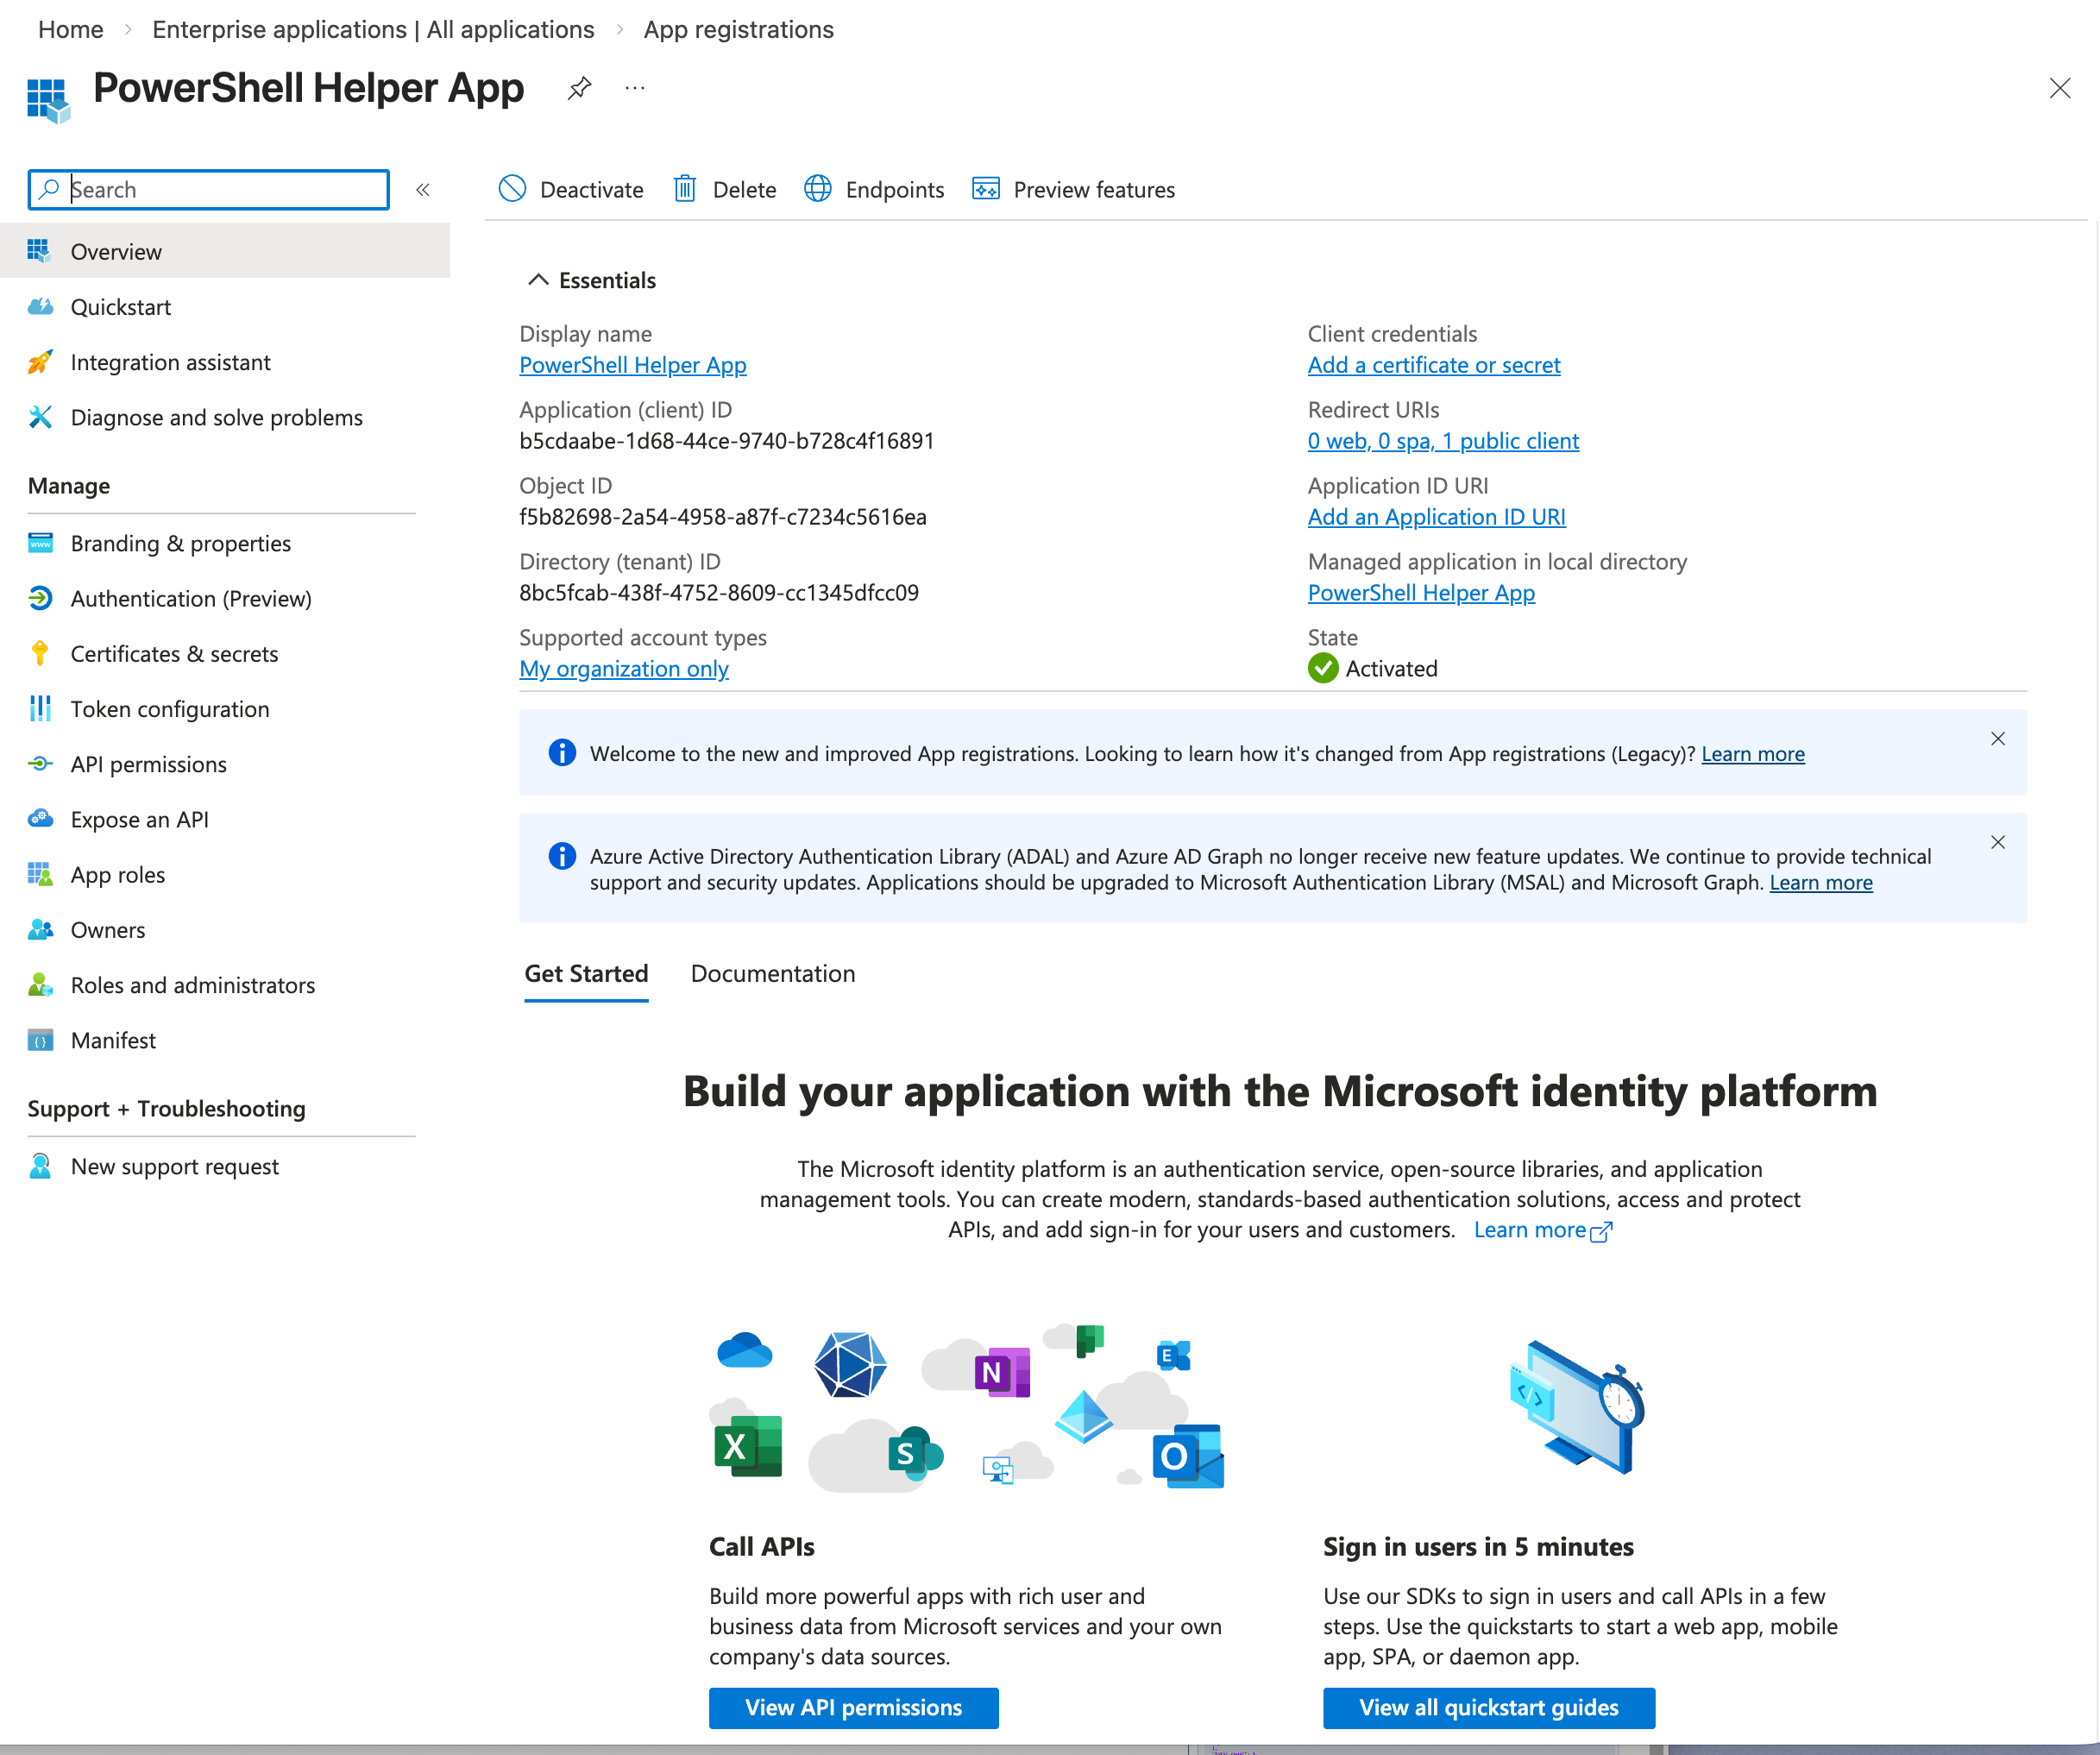 New app registration
Notice that your helper app has an Application (client) ID, you will need it later.
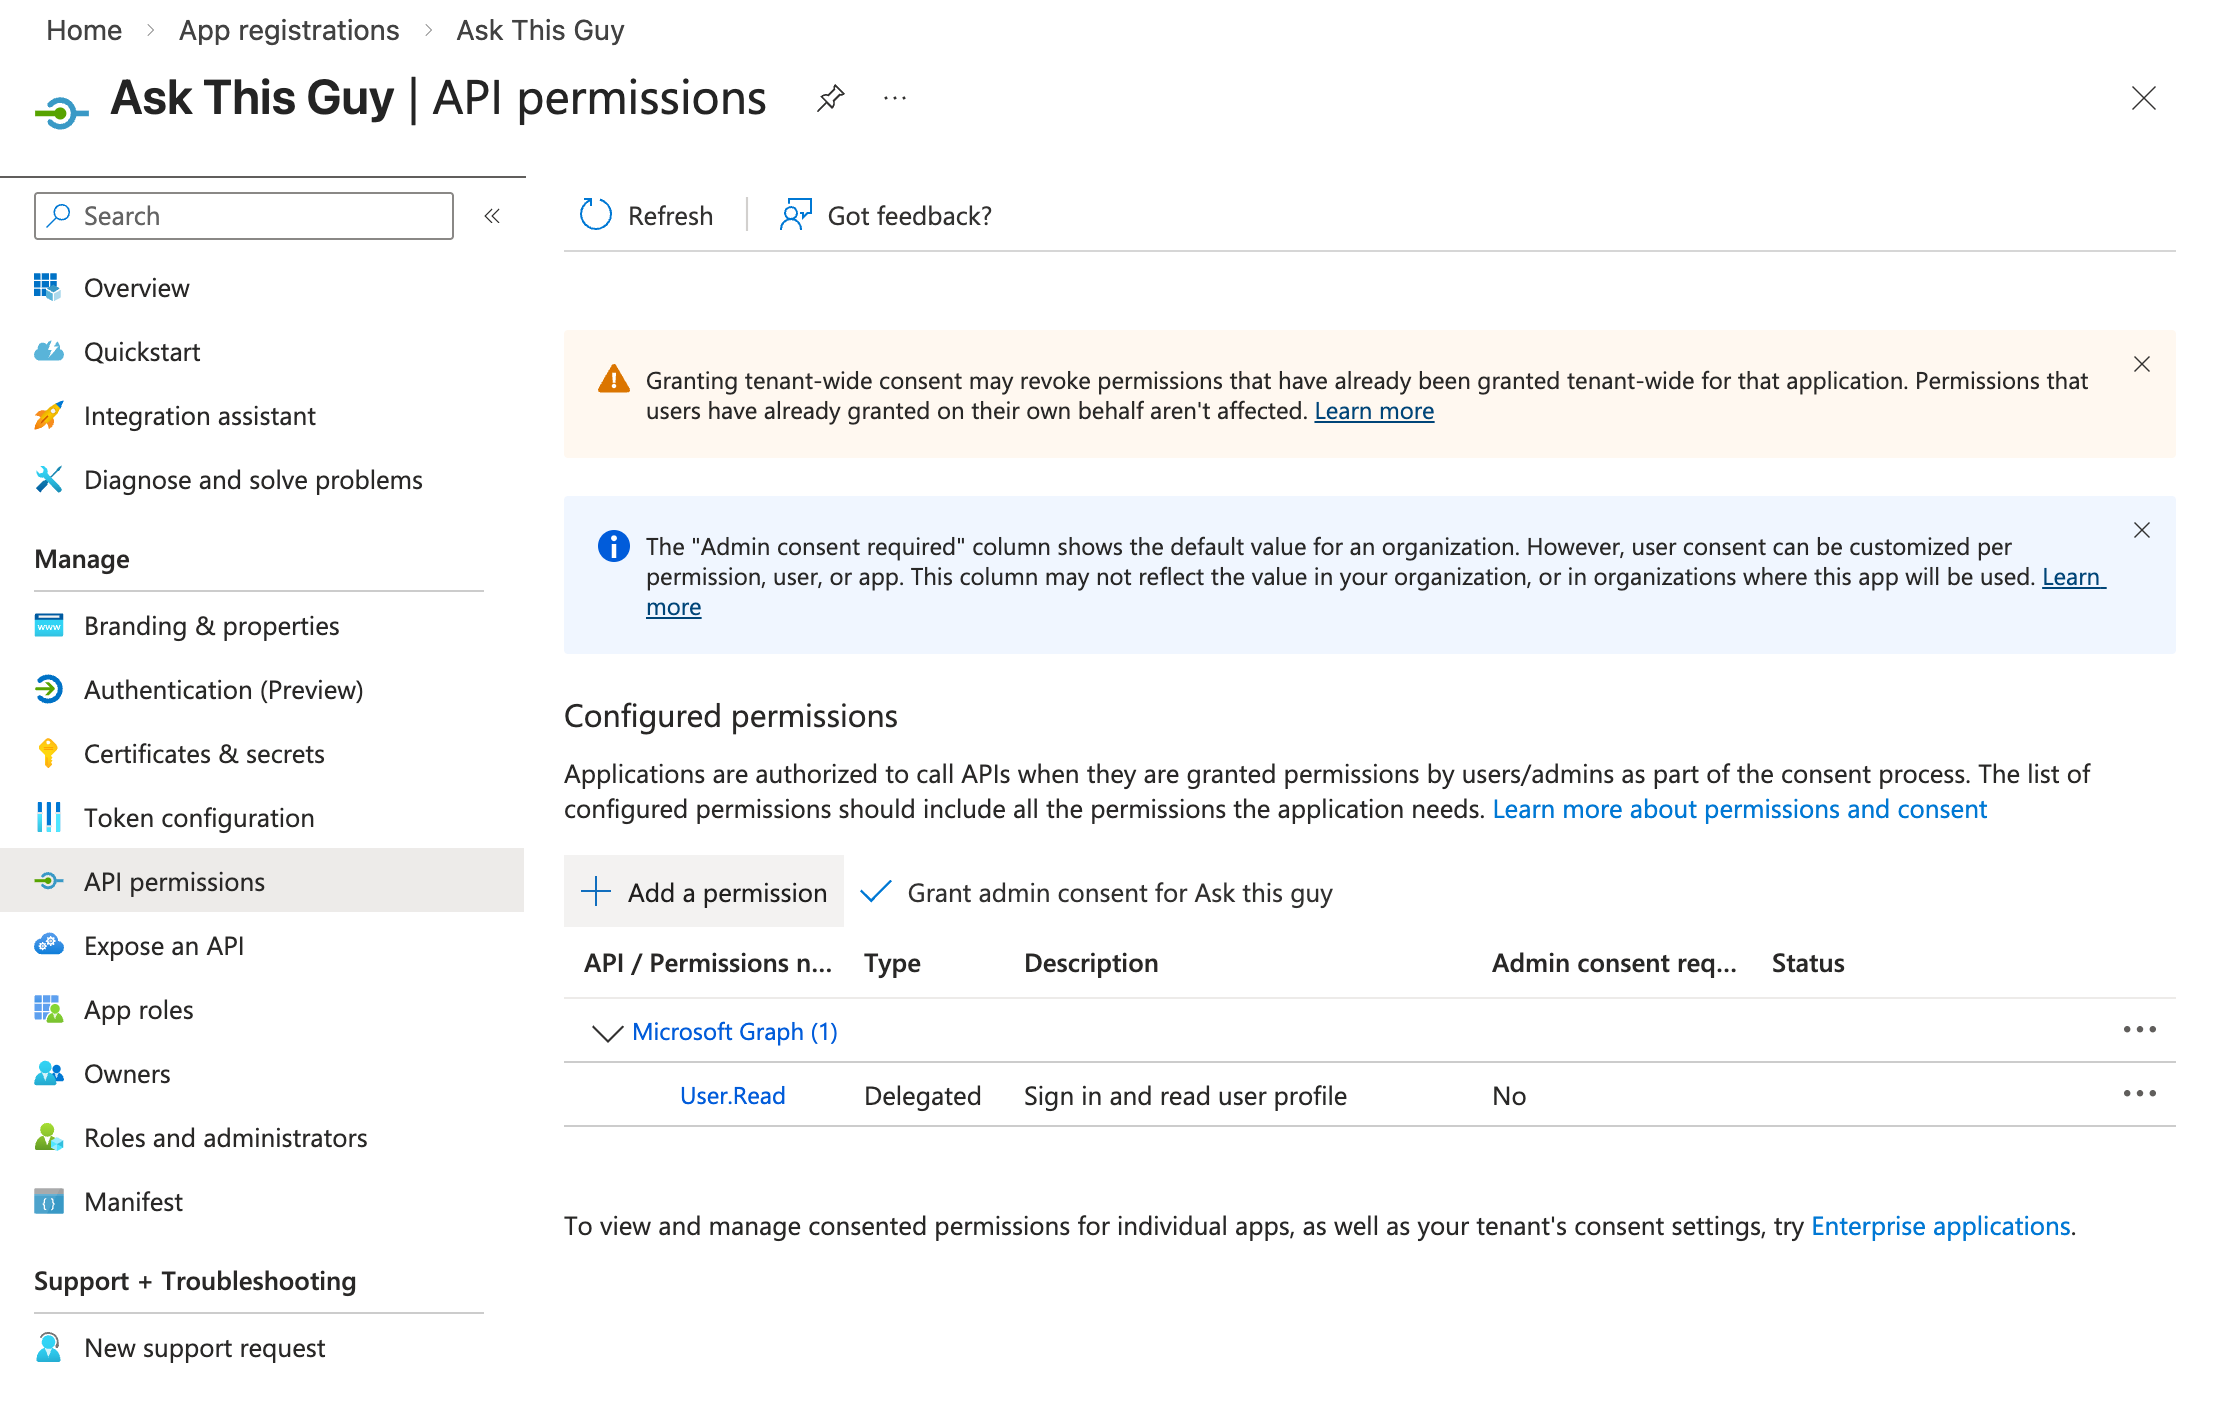
3.4 Configure API permissions for the helper app
In your newly created helper app, navigate to "API permissions".
For the moment, your application should have only one permission: "User.Read":
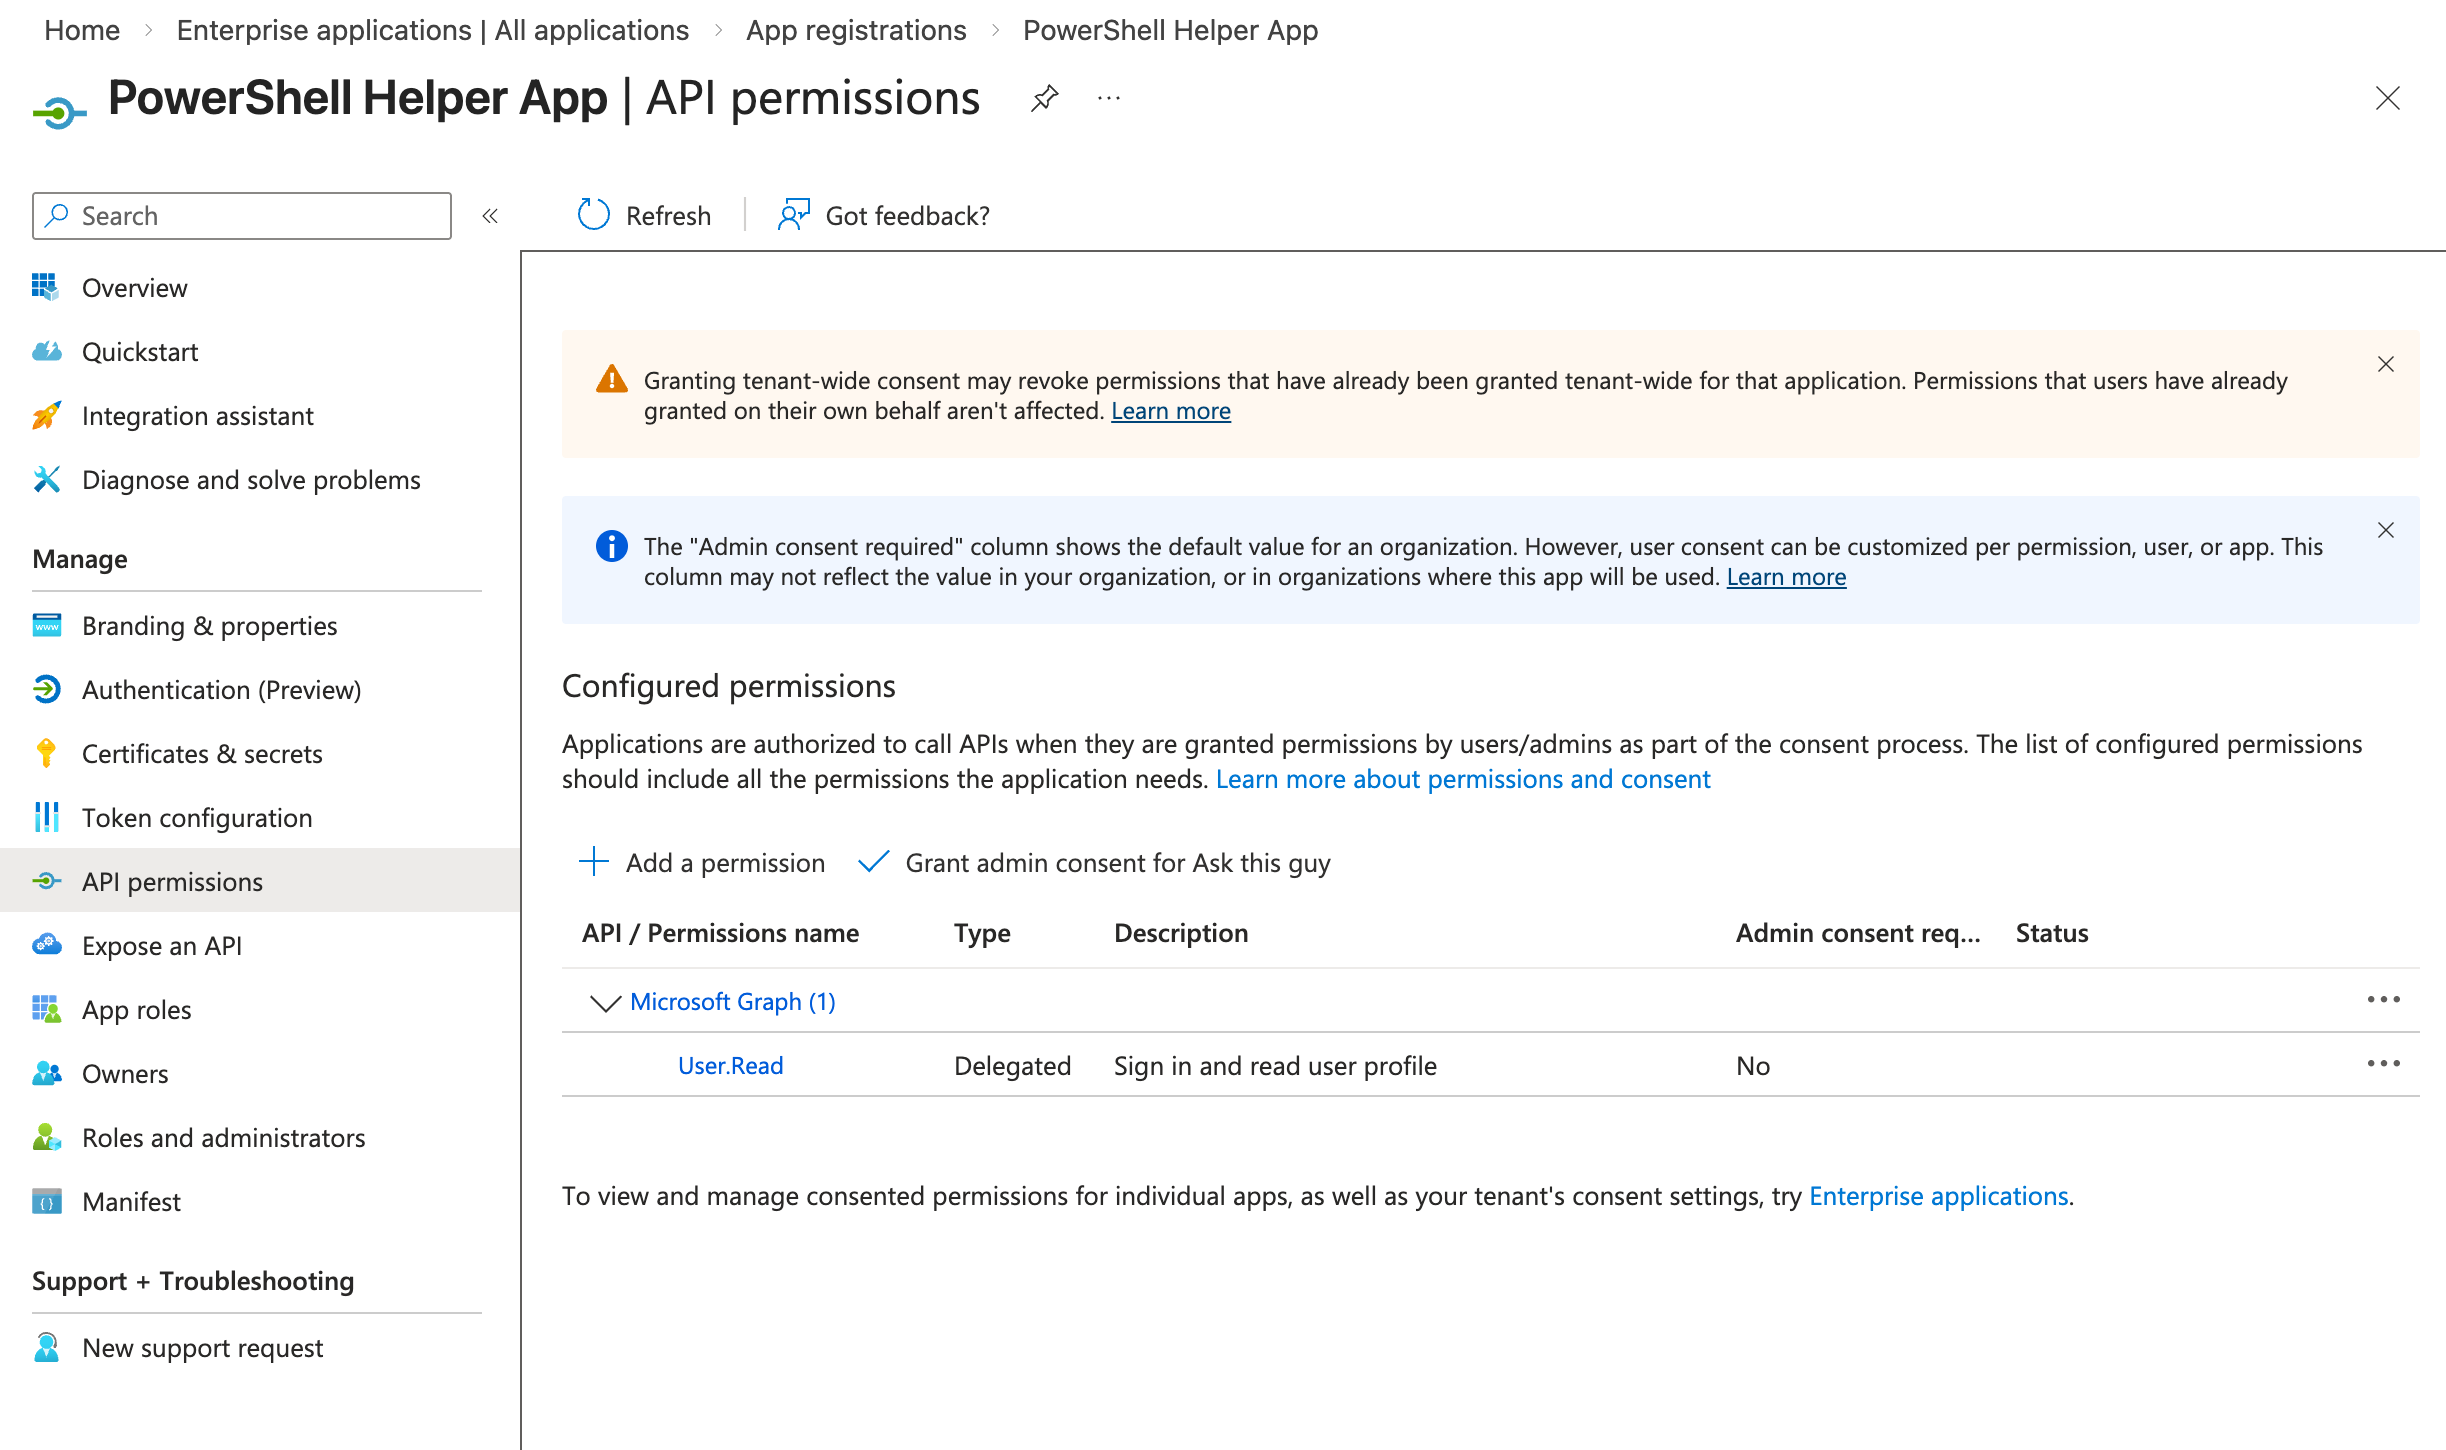 API permissions
We need to add new permissions.Click "+ Add a permission" and select "Microsoft Graph":
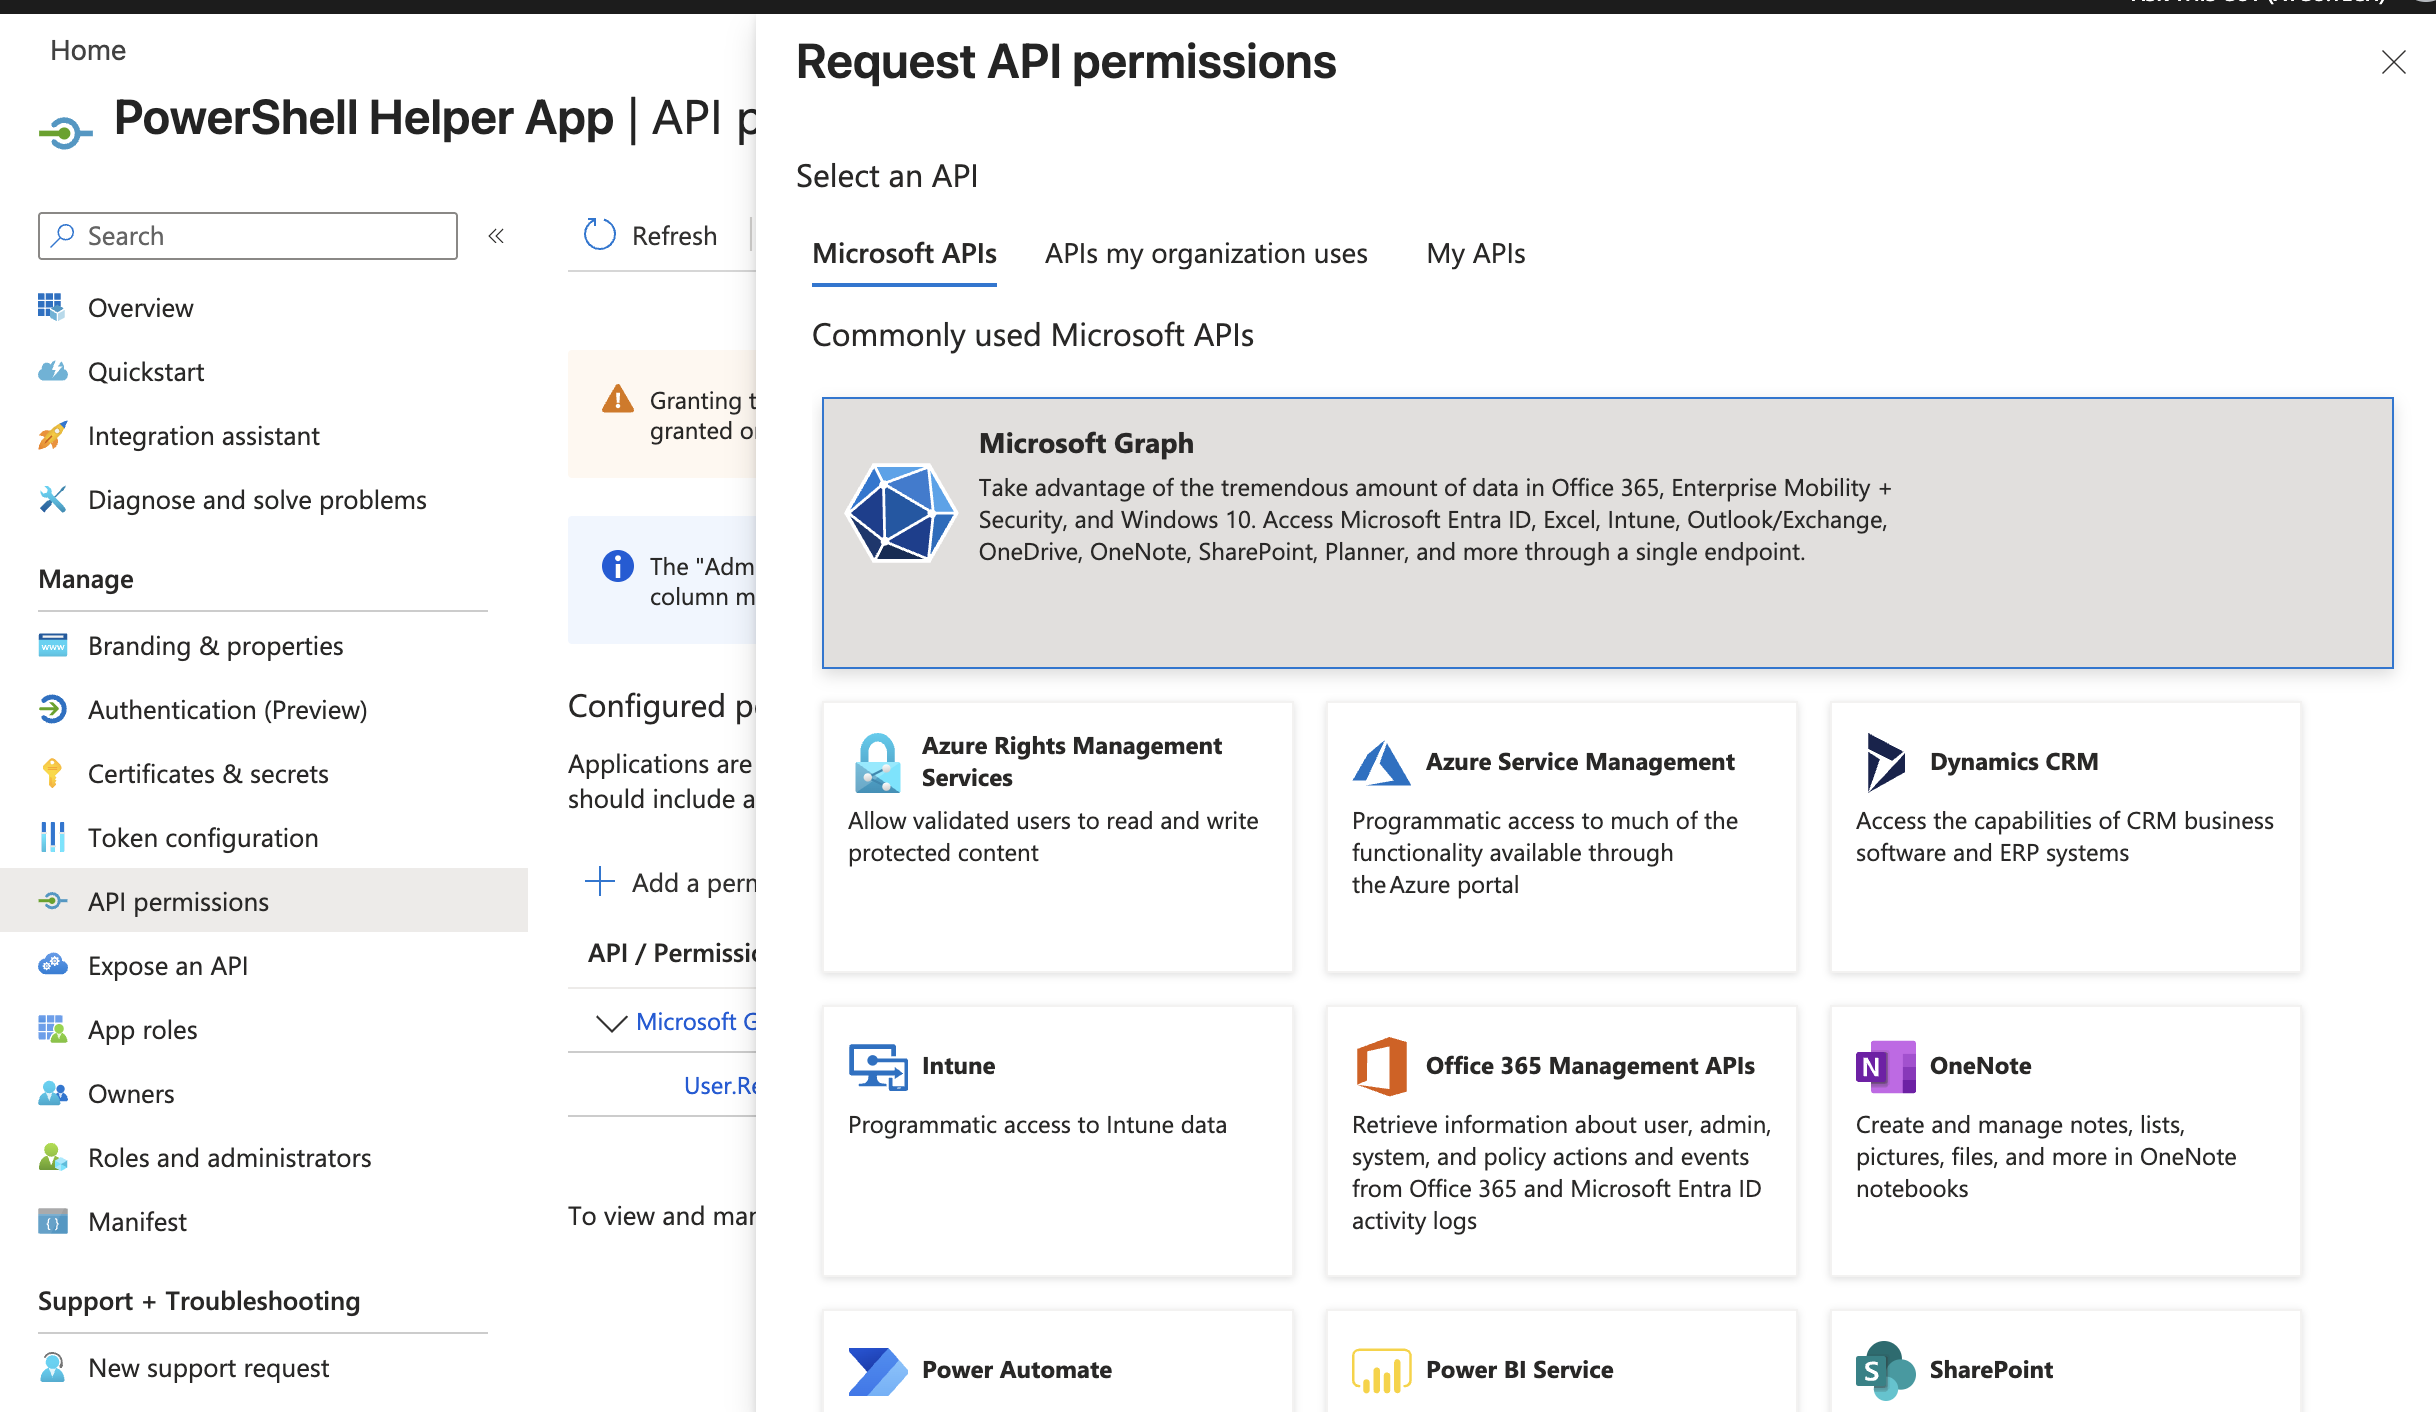 Microsoft Graph
Click on "Delegated permissions":
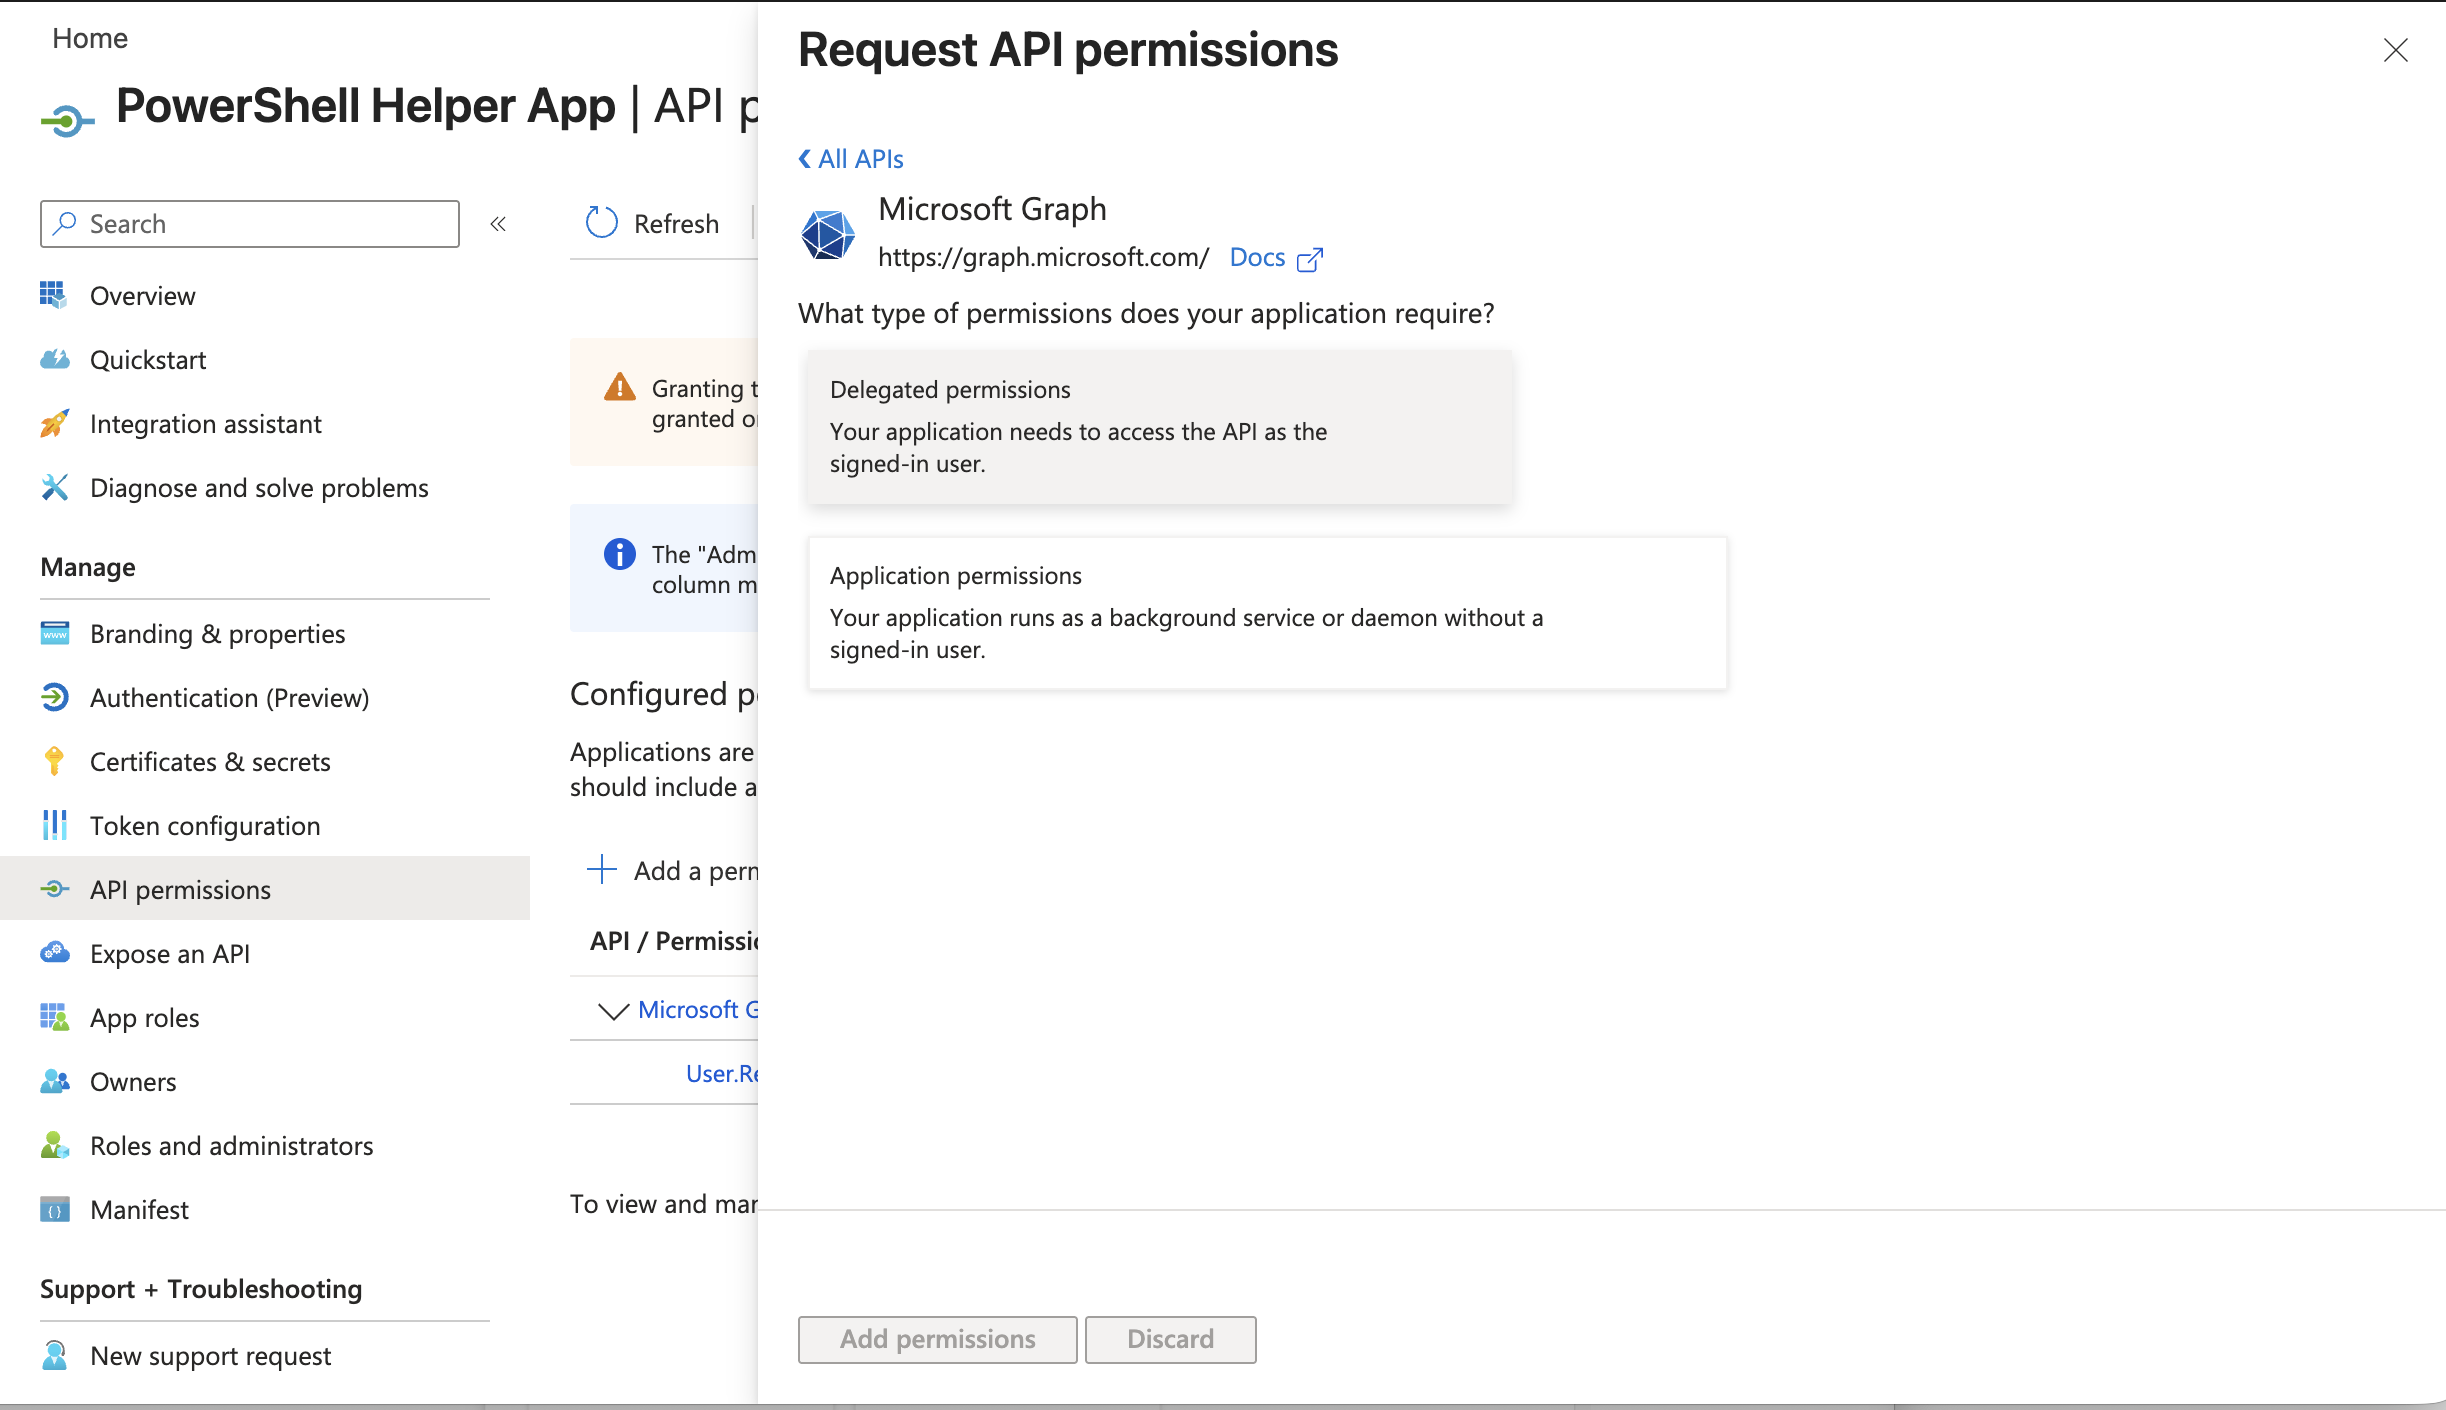 Delegated permissions
Add the following delegated permission:
- Sites.FullControl.All and click on "Add permissions":
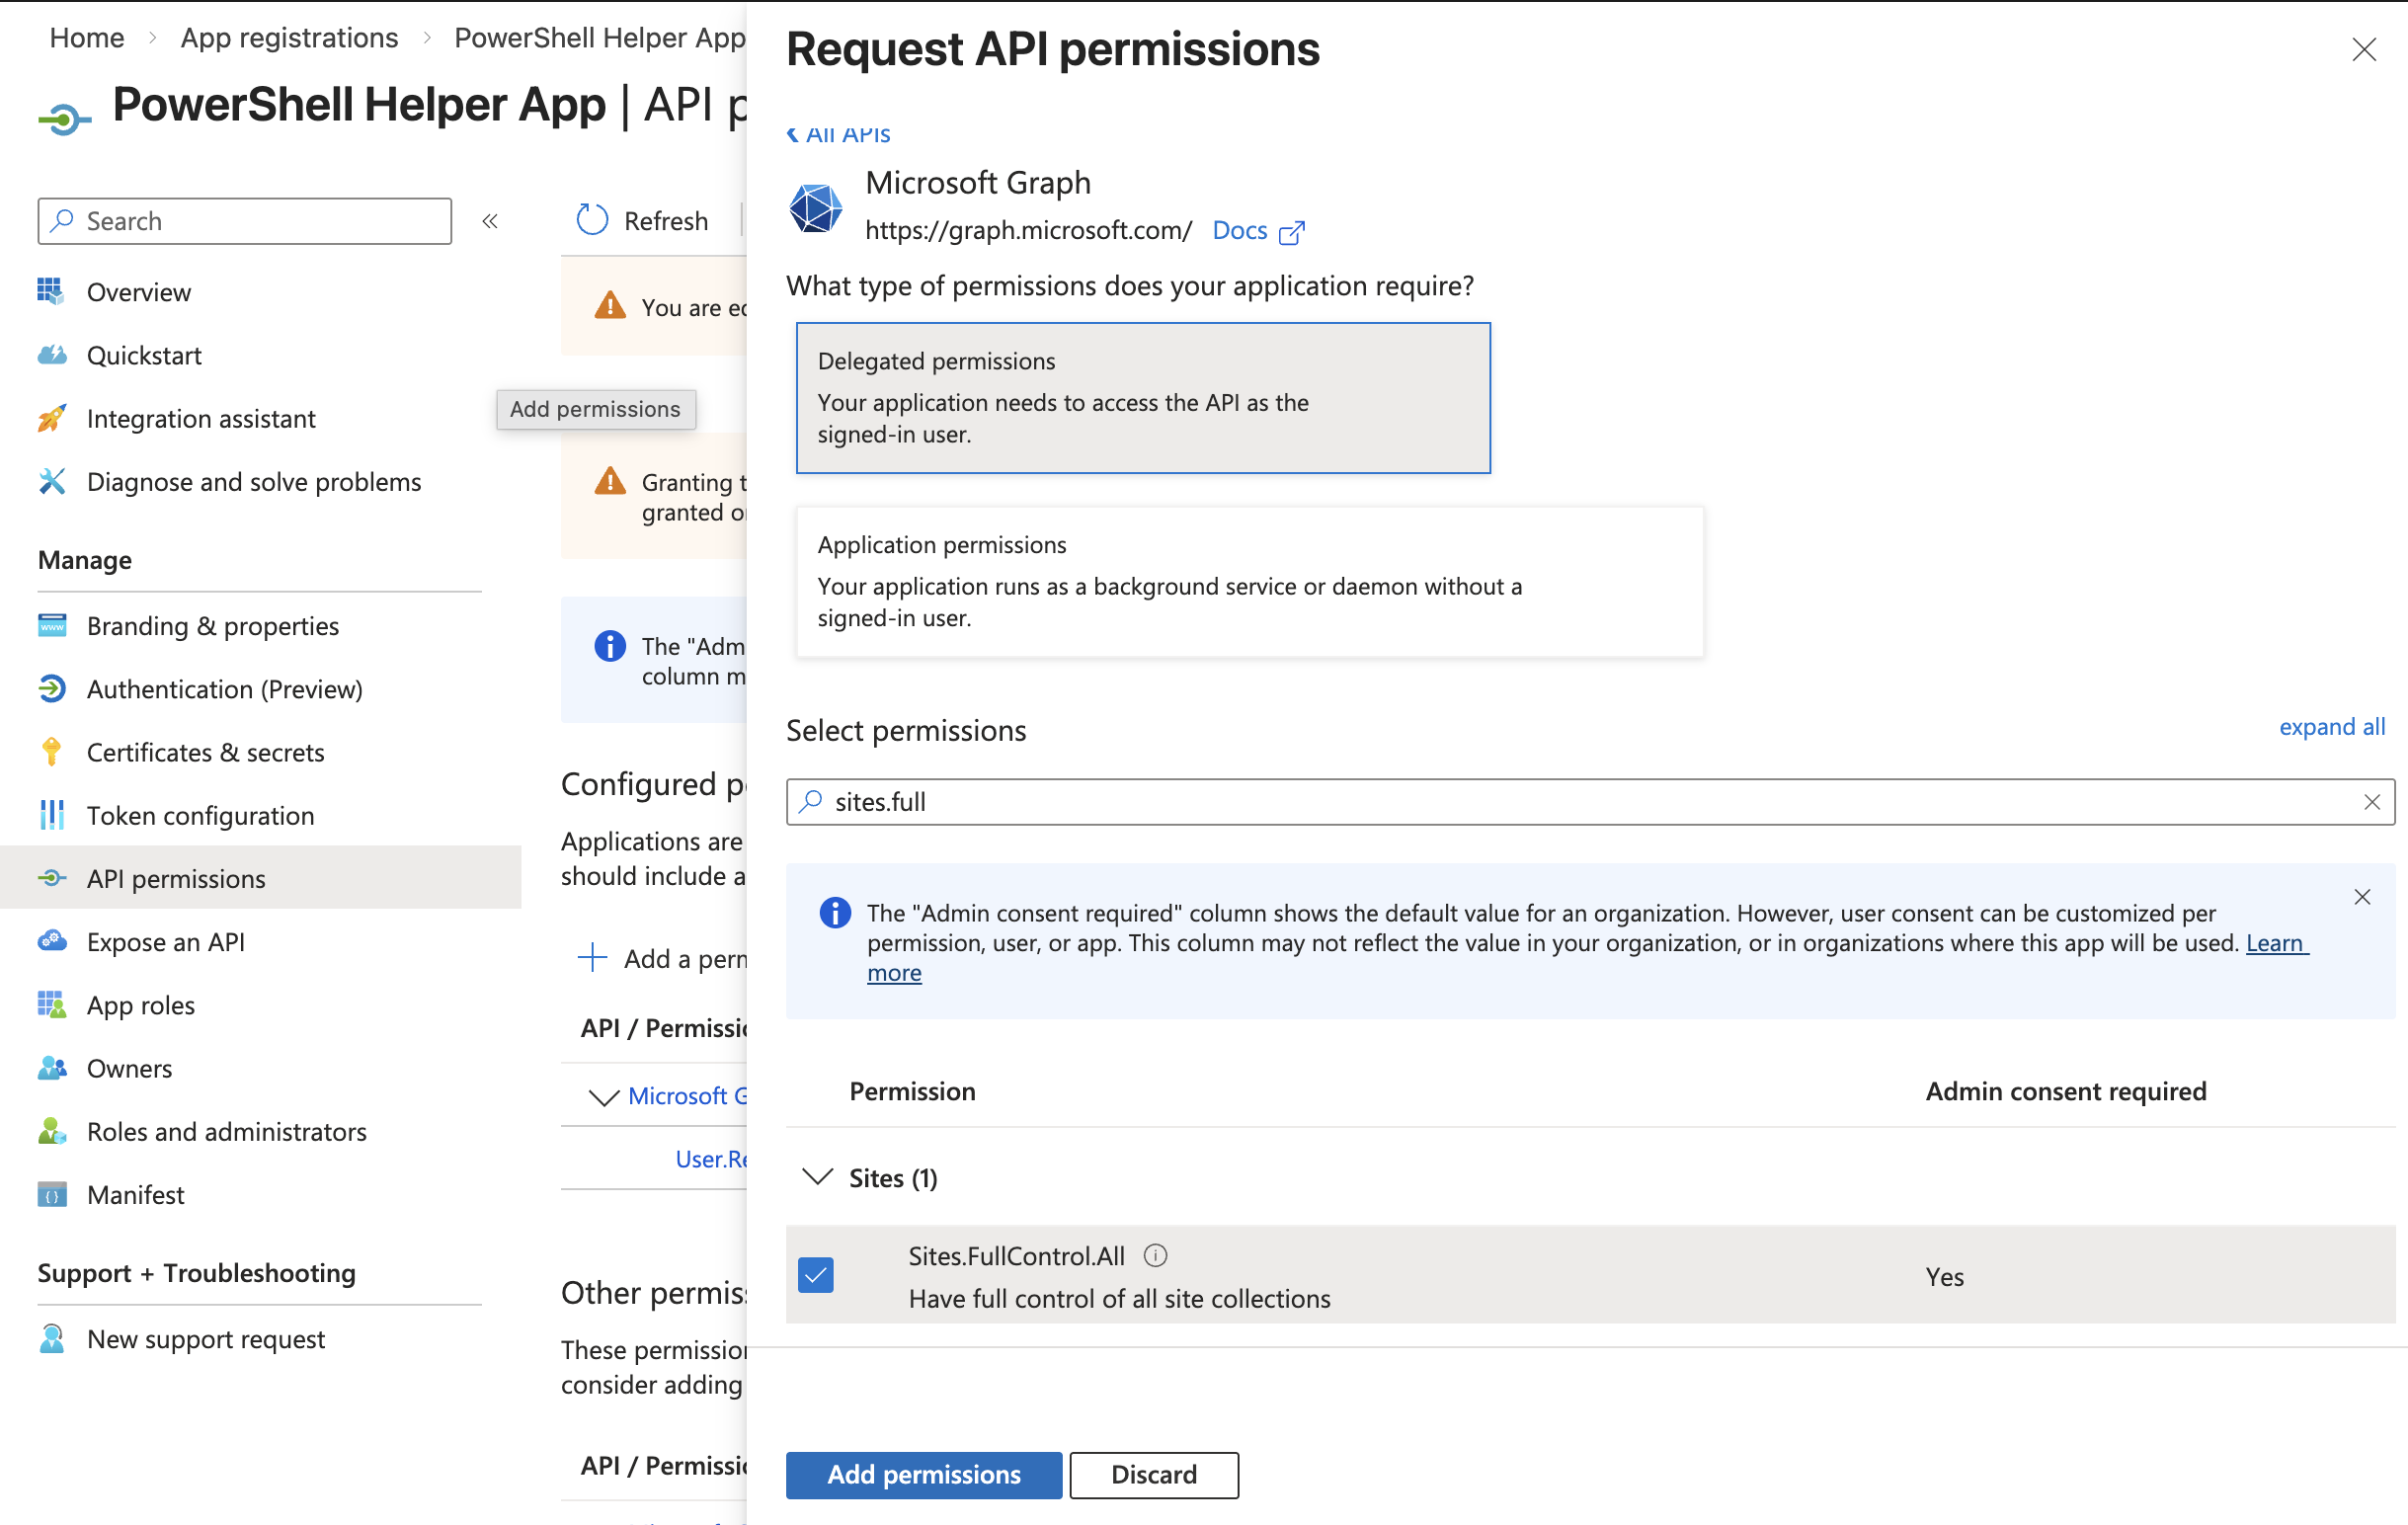 Add permissions
Your application should now have the following permissions:
- User.Read
- Sites.FullControl.All
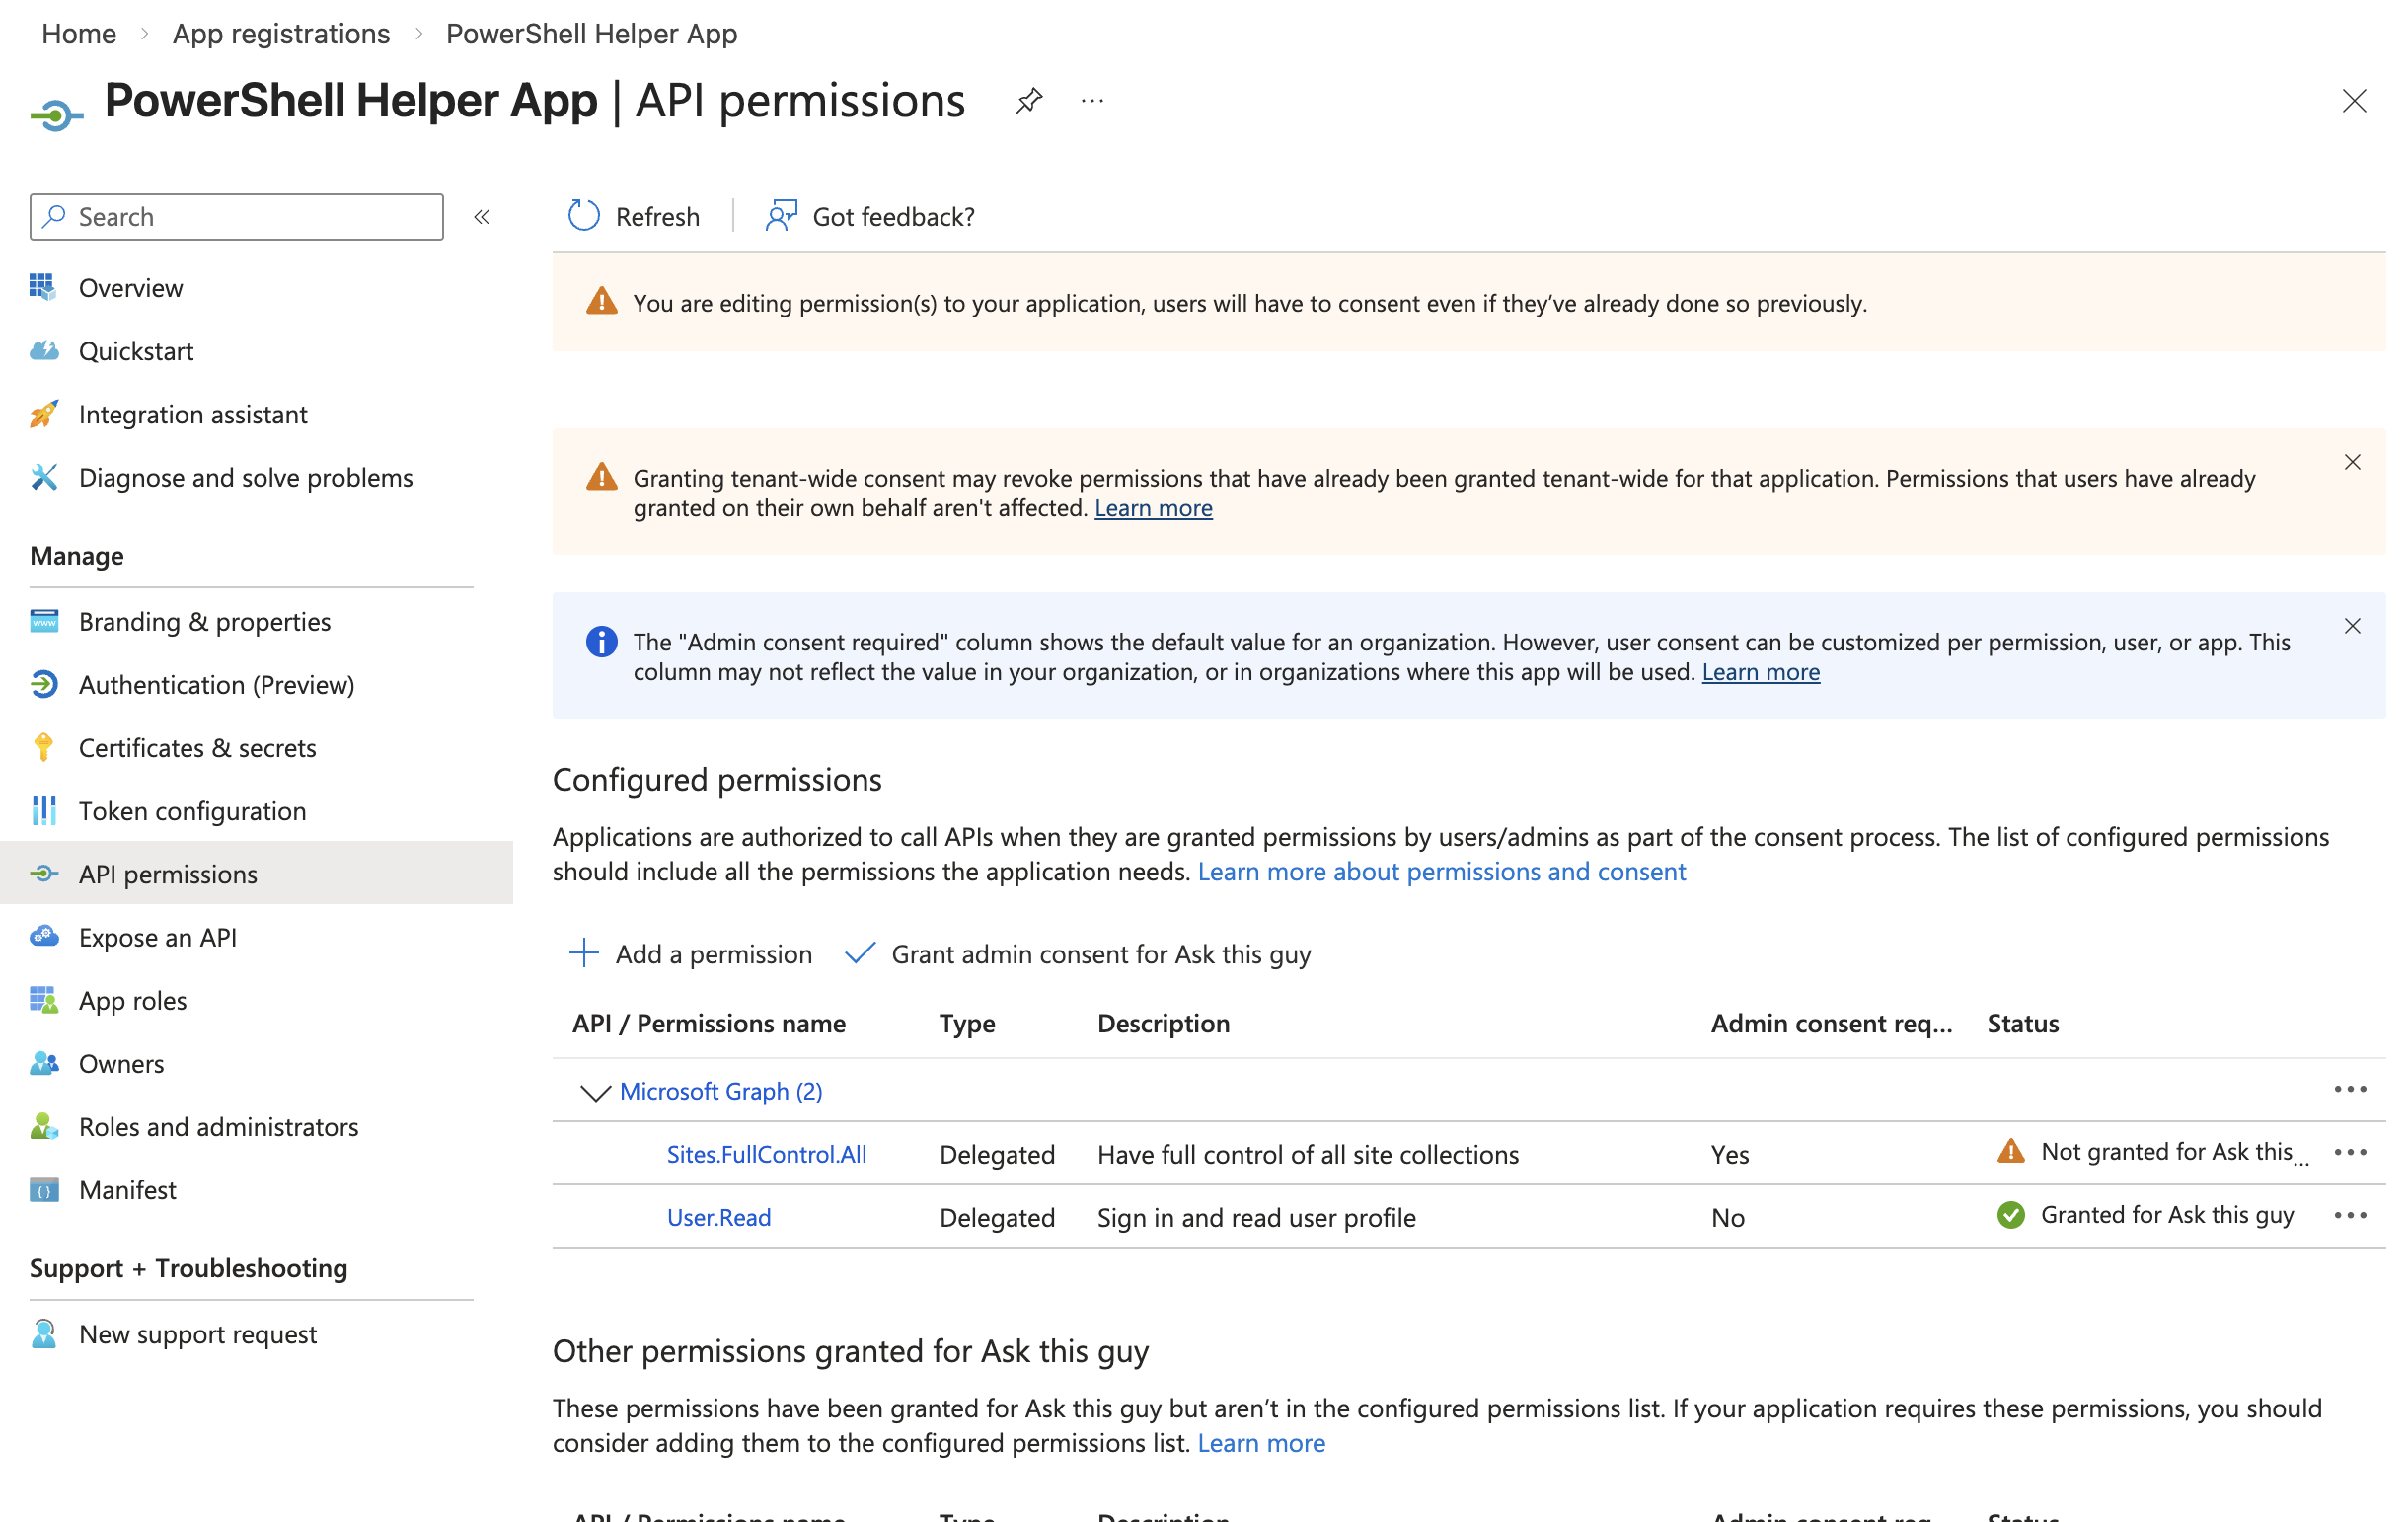 Application permissions
Click "Grant admin consent for [your organization]":
 Grant admin consent
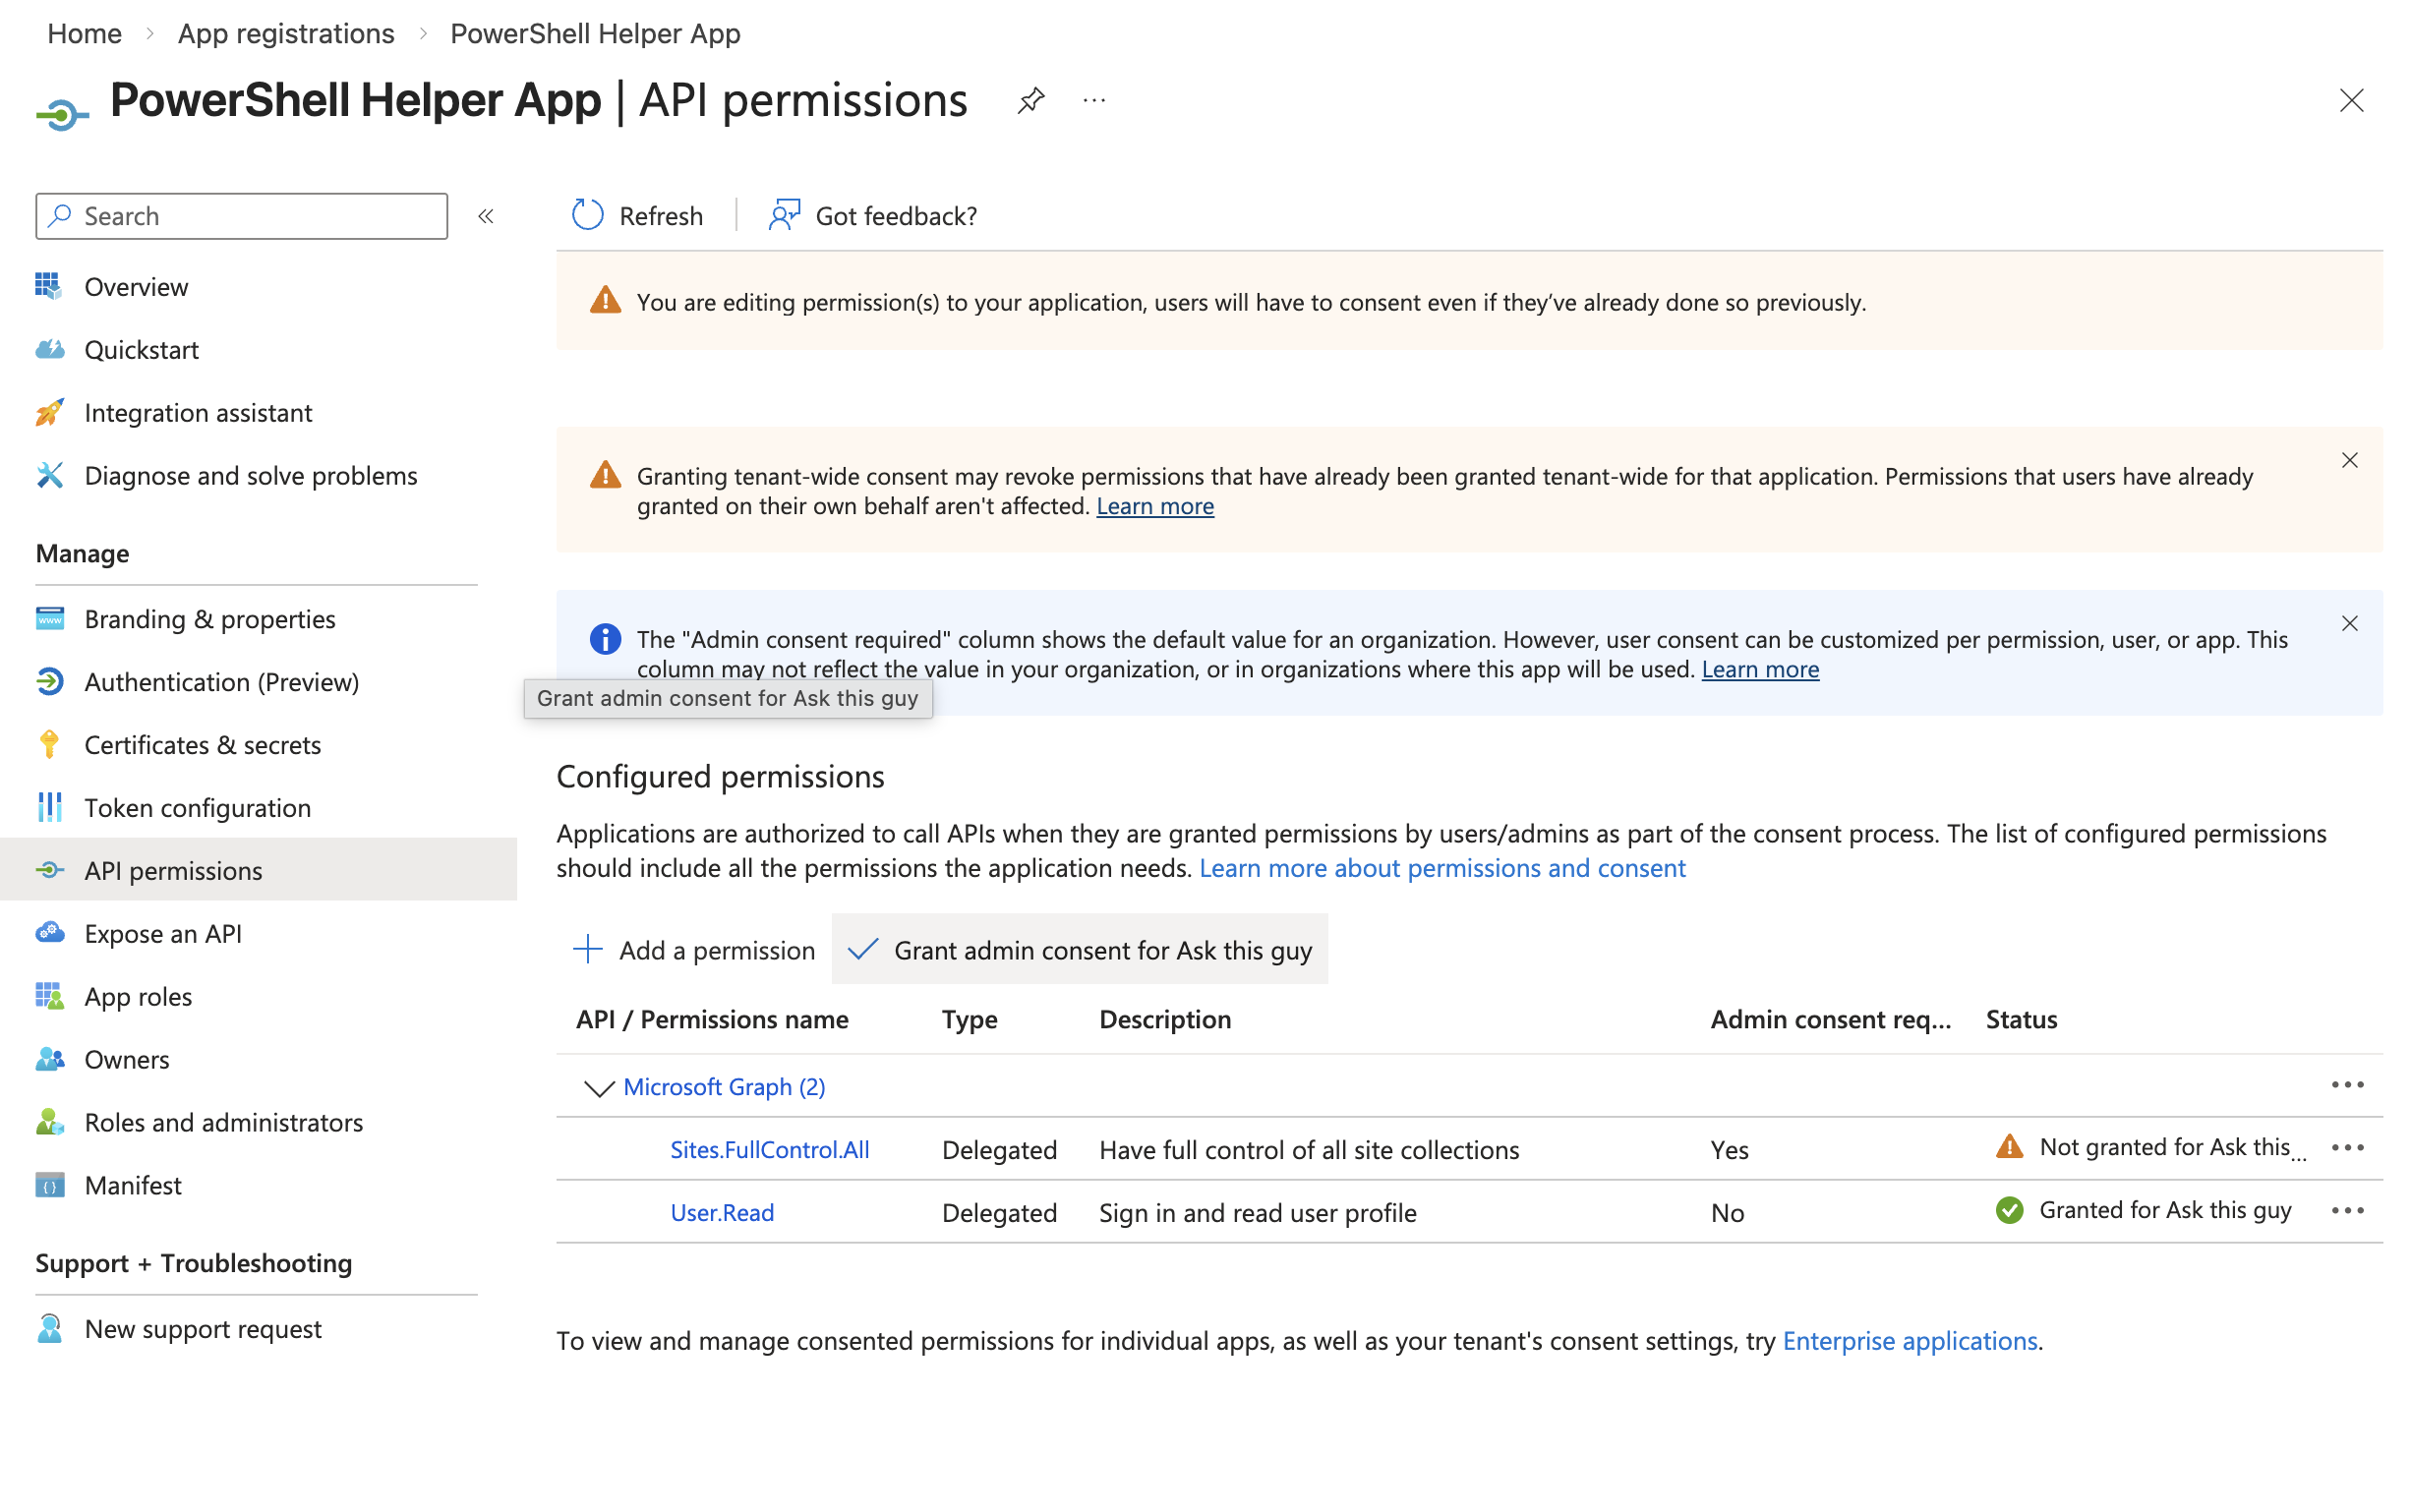
Confirm:
 Grant admin consent
You should now see green checks, like this:
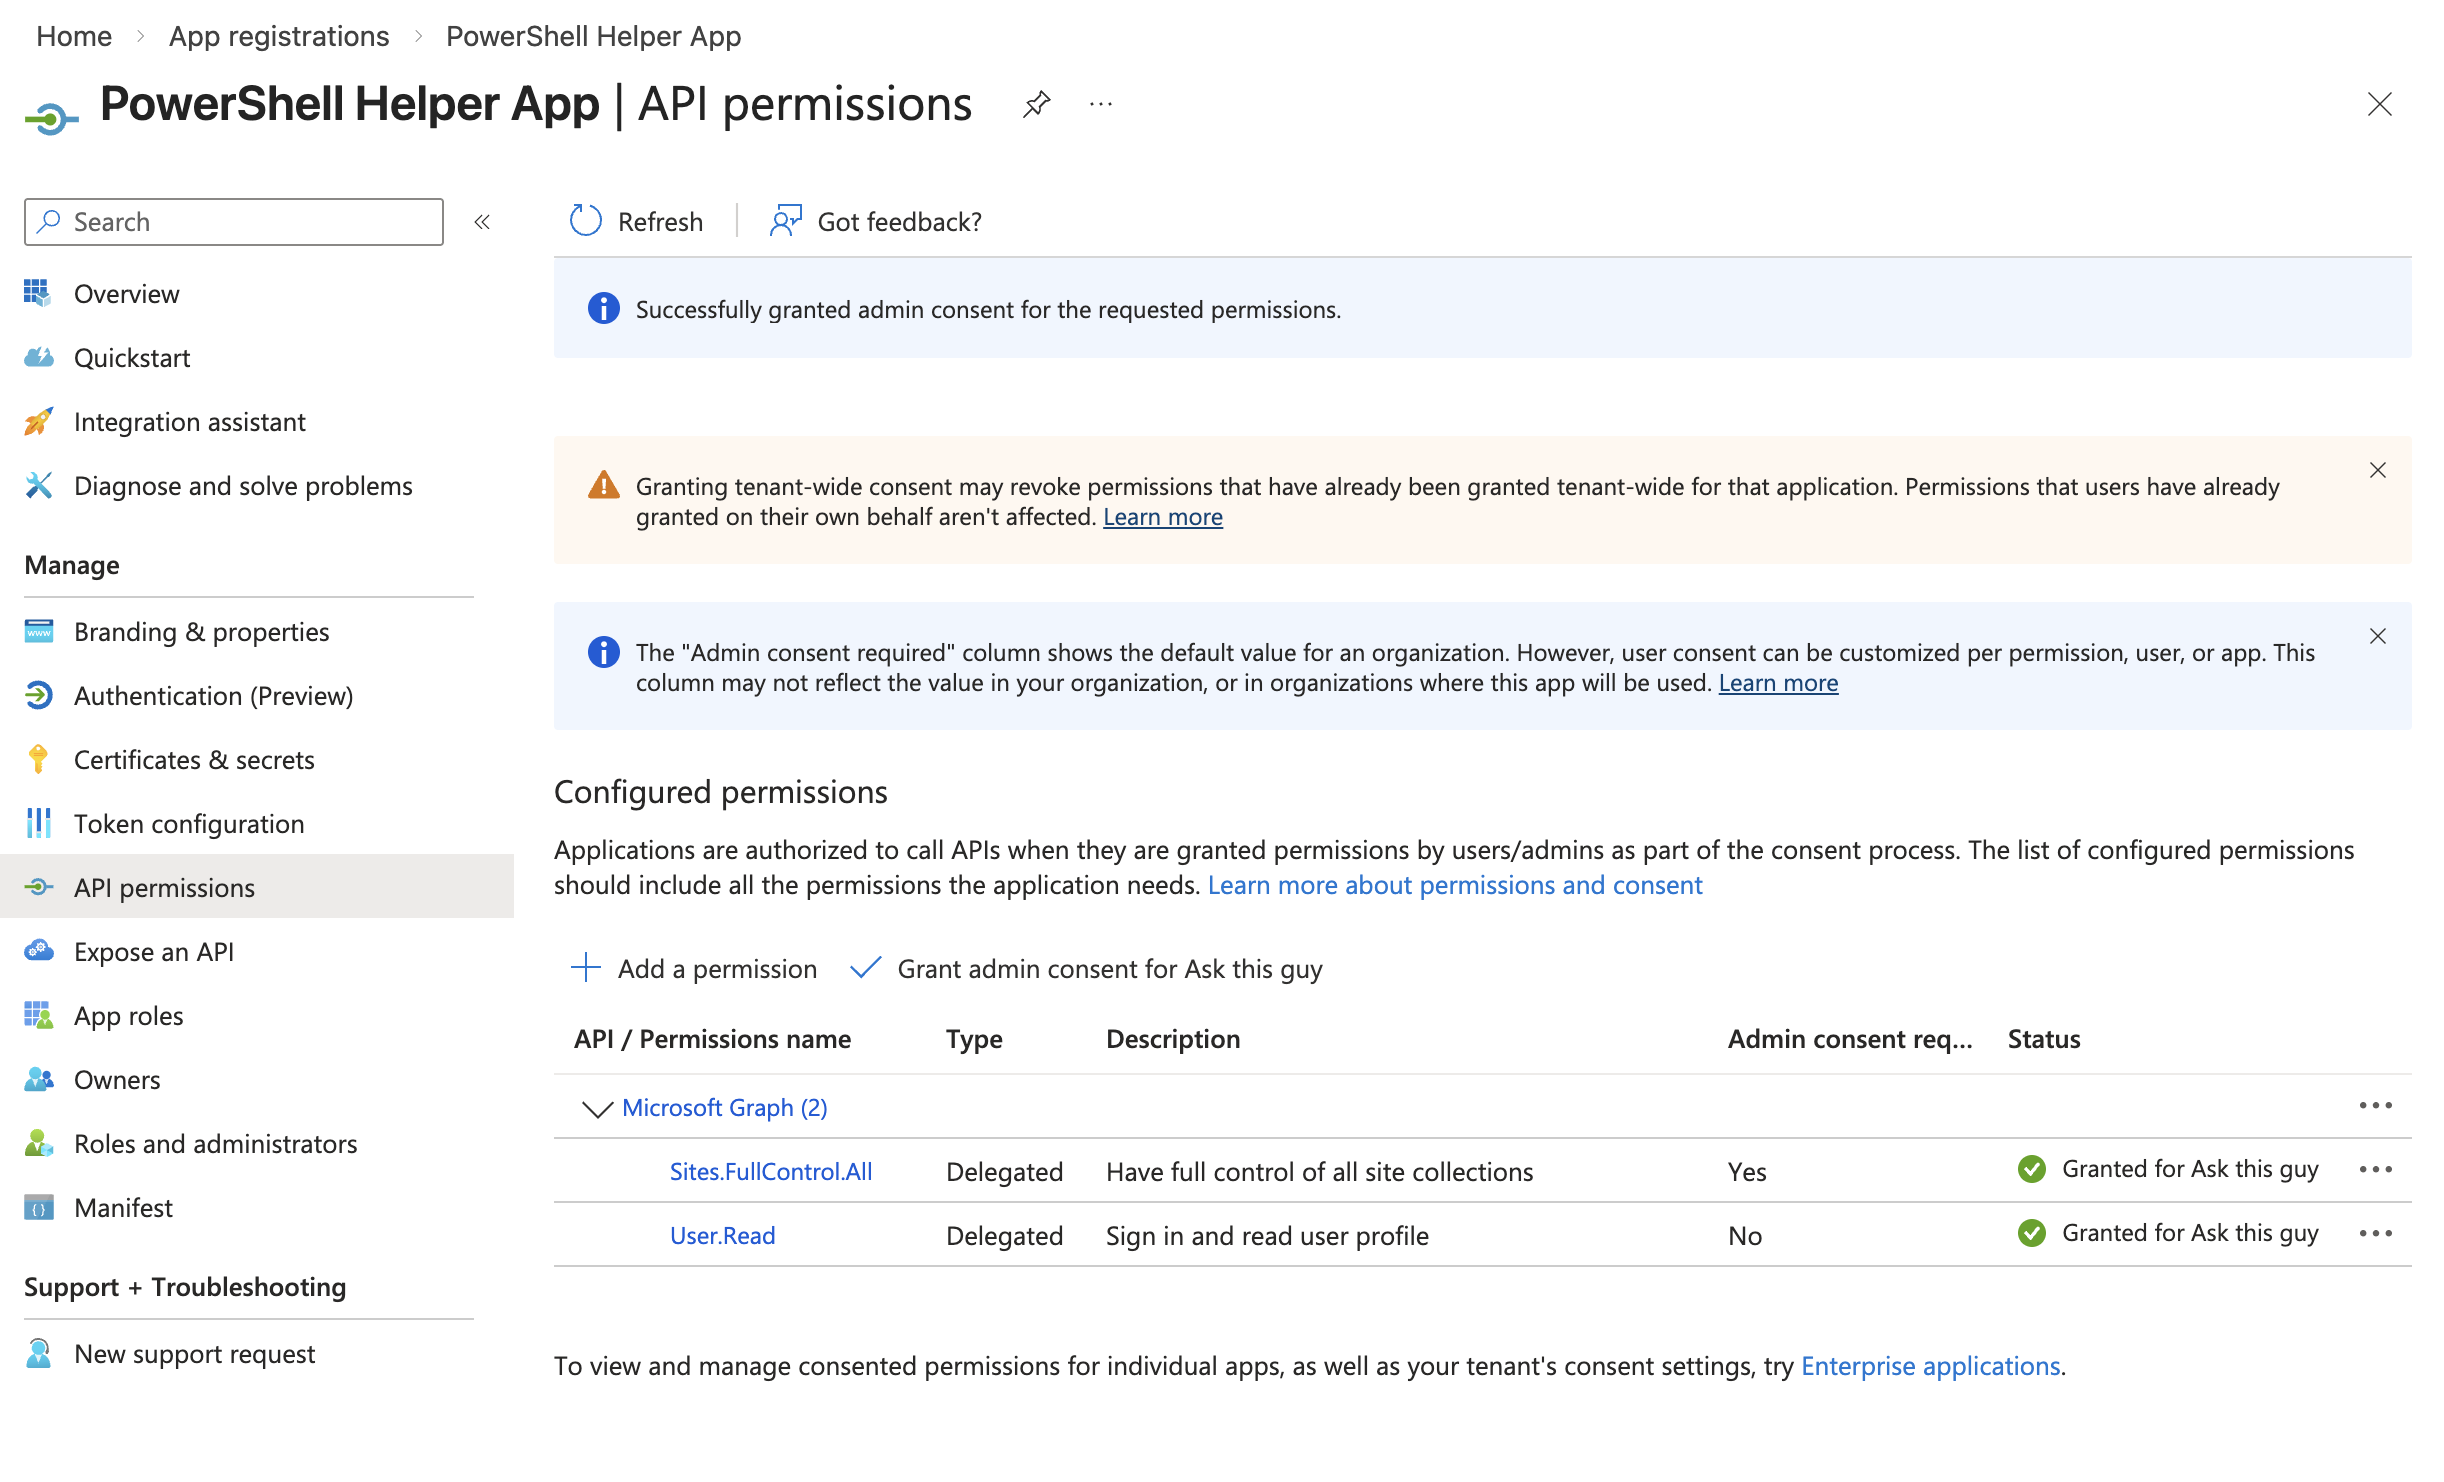 Grant admin consent
3.5 Enable public client flows
Navigate to "Authentication (Preview)" in the left menu
Go to the "Settings" menu
Set "Allow public client flows" to Enabled
Click "Save"
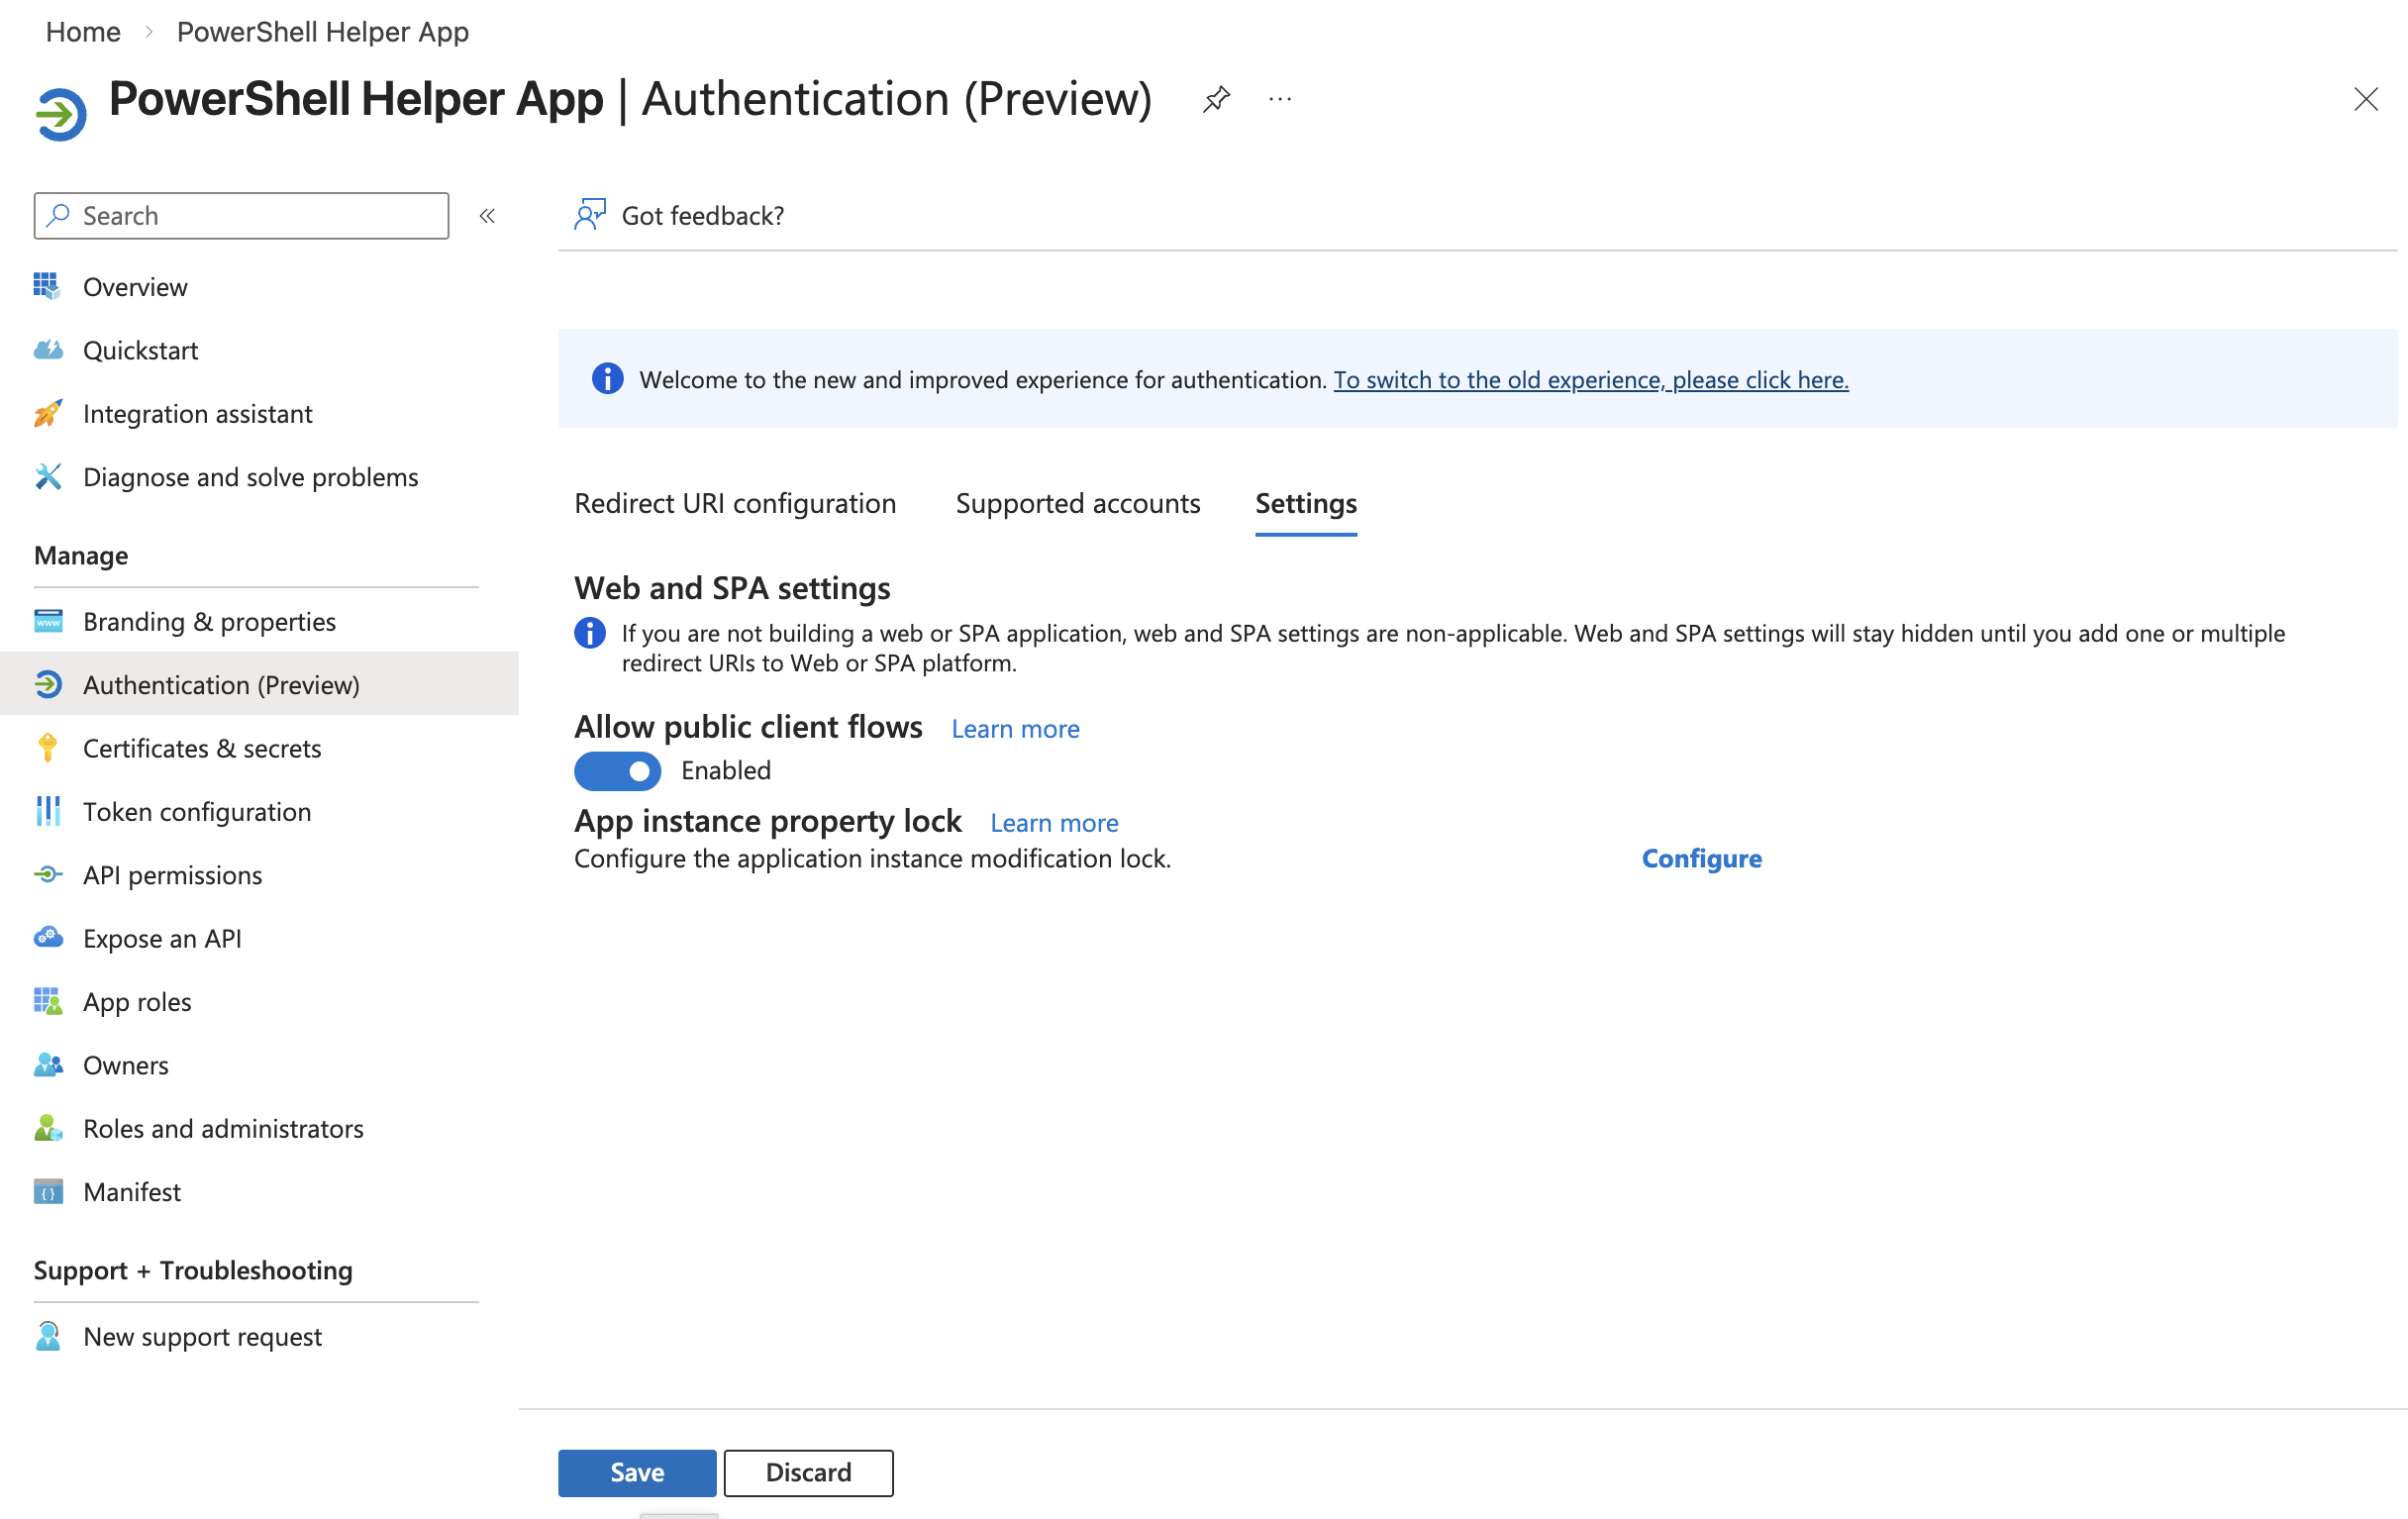 Public client flows
3.6 Connect to SharePoint using PowerShell
Now you can connect to SharePoint as an administrator using the helper app you just created.
Run the following command, replacing:
<YOUR_TENANT_NAME>with your tenant name (e.g., if your SharePoint sites are at https://contoso.sharepoint.com, use "contoso")<YOUR_CLIENT_ID>with the Application (client) ID from the helper app overview page
Connect-PnPOnline `
  -Url https://<YOUR_TENANT_NAME>-admin.sharepoint.com `
  -ClientId <YOUR_CLIENT_ID> `
  -Interactive
A browser window will open for you to authenticate with your administrator credentials.
3.7 List available SharePoint sites (optional)
To see all SharePoint sites in your tenant:
Get-PnPTenantSite |
  Where-Object { $_.Url -like "*/sites/*" } |
  Select Url, Title
3.8 Grant site permissions to the ATG app
For each SharePoint site you want ATG to access, run the following command:
Replace:
<YOUR_TENANT_NAME>with your tenant name<SITE_NAME>with the site name (e.g., "TeamSite")<ATG_APP_ID>with the Application (client) ID from your ATG app (the first app you created, not the helper app)<DISPLAY_NAME>with a friendly name (e.g., "Ask This Guy Connector")
Grant-PnPAzureADAppSitePermission `
  -Site https://<YOUR_TENANT_NAME>.sharepoint.com/sites/<SITE_NAME> `
  -AppId <ATG_APP_ID> `
  -DisplayName "<DISPLAY_NAME>" `
  -Permissions Read
Example:
Grant-PnPAzureADAppSitePermission `
  -Site https://contoso.sharepoint.com/sites/Engineering `
  -AppId b742cb55-dc46-4a46-adc4-72a5a28c4b64 `
  -DisplayName "Ask This Guy Connector" `
  -Permissions Read
Repeat this command for each site you want to authorize.
3.9 Verify permissions (optional)
To view the permissions granted to a specific site:
Get-PnPAzureADAppSitePermission -Site <SITE_NAME>
4. Create a client secret
Navigate to "Certificates & secrets" in the left menu of the app registration:
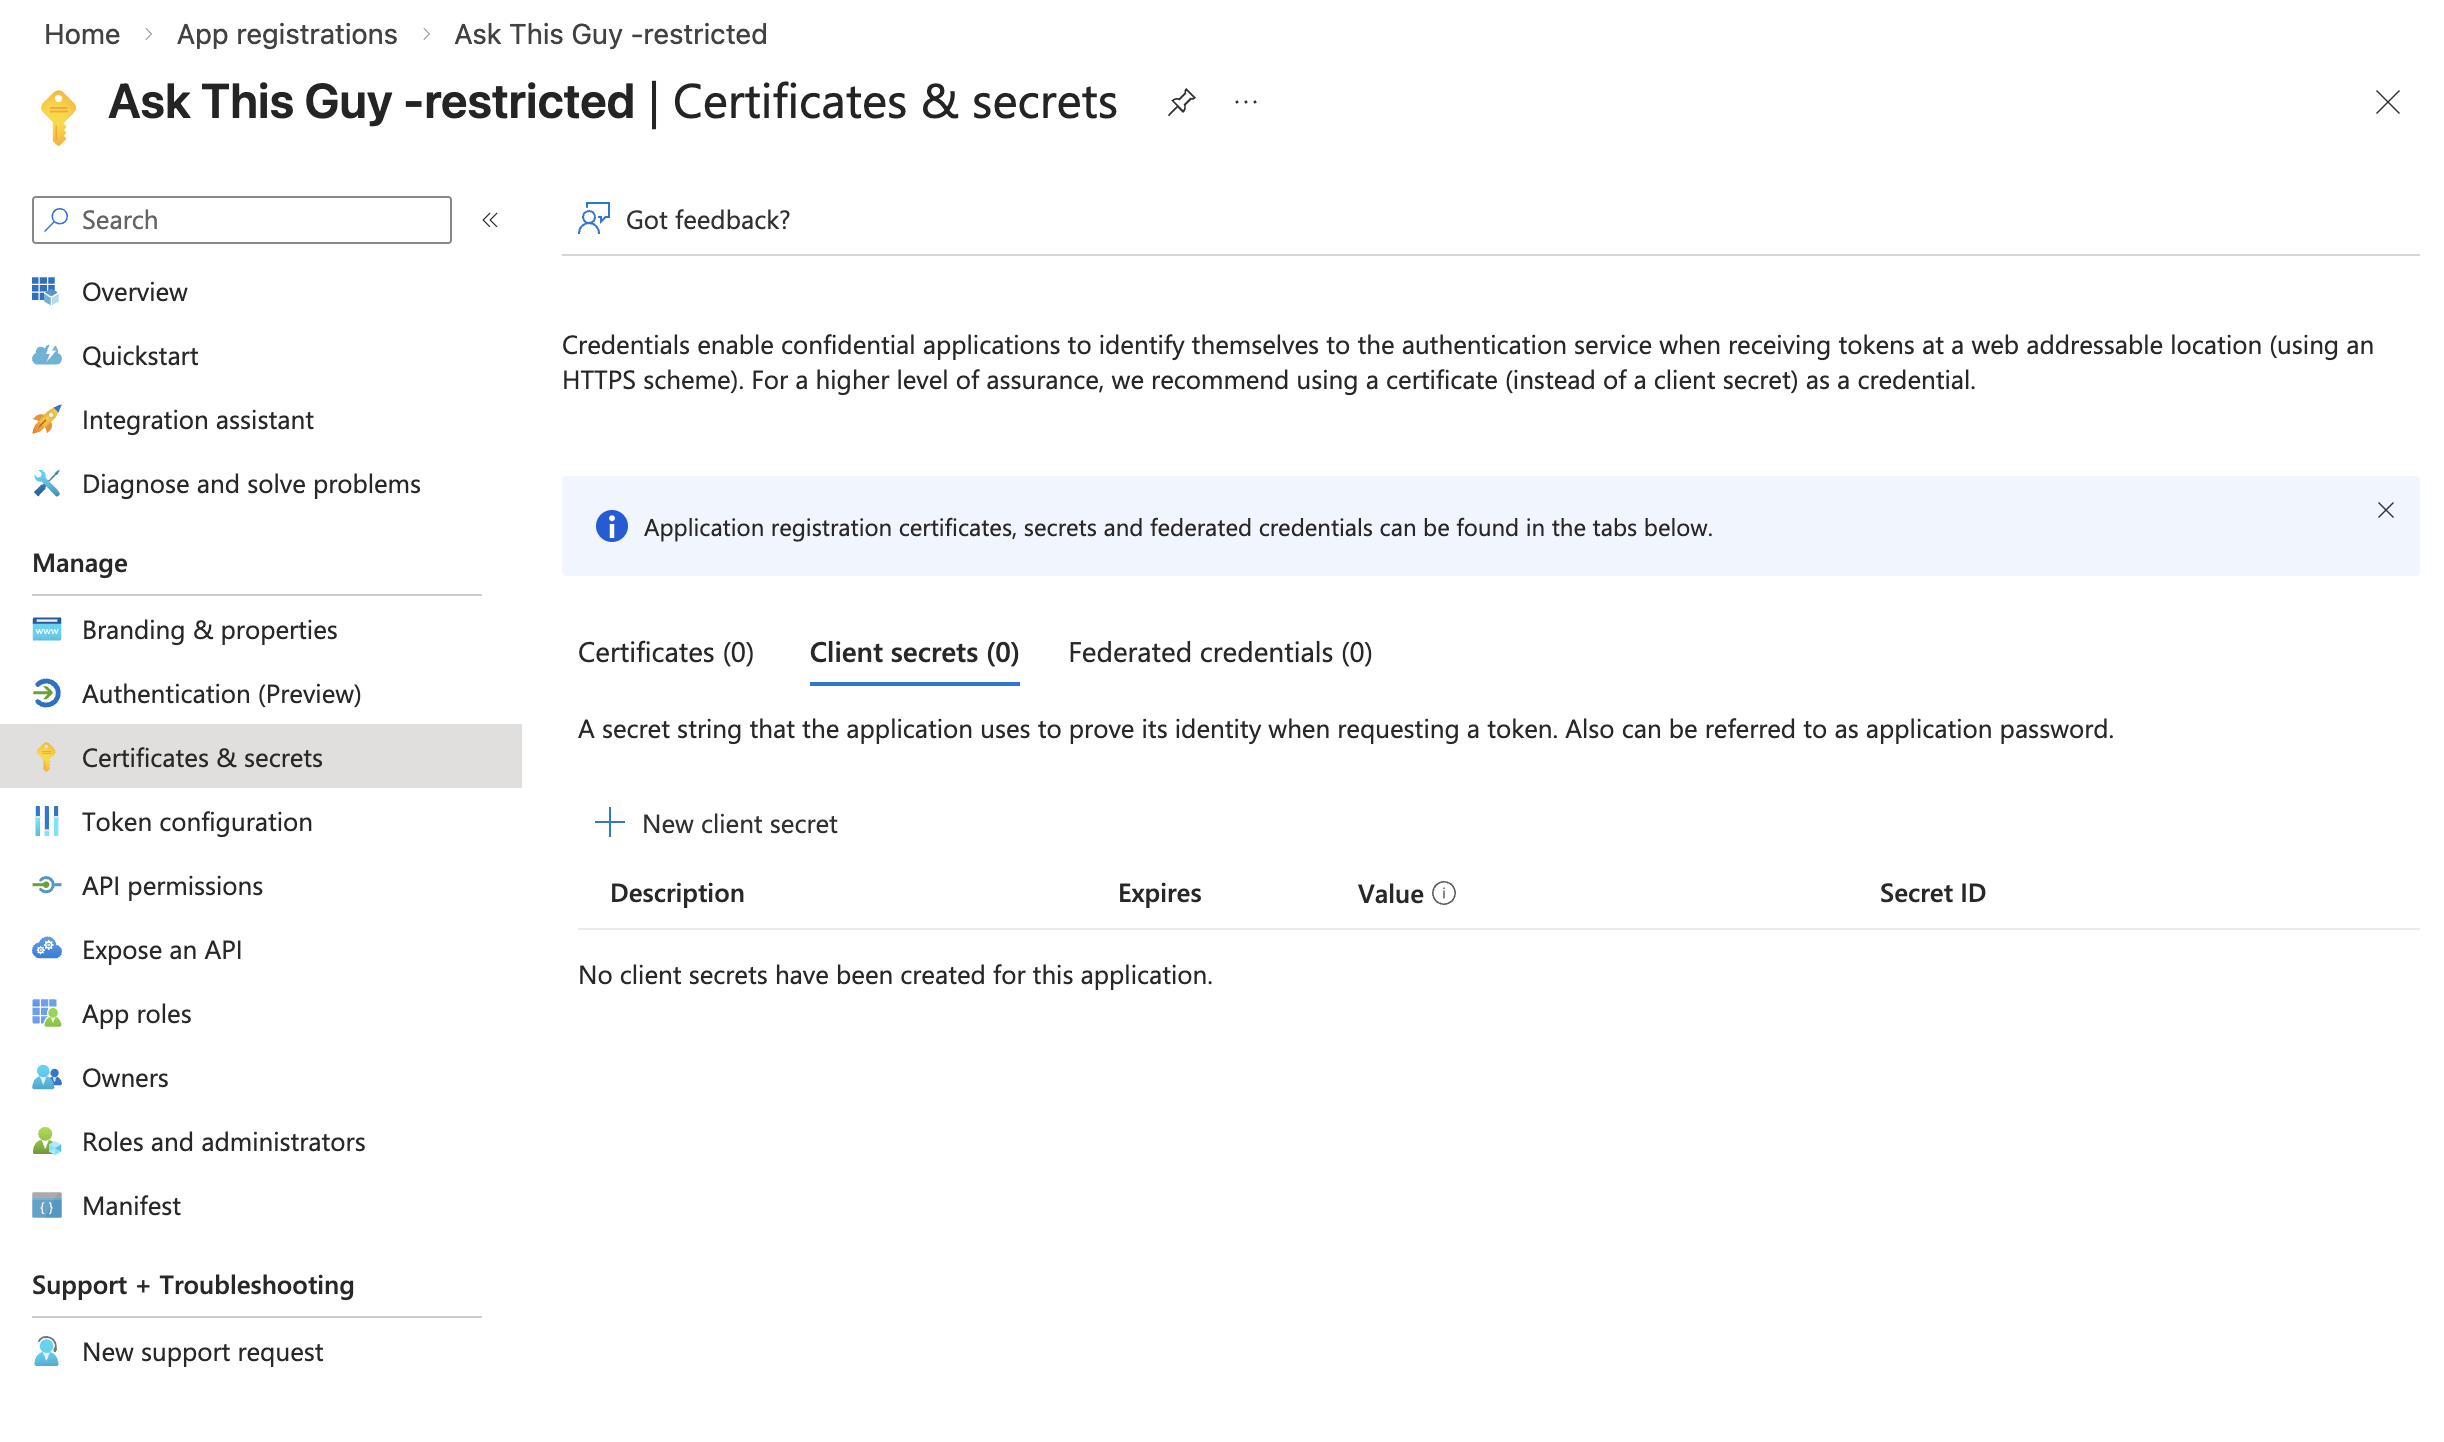 Certificates & secrets
Click on "+ New client secret", enter a description (optional) and select an expiration period, then click "Add":
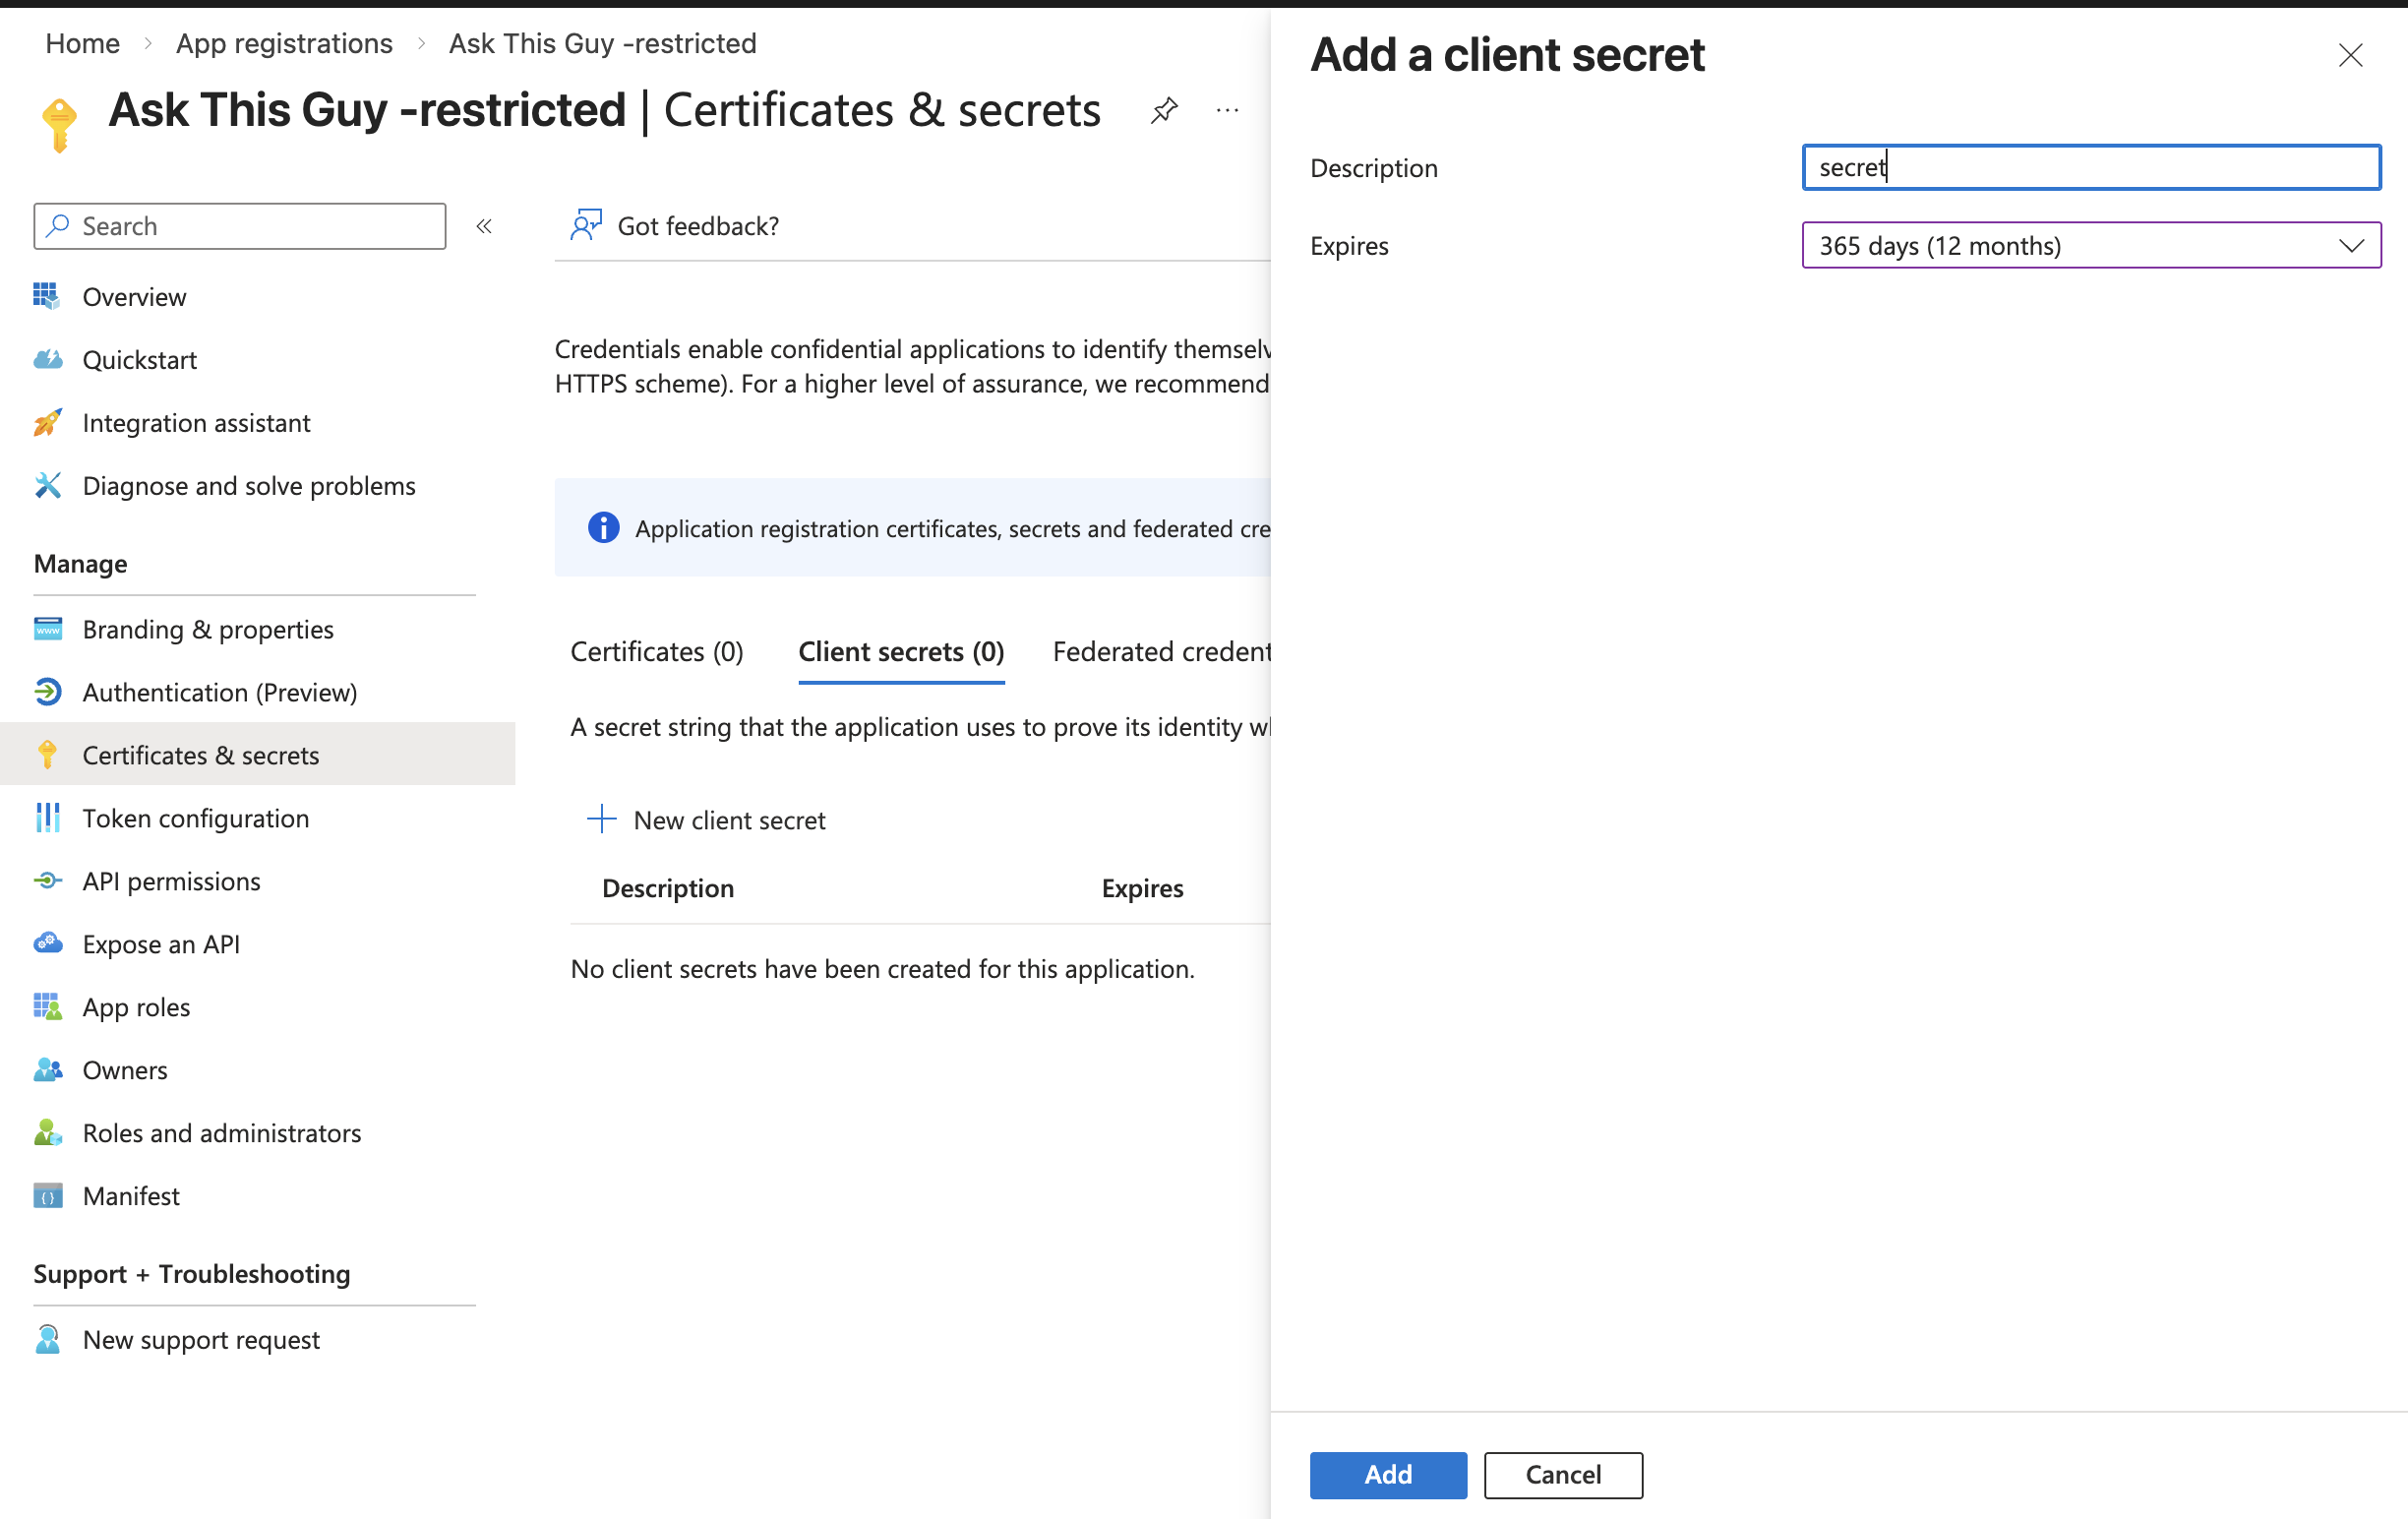 New client secret
5. Gather credentials for ATG
You will need the following three values to configure the SharePoint connector in ATG:
- Tenant ID: Found on the application overview page
- Client ID: Found on the application overview page under "Application (client) ID"
- Client Secret Value: The value you copied from the client secret creation step
6. Connect SharePoint in ATG
Go the the Connectors Menu in ATG Administrator Console
Go to the Connectors menu:
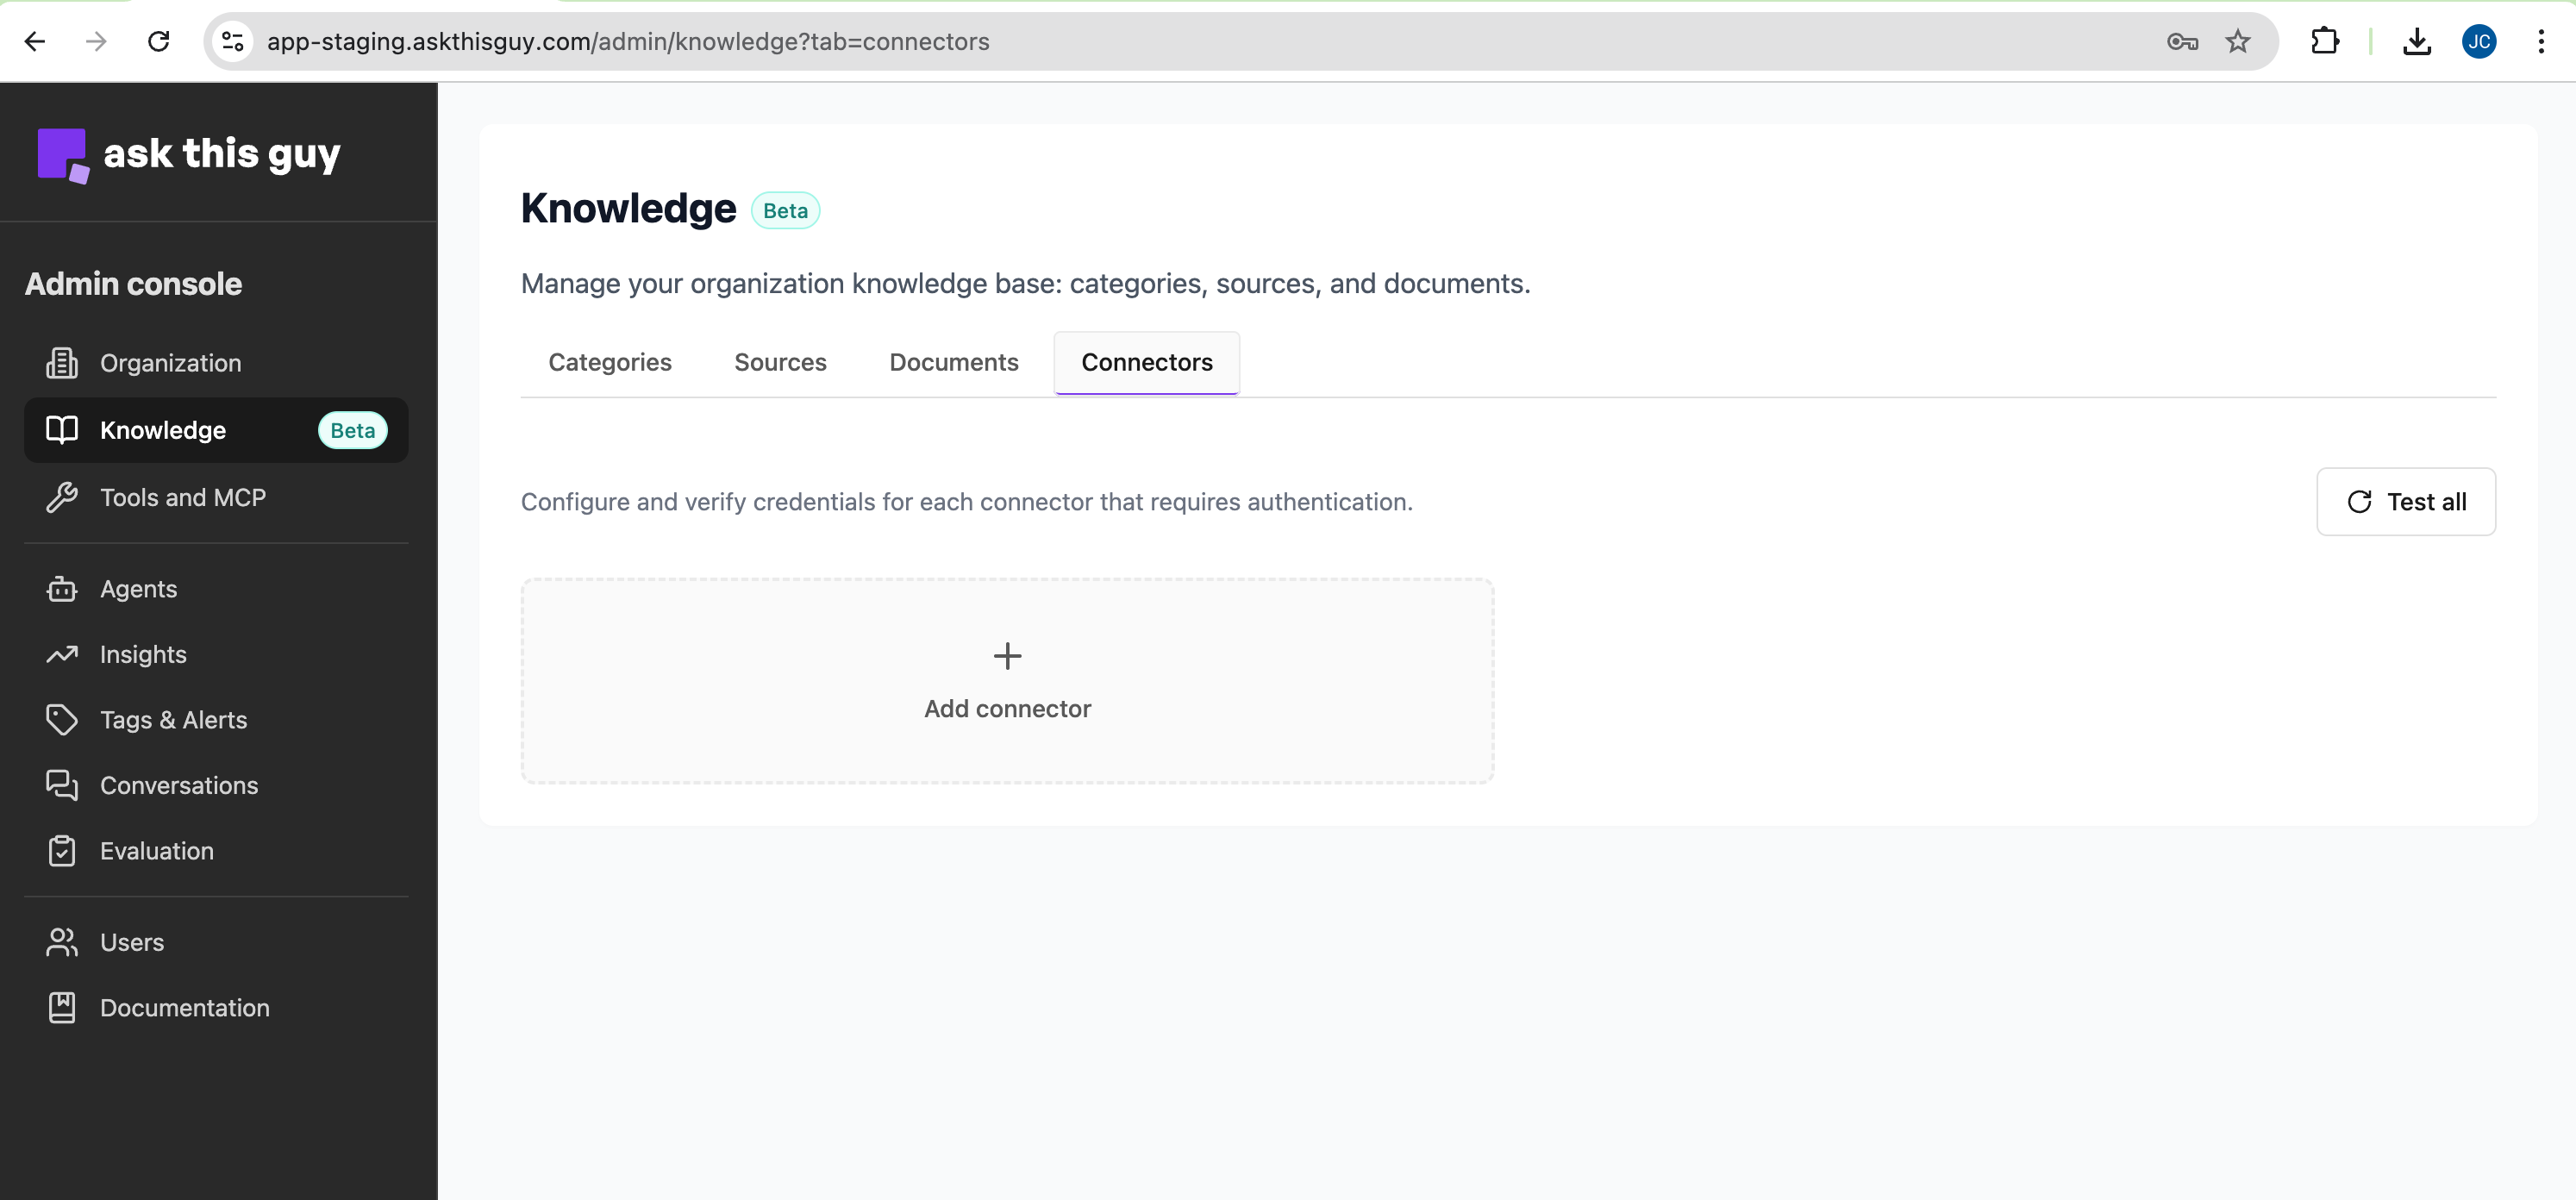 Connectors menu in Admin Console
Click on 'Add connector', select 'Sharepoint':
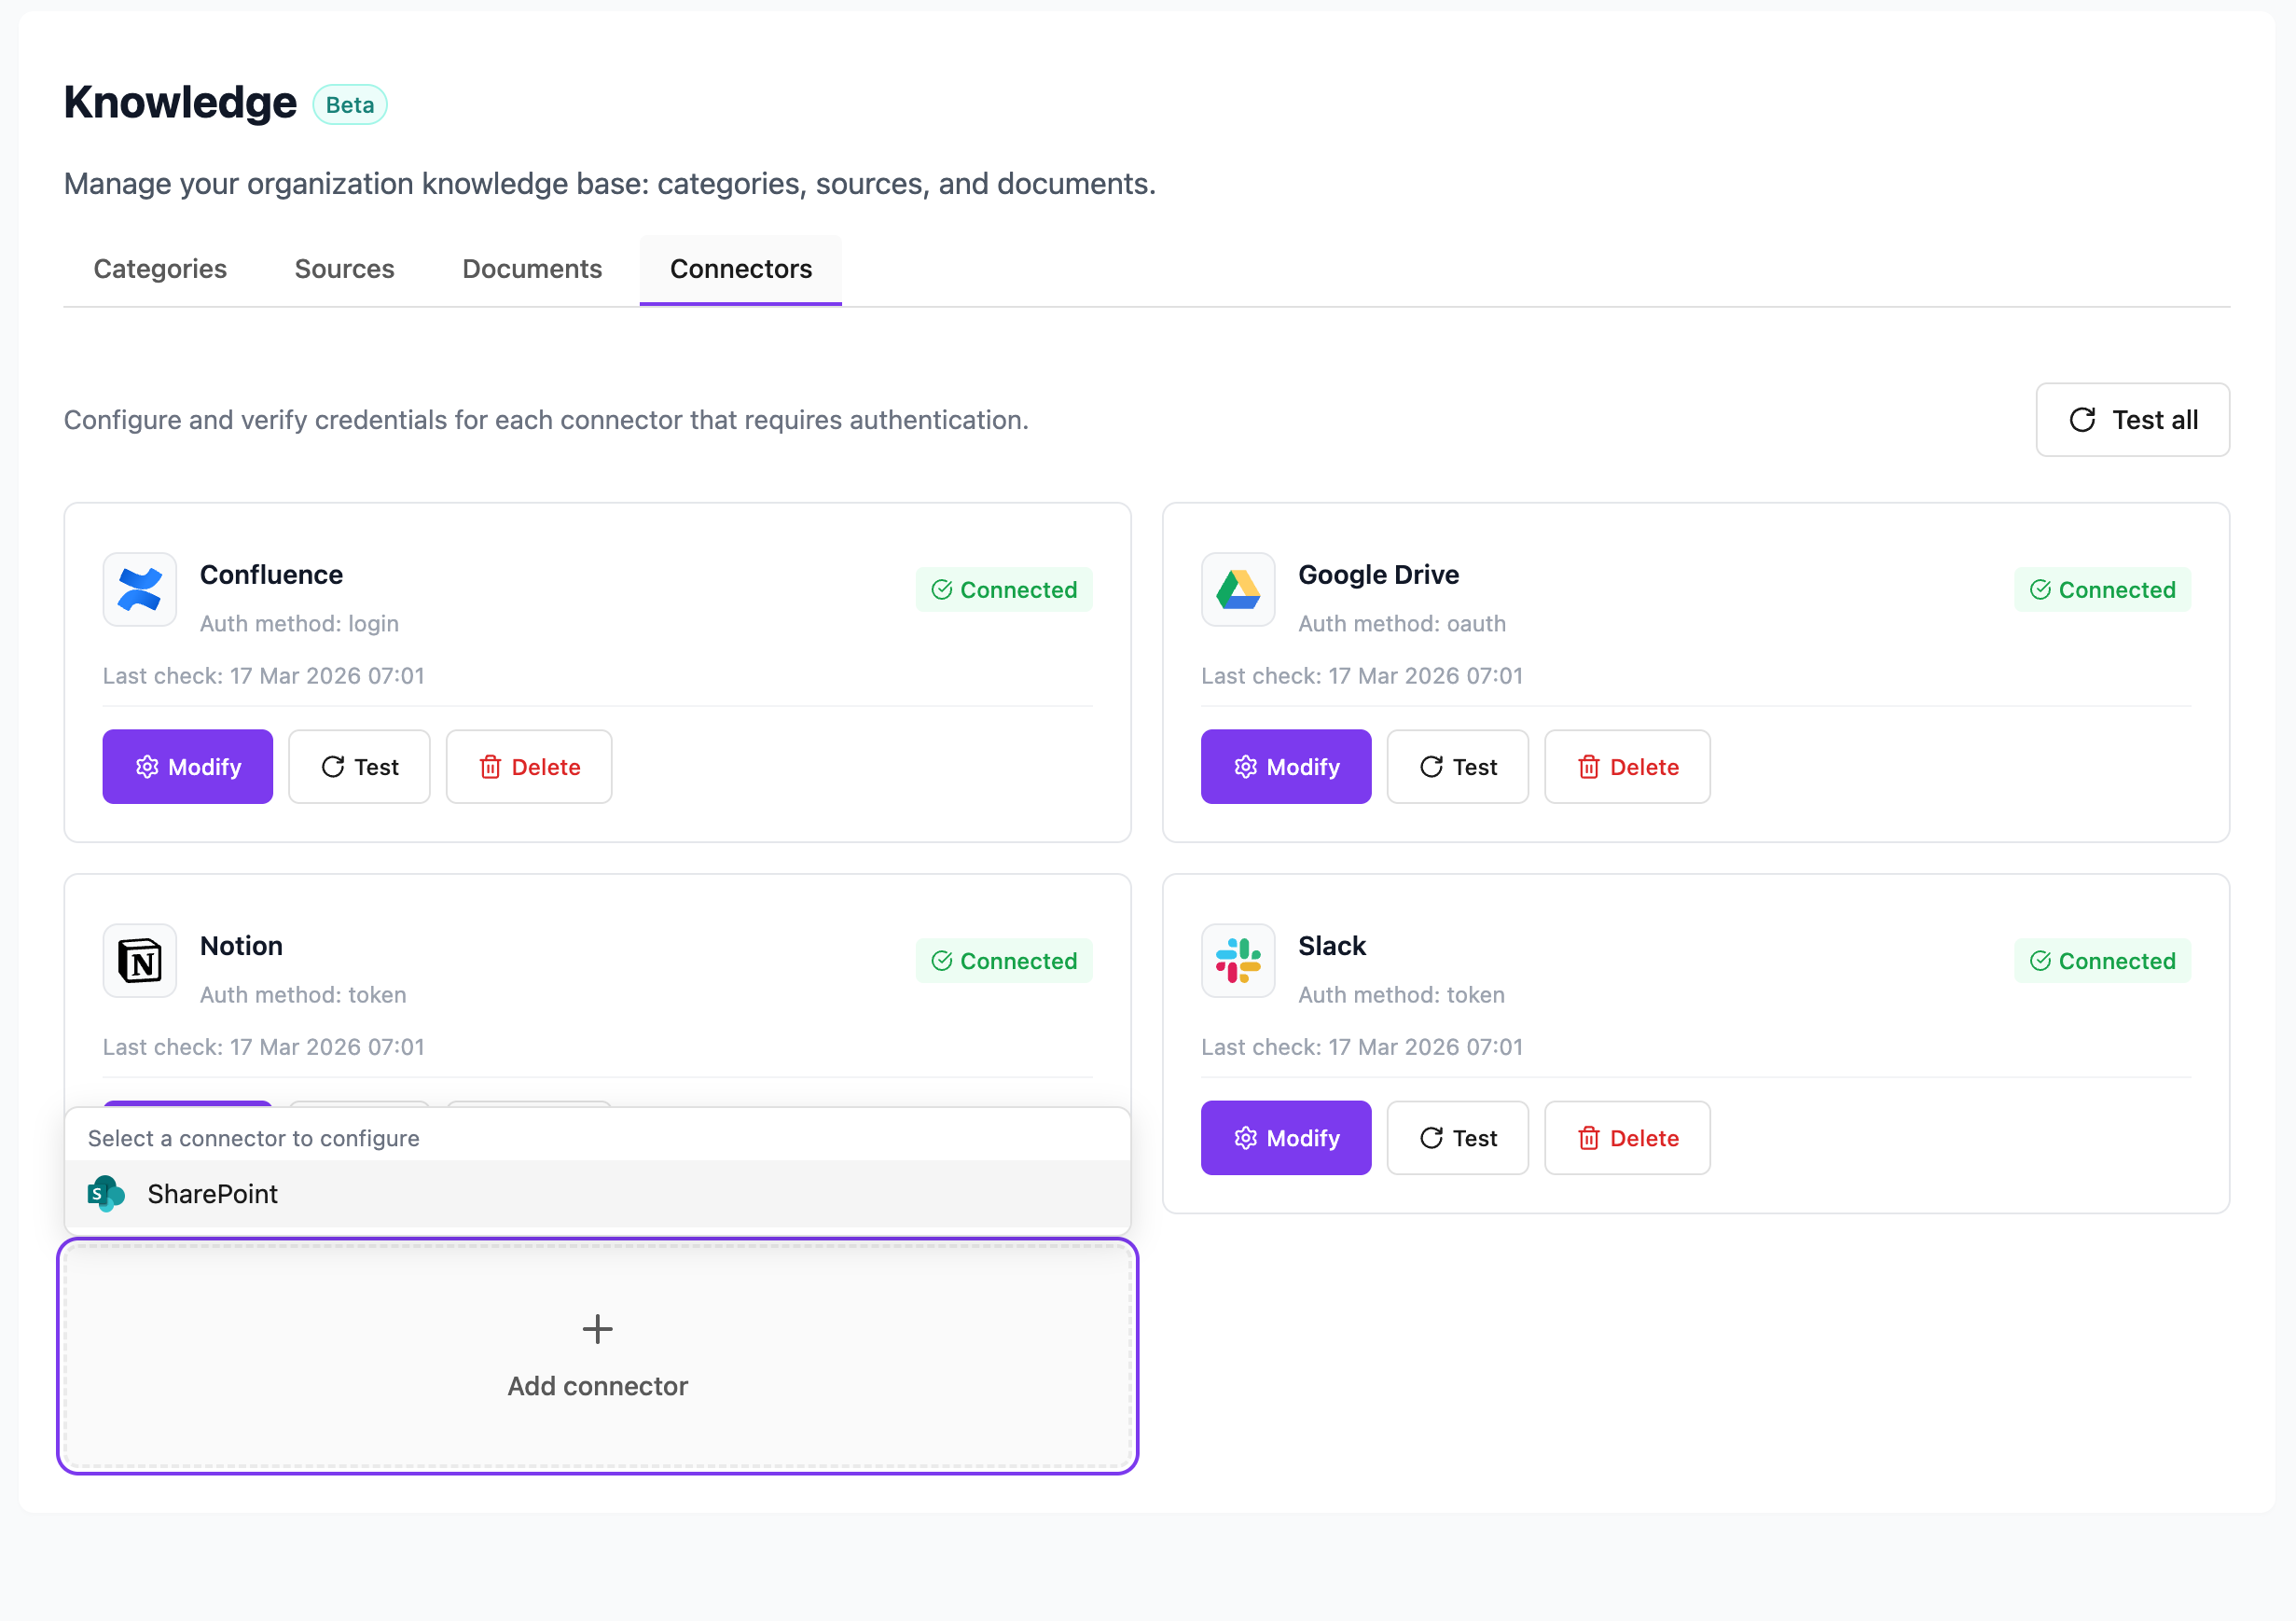 Add a connector, select SharePoint
Add the credentials you gathered:
- Tenant ID
- Application (client) ID
- Client secret
then click on "Save":
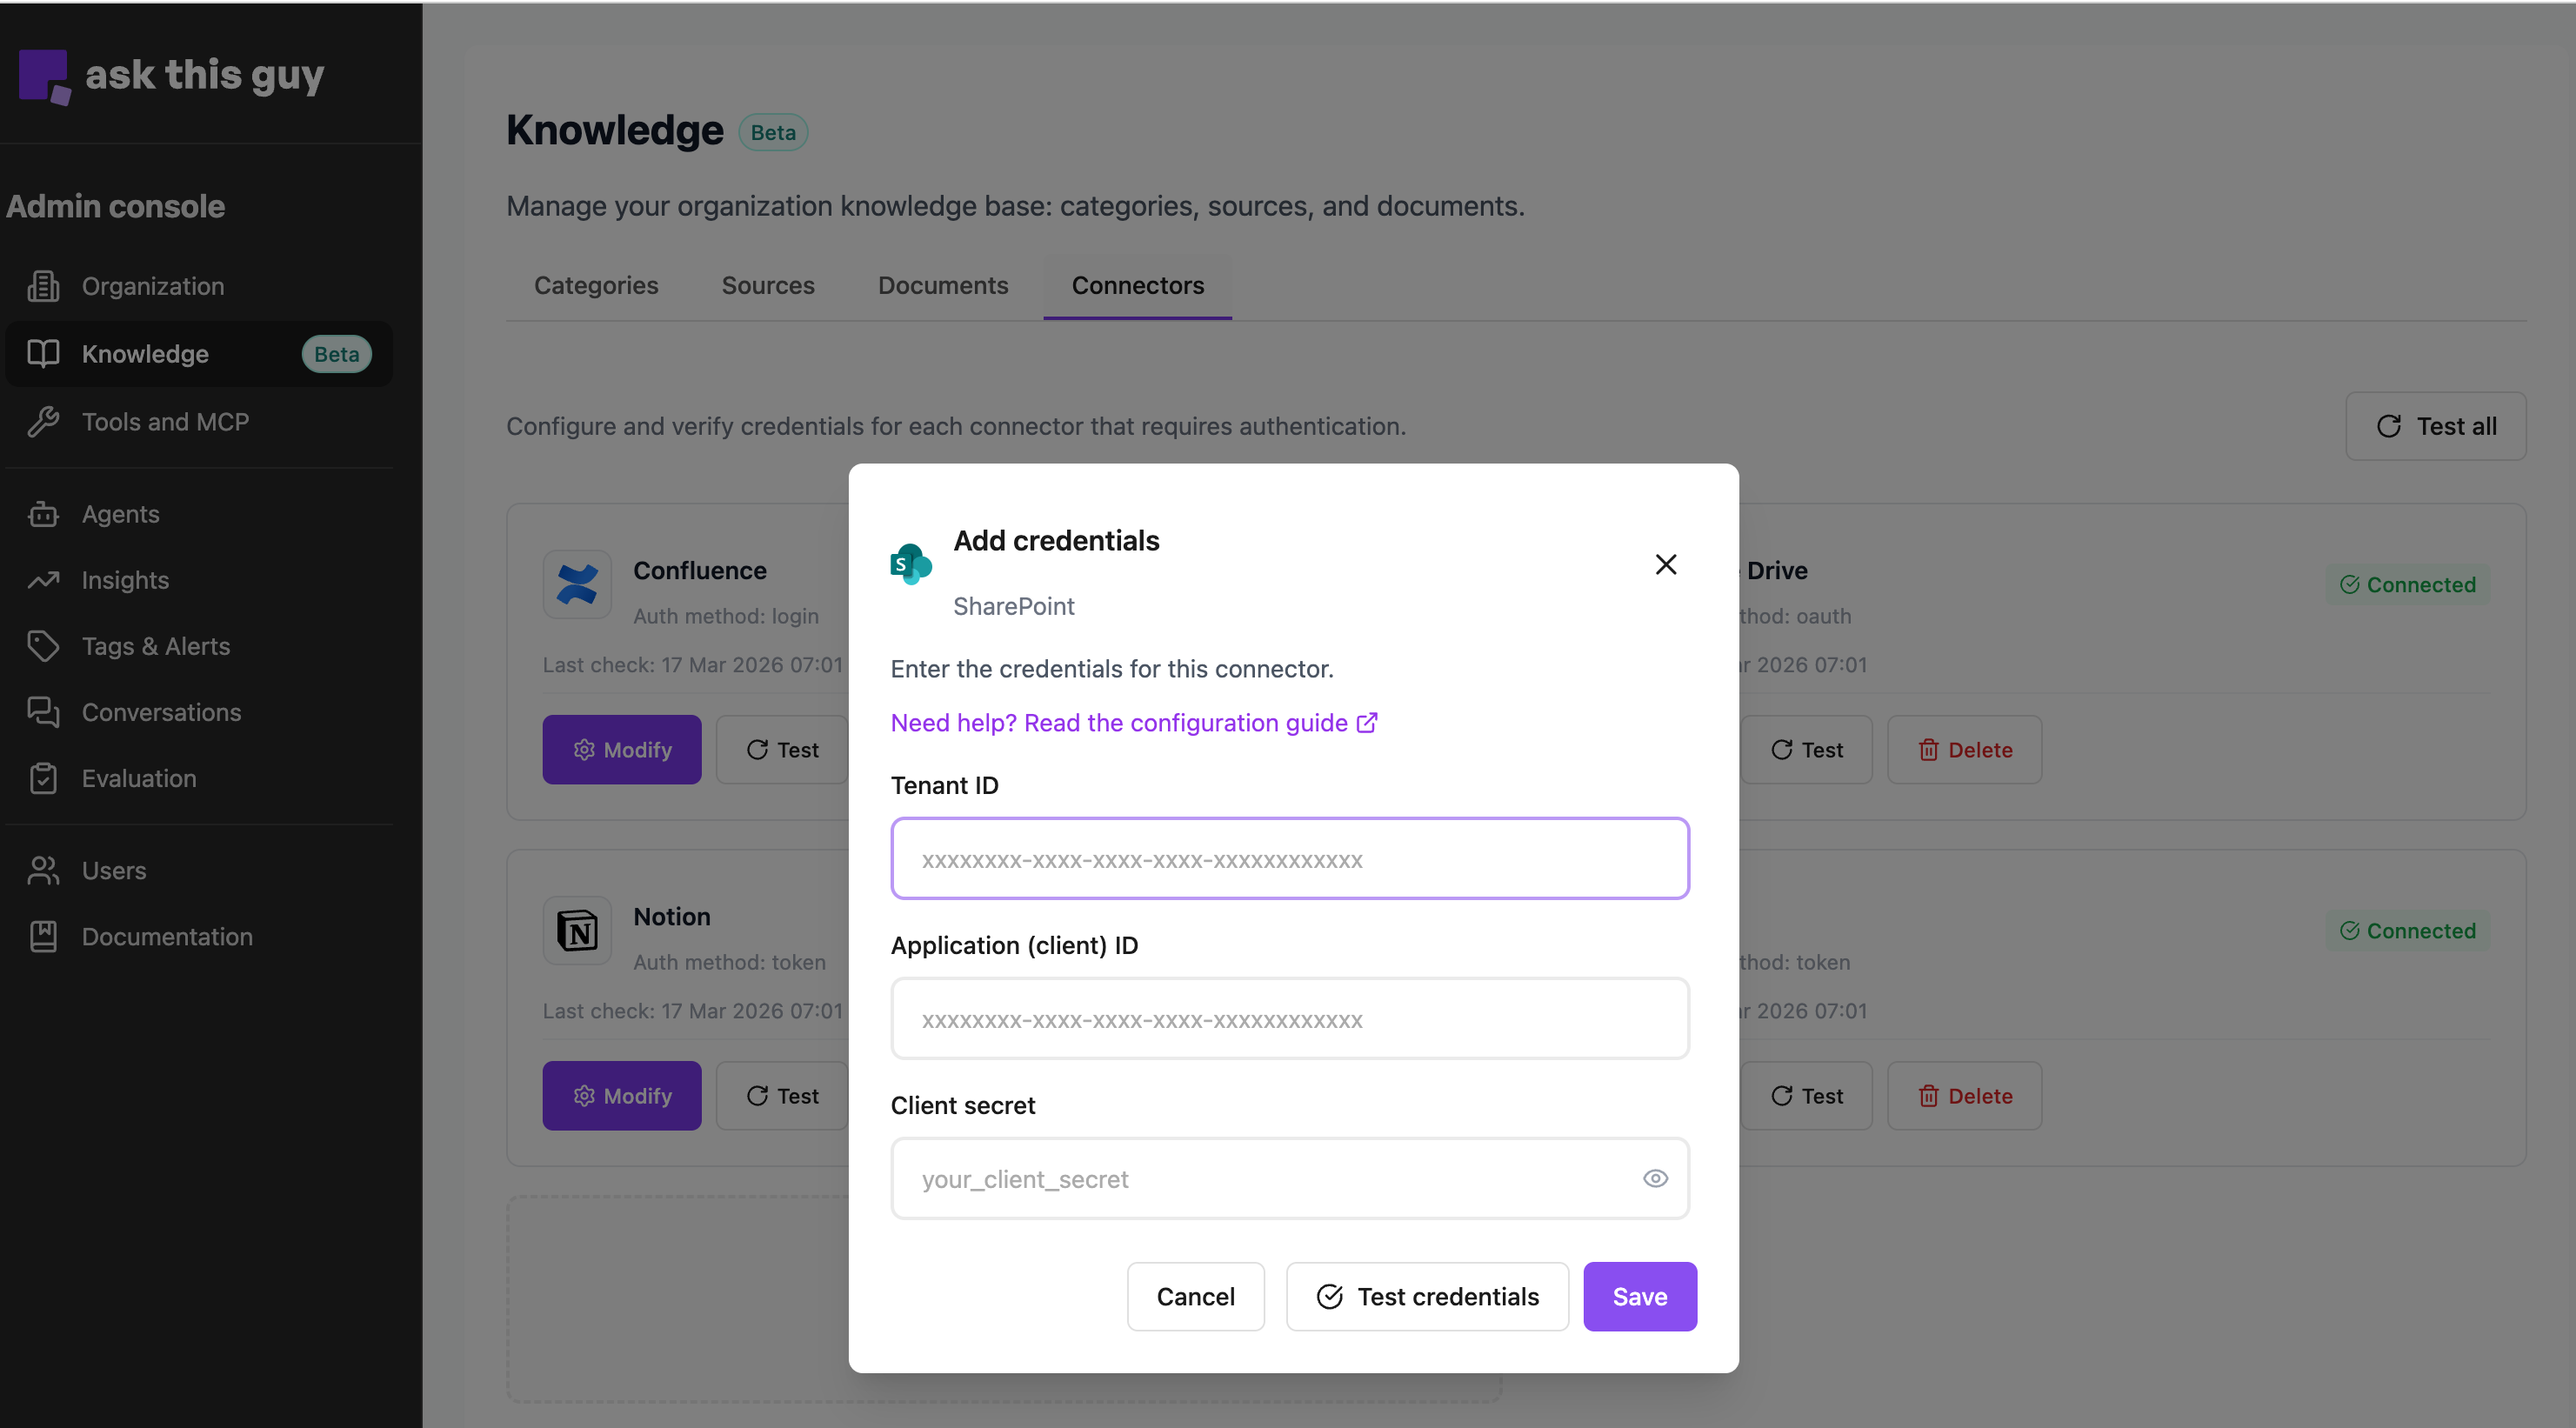 Add credentials
Well done! SharePoint connector is now added to ATG! You can now add sources to your connector.
To add a source, go to the Sources menu, and add a source (SharePoint Connector is now available in the list).