 Slack
Slack
Step-by-step guide to connect ATG to Slack: create a Slack app, define scopes, install and authorize the app, then import the token in ATG.
In order to connect ATG to Slack, you will need to get a token from Slack.
To get started, you'll need to create a Slack app. Your app will be a container for your credentials; you can't get a token without one.
You can follow the Slack quickstart guide on how to create an app:
Below step-by-step instructions to create, install and setup your ATG connection to Slack:
![]() 2. Defining the scopes of your app
2. Defining the scopes of your app
![]() 3. Installing and authorizing the app
3. Installing and authorizing the app
1. Creating an app
Navigate to your Slack apps
Slack API: Applications | Slack
Start Creating a New App
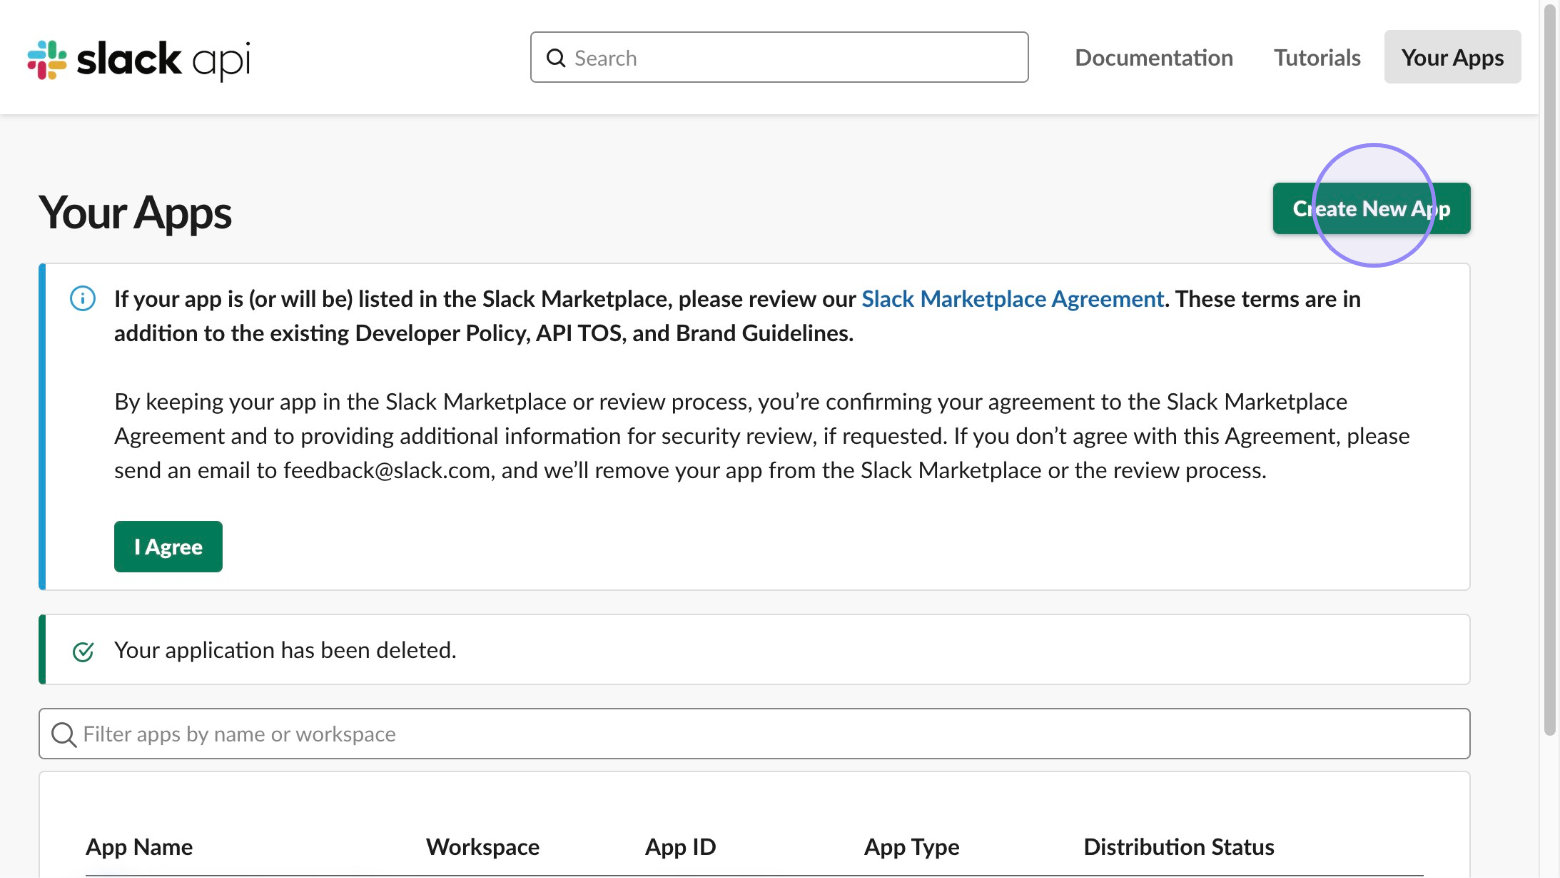
Click the ‘Create New App’ button.
Option 1 (recommended): choose “From a manifest”
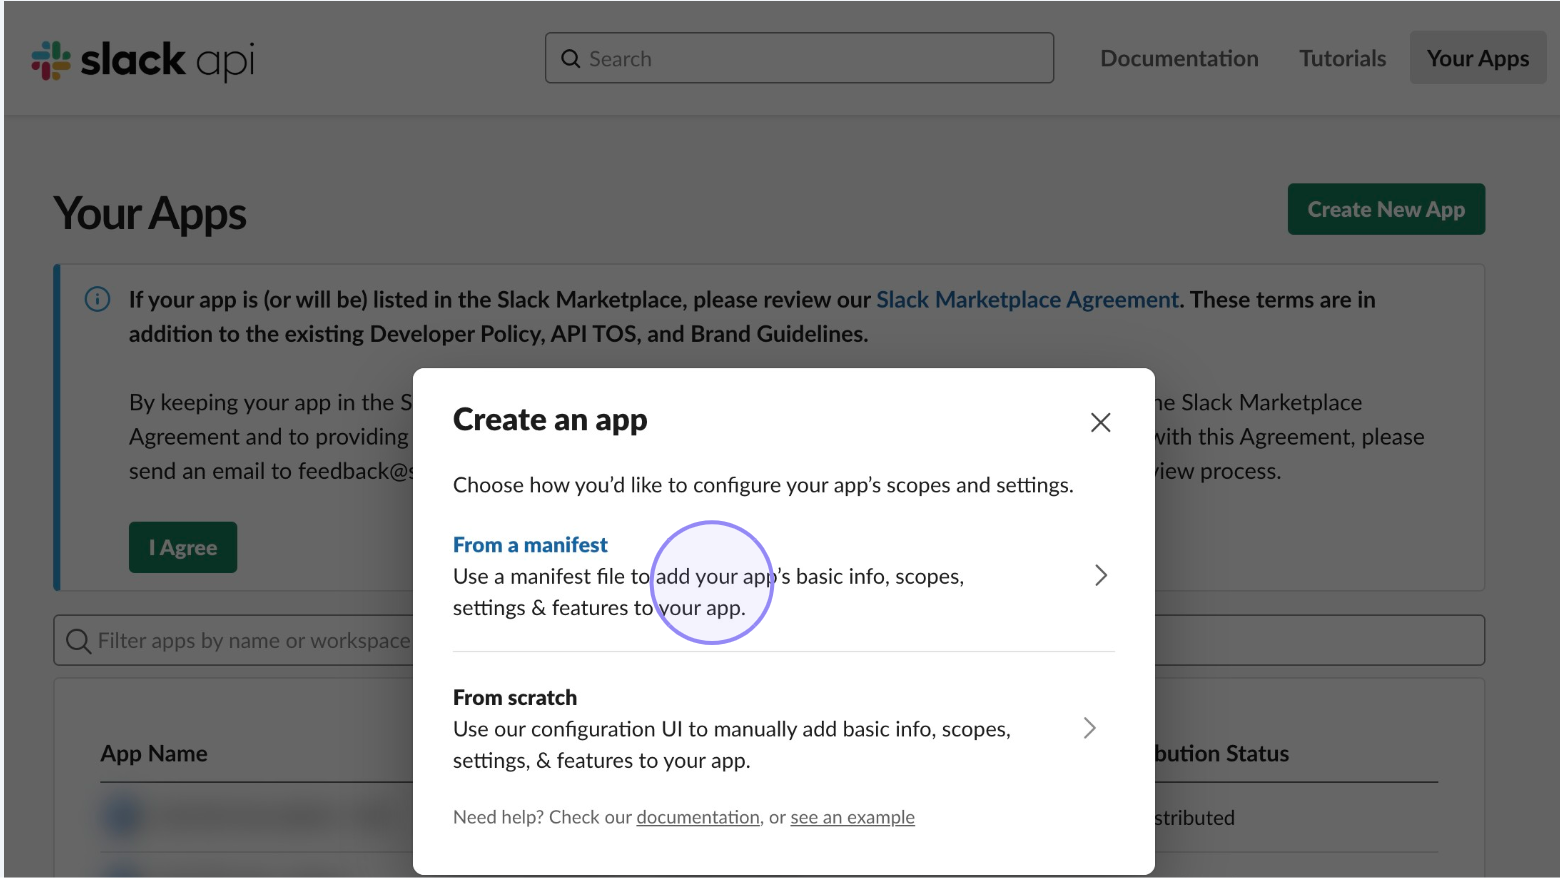
Select the option to create the app from a manifest file.
Select workspace
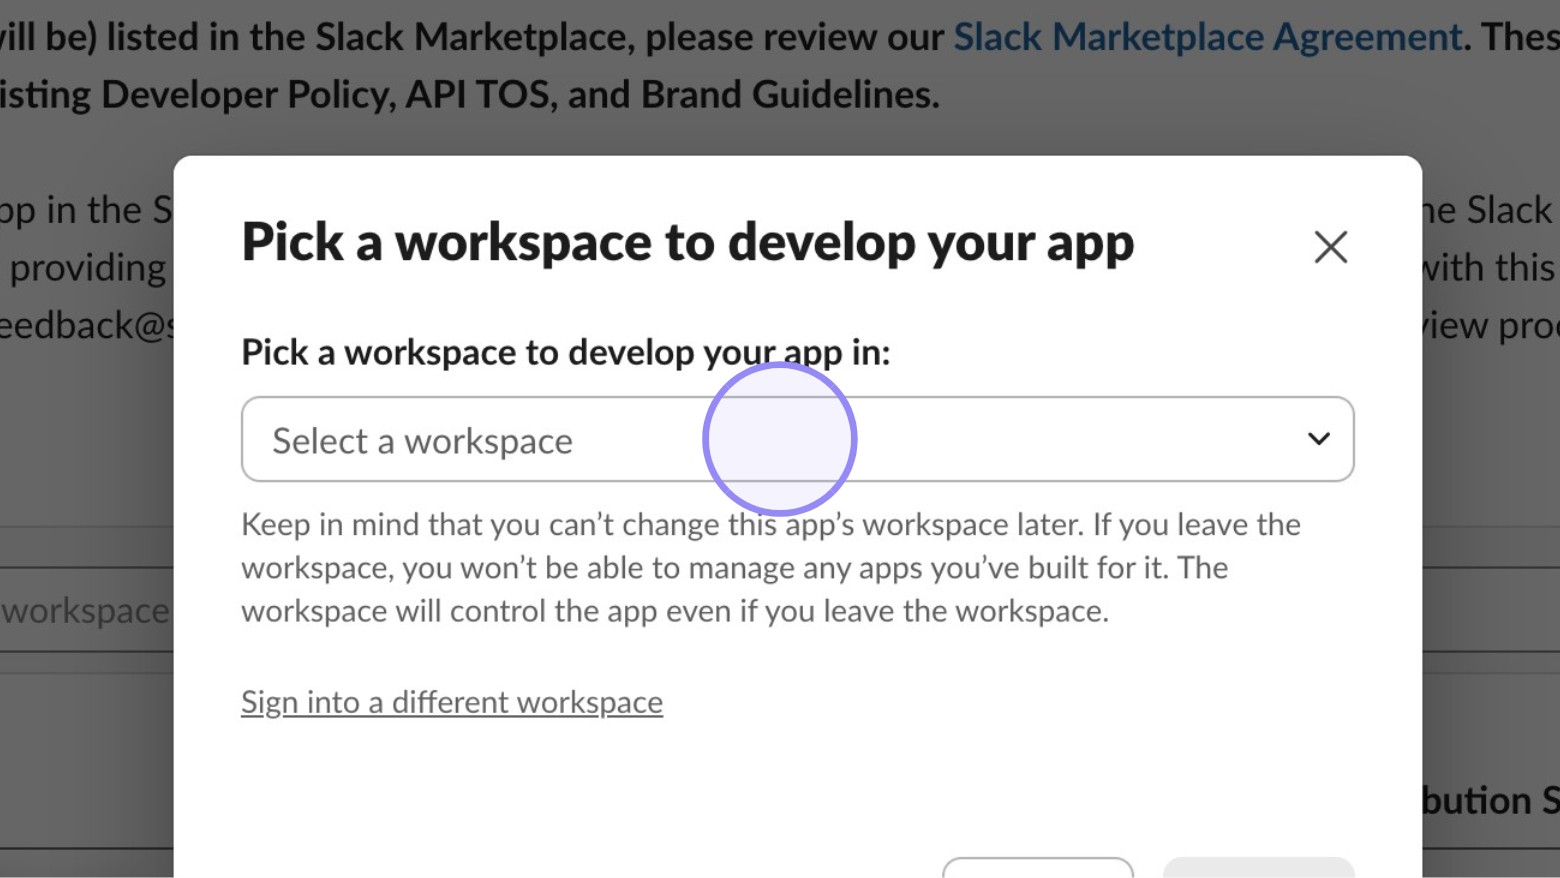
Choose the workspace where you want to develop your app and click ‘Next’.
Confirm Workspace Selection

Click the ‘Next’ button.
Copy and Paste the JSON manifest below
{
    "display_information": {
        "name": "Ask This Guy"
    },
    "oauth_config": {
        "scopes": {
            "user": [
                "channels:history",
                "channels:read",
                "files:read",
                "users:read"
            ]
        }
    },
    "settings": {
        "org_deploy_enabled": false,
        "socket_mode_enabled": false,
        "token_rotation_enabled": false
    }
}
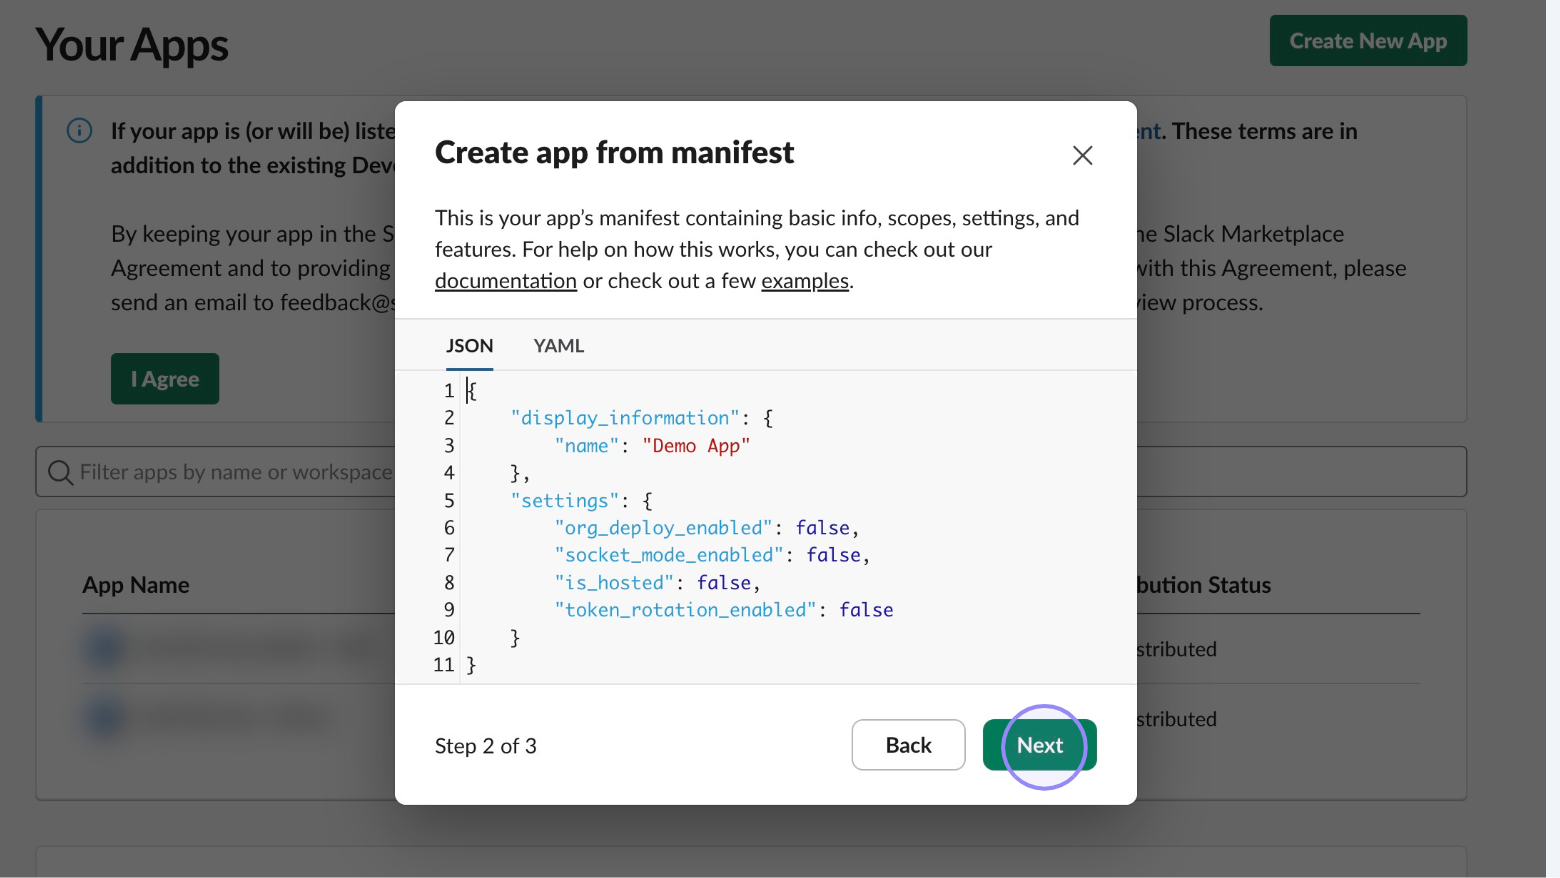
Click the ‘Next’ button.
Option 2: choose “From scratch”
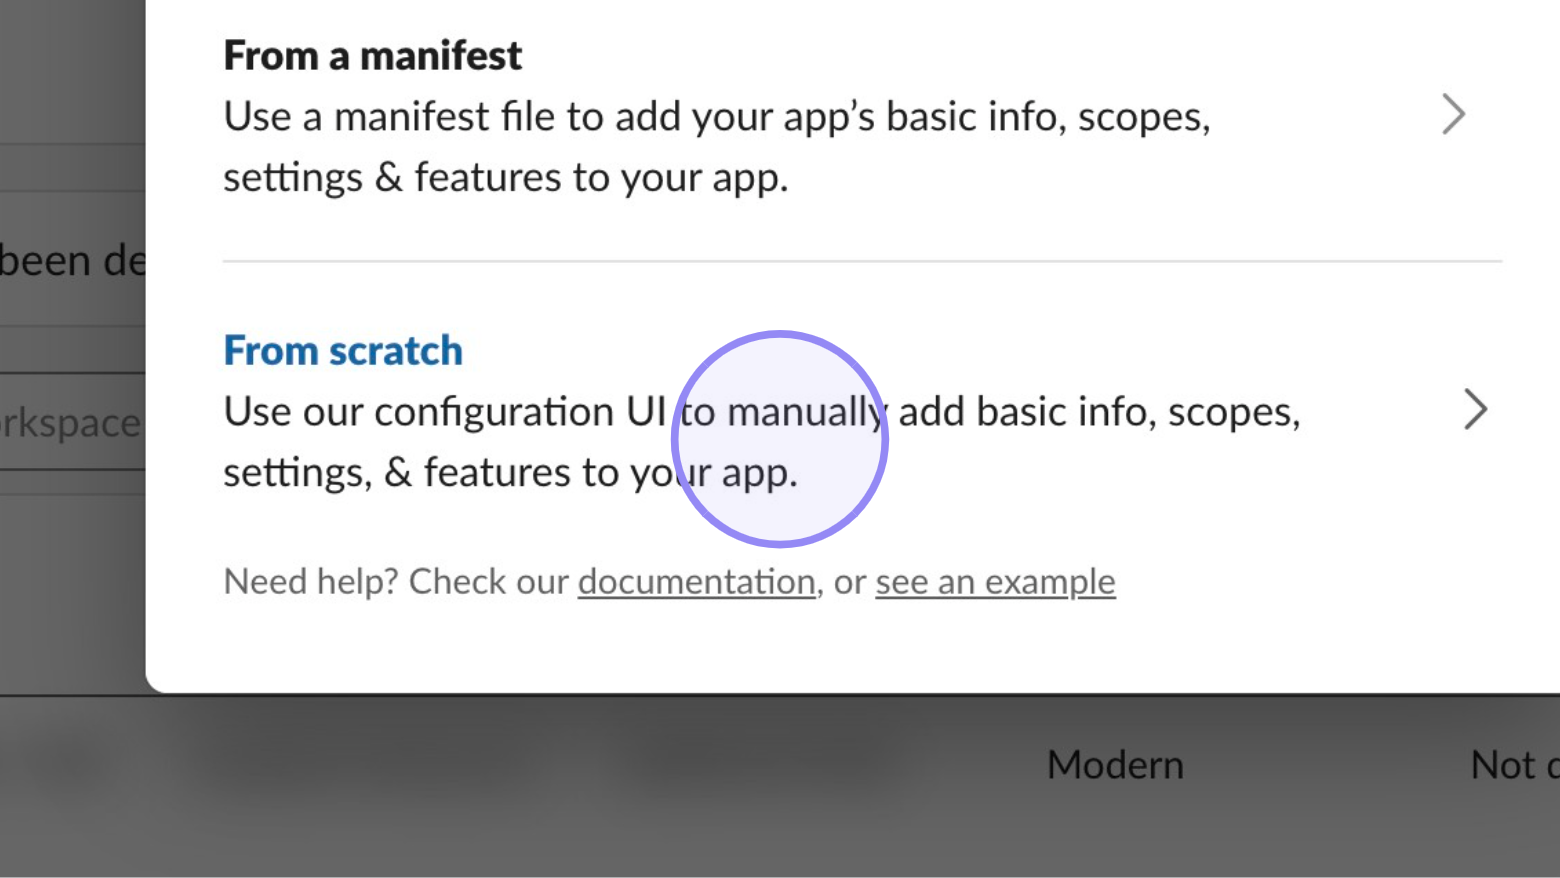
Select ‘From scratch’.
Name Your App
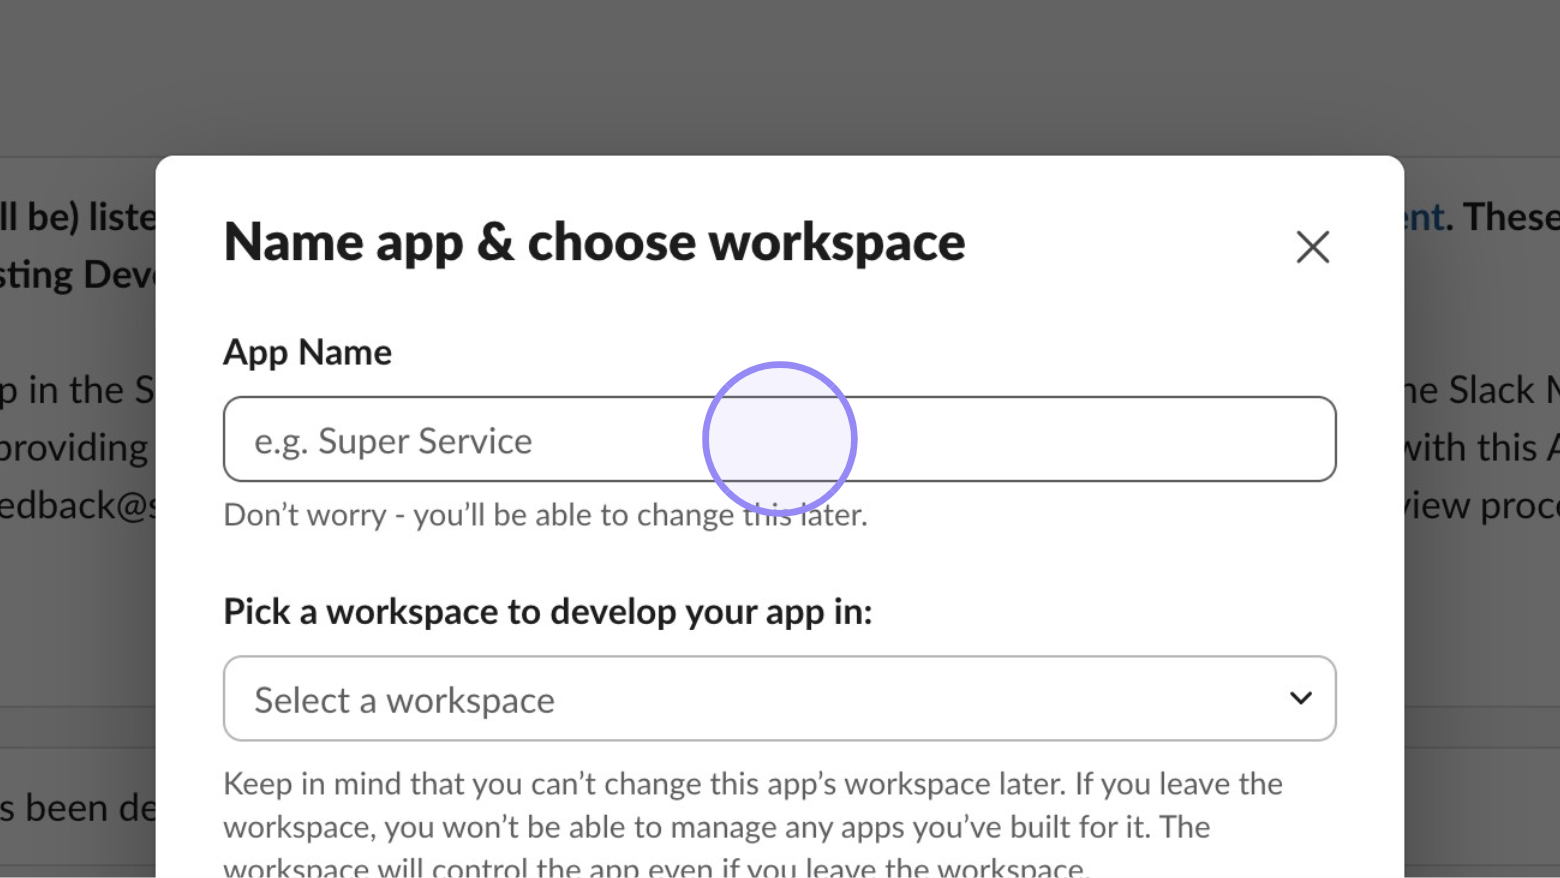
Enter an app name and choose a workspace.
Select Your Workspace
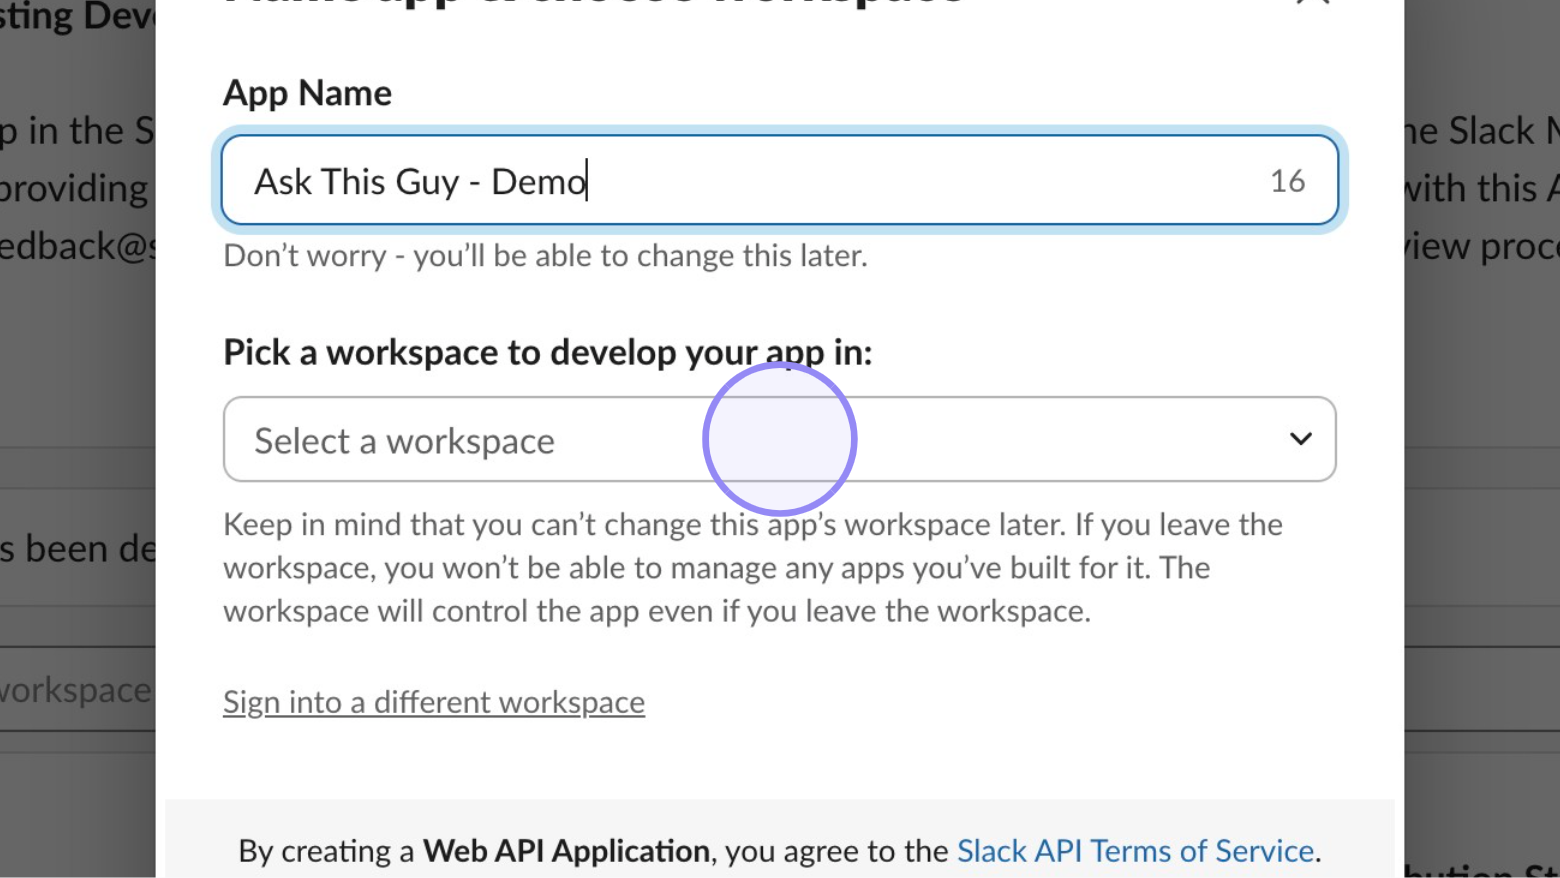
Chose an App Name, select the workspace you want to develop your app in and then click ‘Create App’.
2. Defining the scopes of your app
Scopes give your app permission to perform actions, such as reading messages in your workspace.
If you created your app from scratch, you'll need to setup/modify scopes for your app.
If you created your app from a manifest, the recommended scopes are already setup. You can modify them later if needed following the below steps:
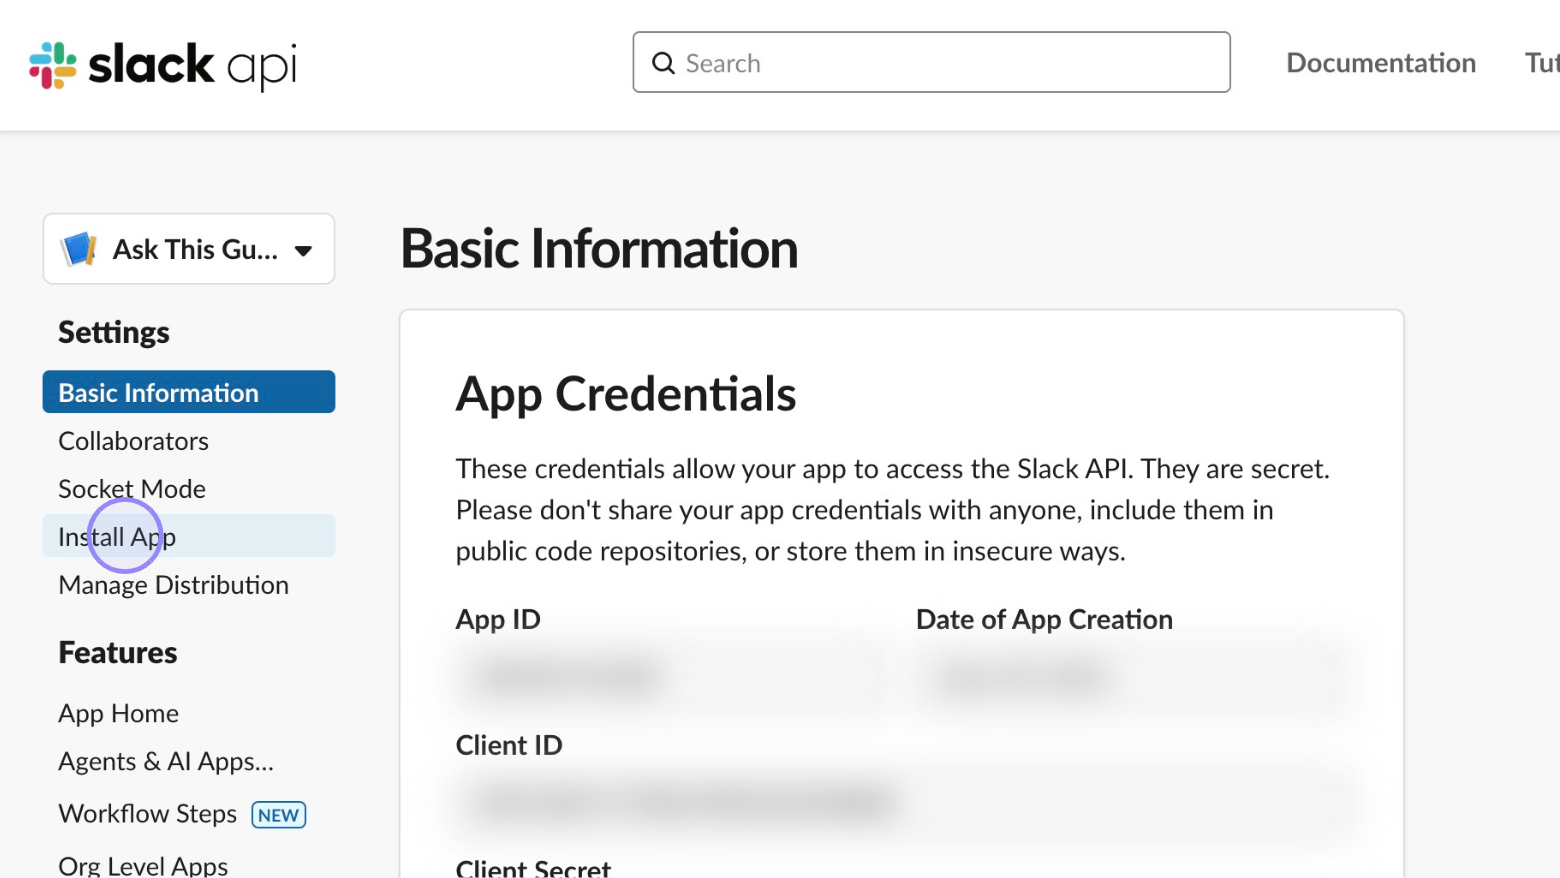
Navigate to your Slack apps and select your app
Slack API: Applications | Slack
Navigate to OAuth & Permissions
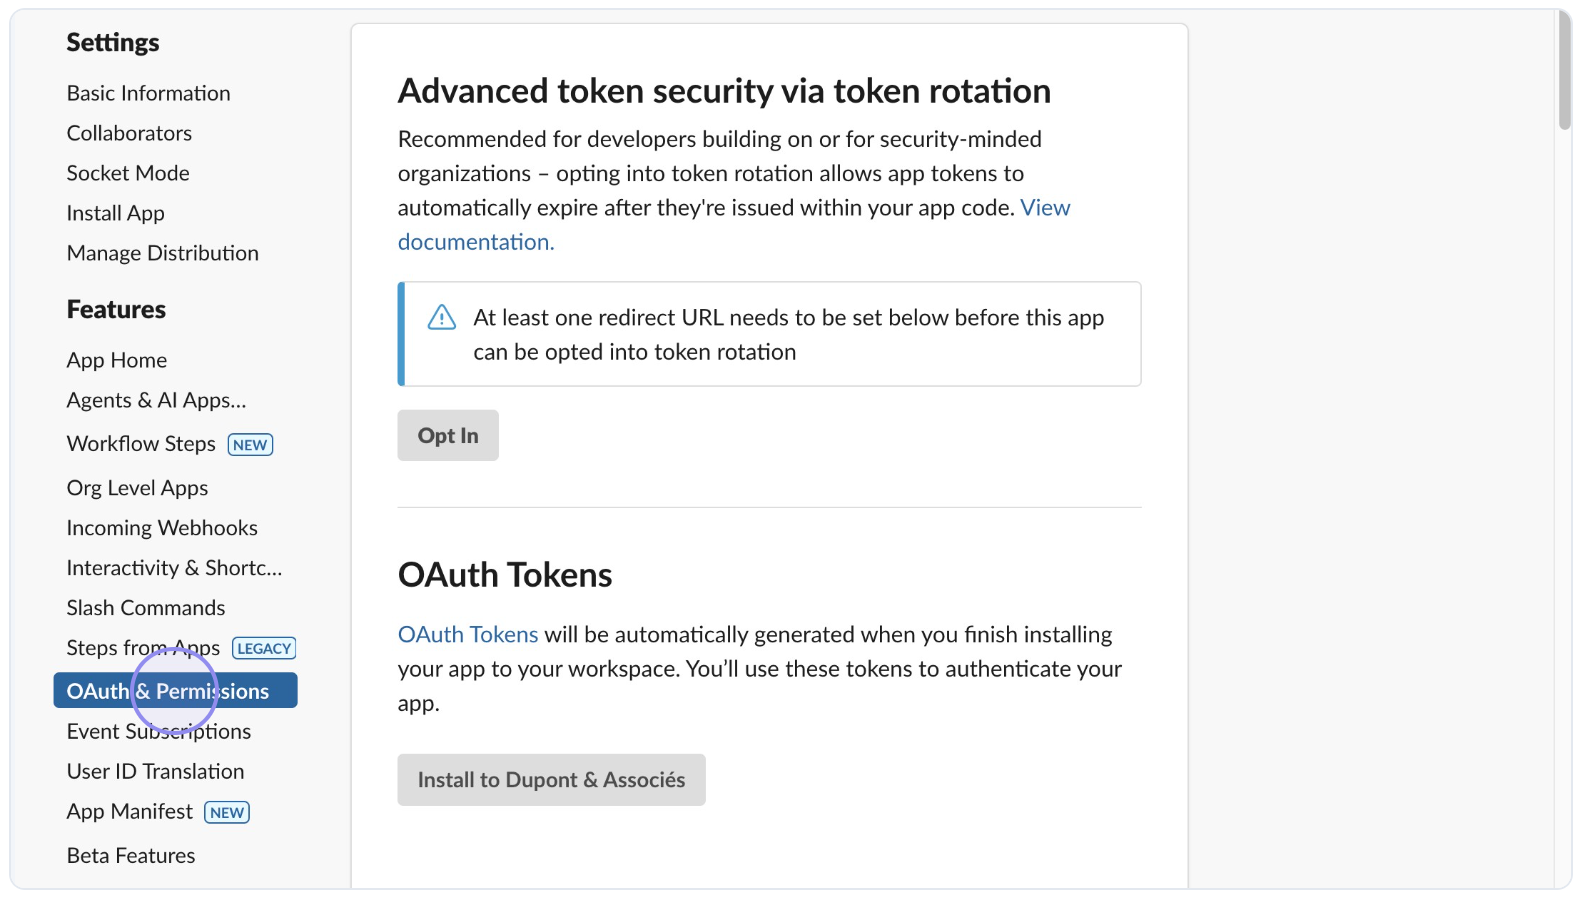 image.png
Click on ‘OAuth & Permissions’ in the Features section.
Add an OAuth Scope
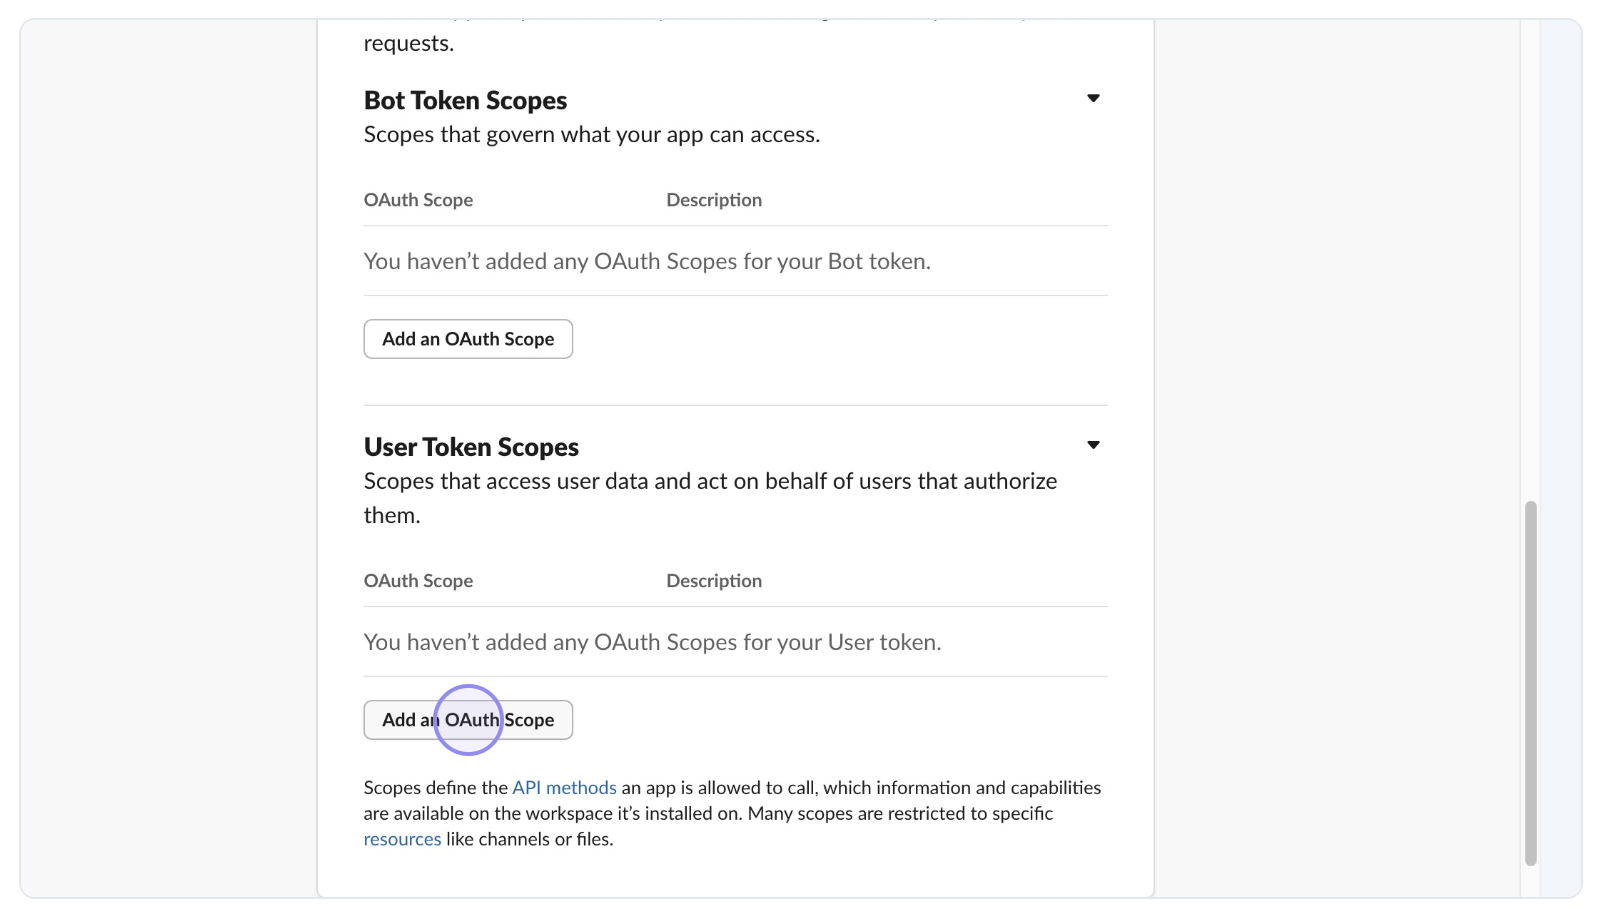 image.png
Scroll down to the Scopes section, and ‘Add an OAuth Scope’ button under ‘User Token Scopes’.
Add OAuth Scopes
Scroll down to the Scopes section, and ‘Add an OAuth Scope’ button under ‘User Token Scopes’.
We recommend to limit the scopes to the minimal configuration for ATG to work:
| **channels:history** | View messages and other content in a user’s public channels |
|---|---|
| channels:read | View basic information about public channels in a workspace |
| files:read | View files shared in channels and conversations that a user has access to |
| users:read | View people in a workspace |
3. Installing and authorizing the app
Navigate to the Install App Section
On the Slack API settings page, click on the ‘Install App’ option in the left-hand menu.
Begin the Installation Process
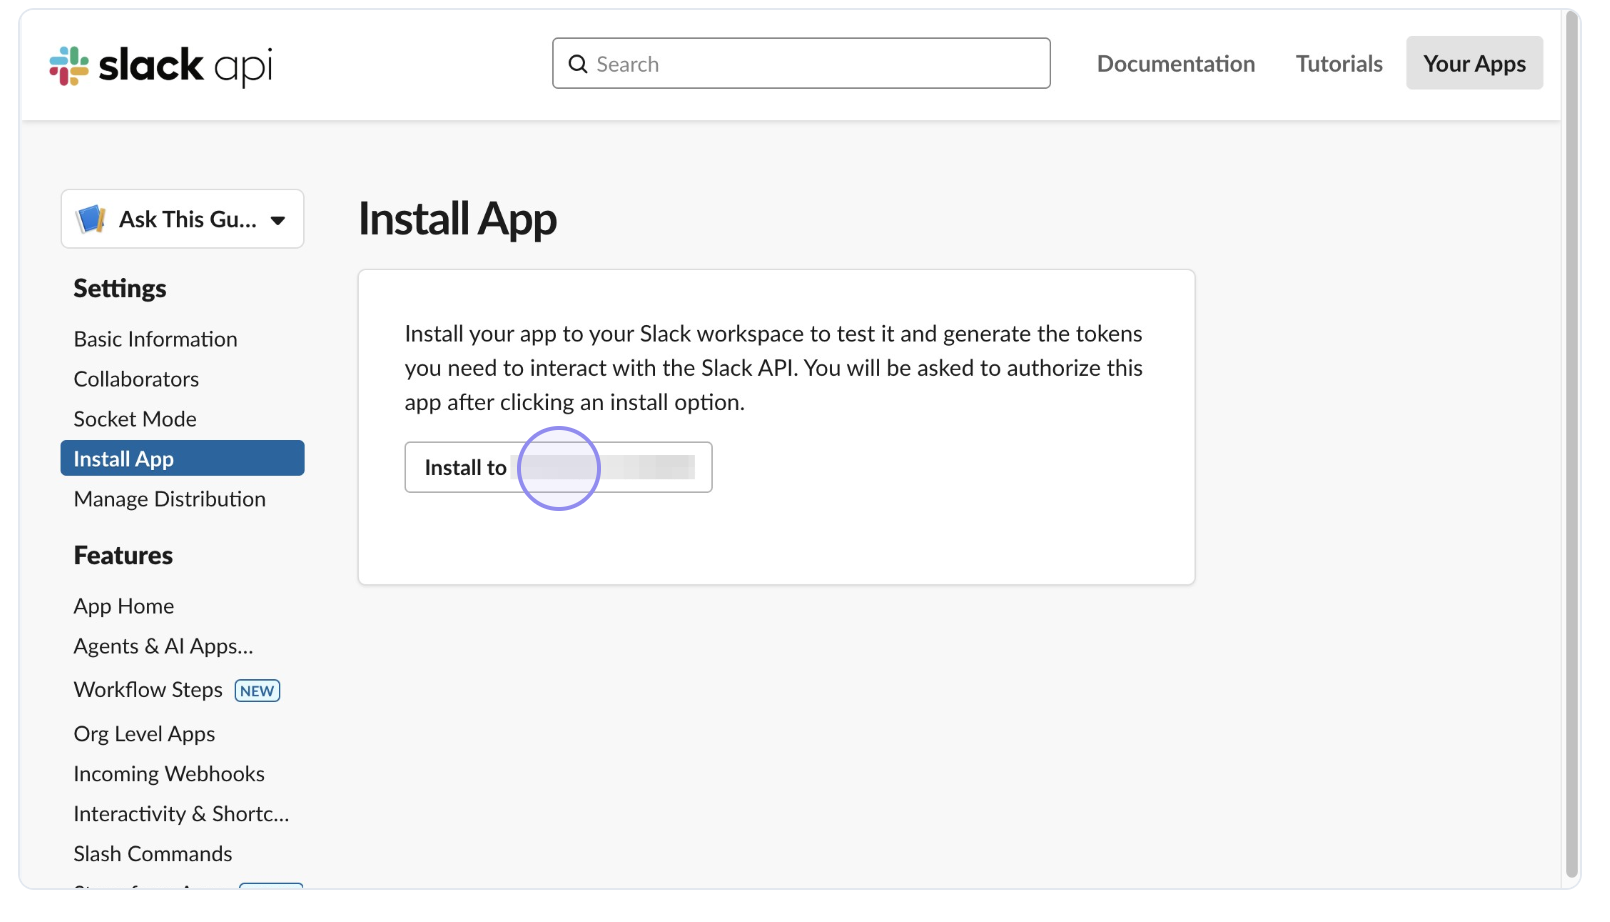 image.png
Click on the Install button to start the app installation for the chosen workspace
Authorize the App
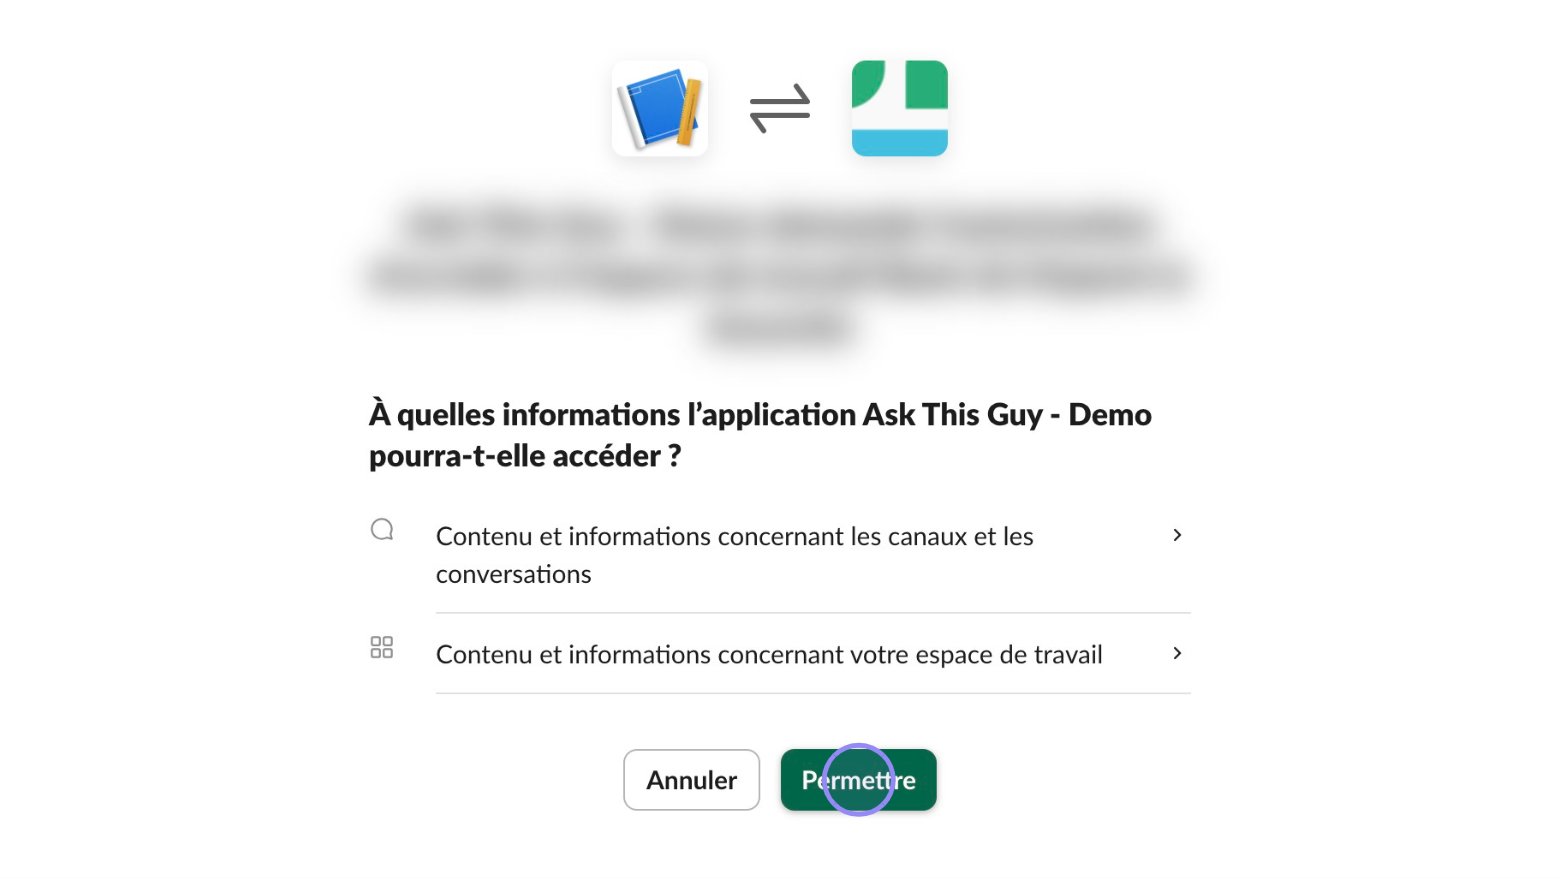
Review the permissions the app requests and then click ‘Allow’ to authorize the app within your Slack workspace.
View/copy the OAuth Token
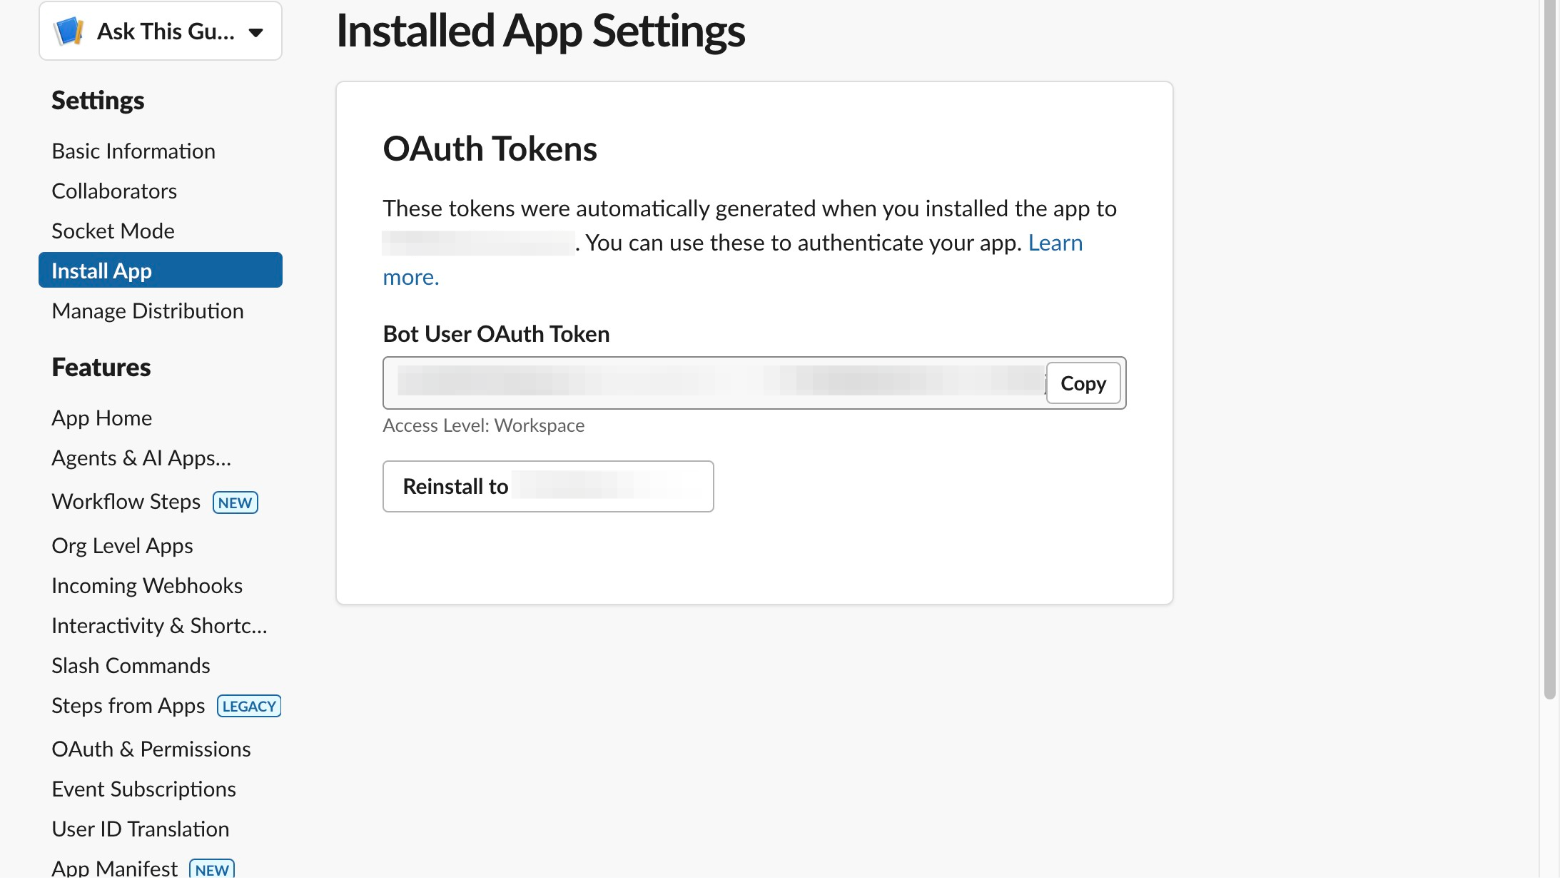
After successful installation, the ‘Installed App Settings’ page displays your Bot User OAuth Token. This is the token that you will use to make calls to the Slack API on behalf of your app. Click on Copy to copy it to your clipboard for later use in ATG.
4. Importing the token in ATG
Open Knowledge categories
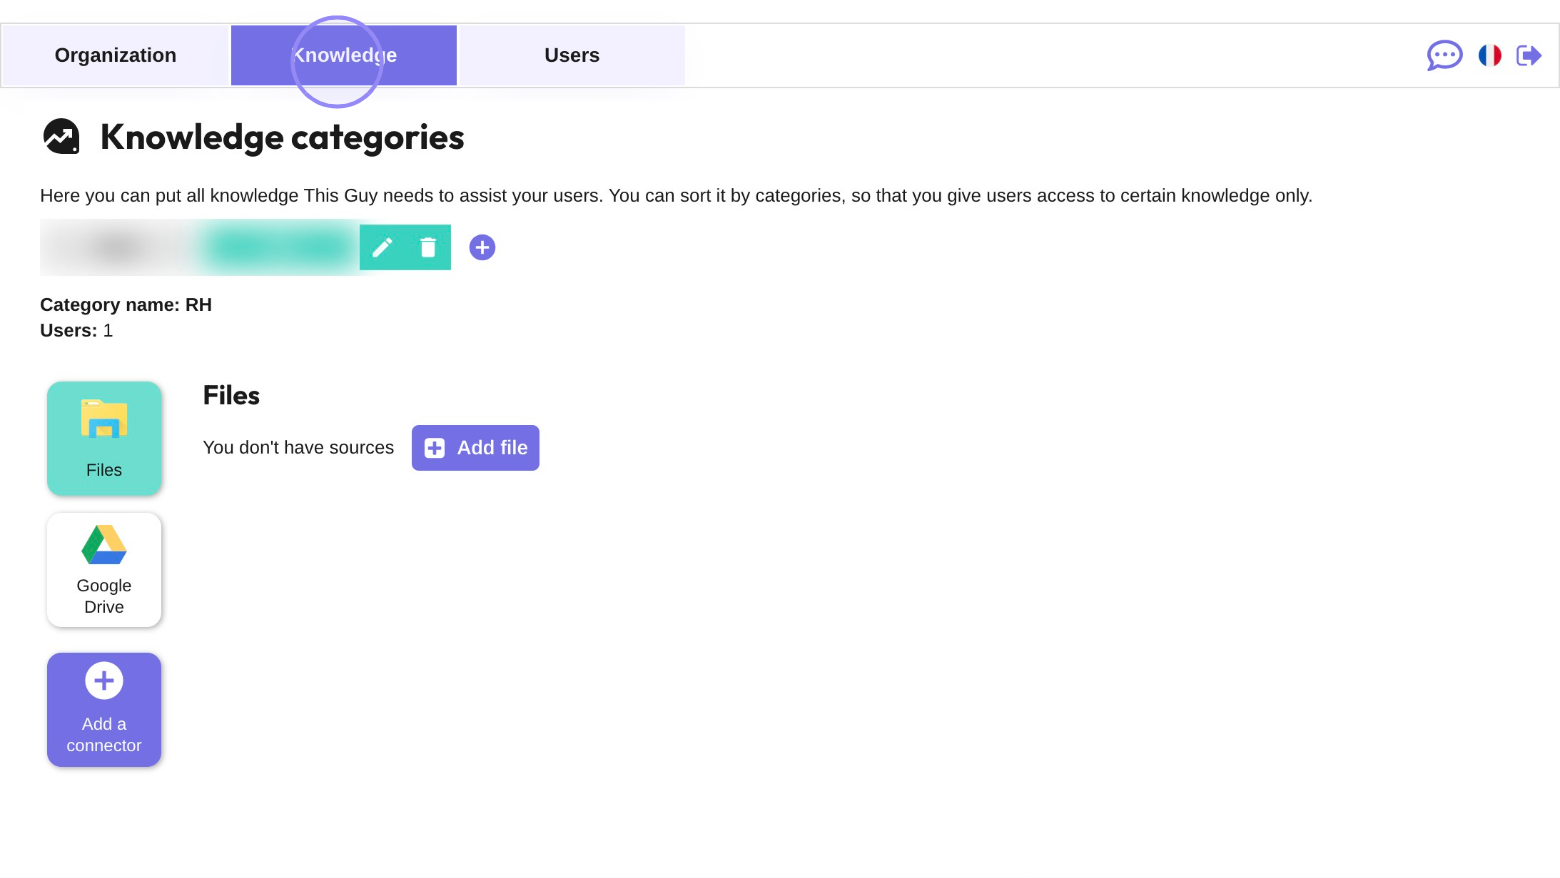
Open the Knowledge Categories section of ATG Administration Console.
Add a Connector
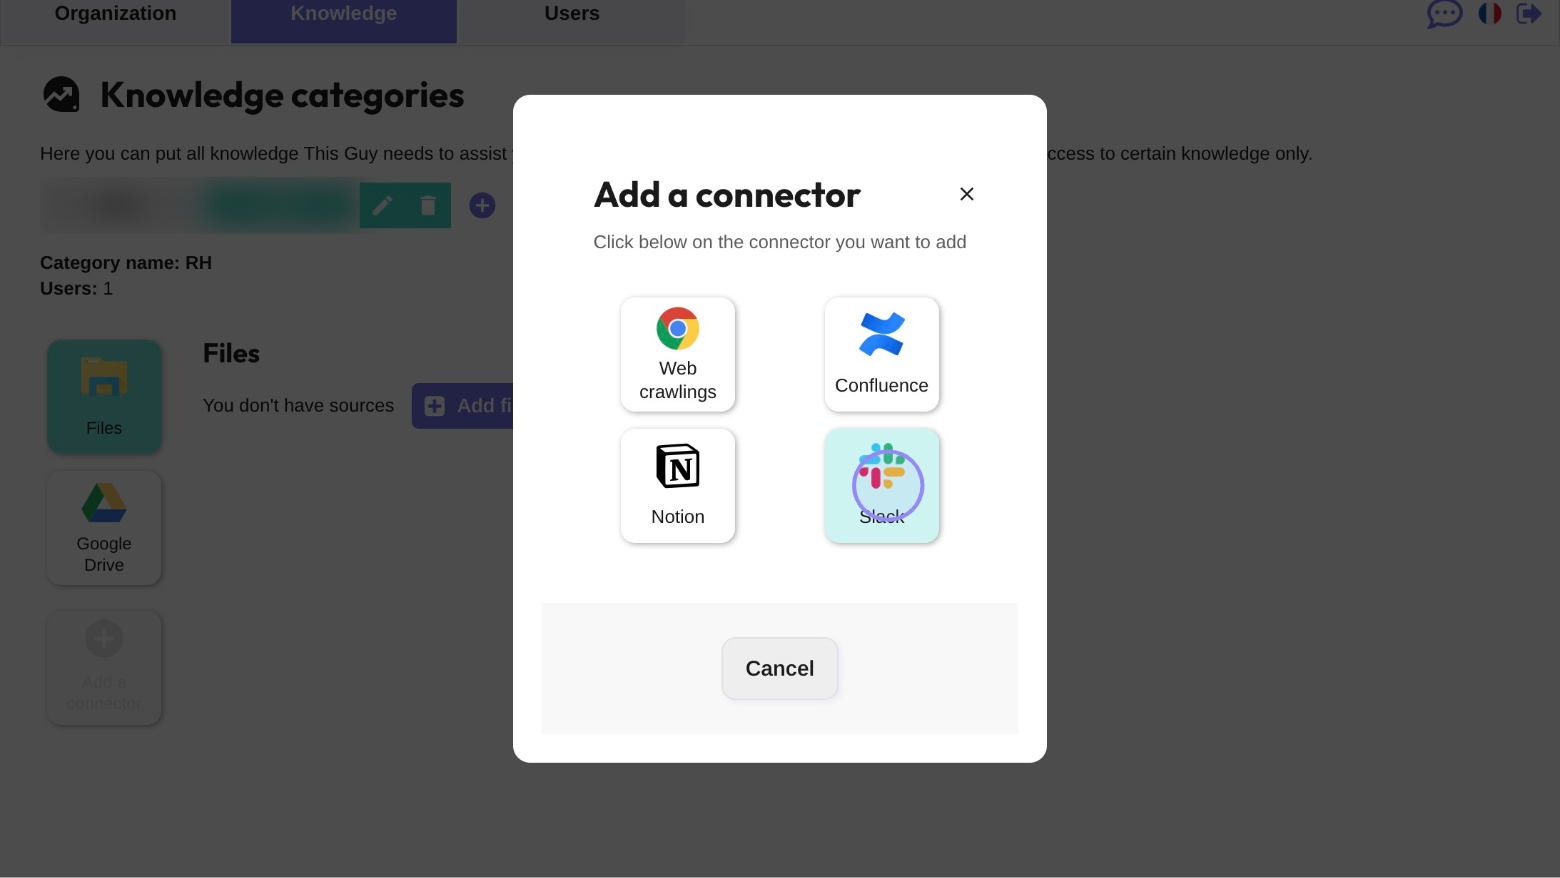
Click on ‘Add a connector’ to open the connector selection menu and choose the Slack connector from the available options.
Paste your token

Paste your token generated previously in Slack administration console.
Validate Slack connector
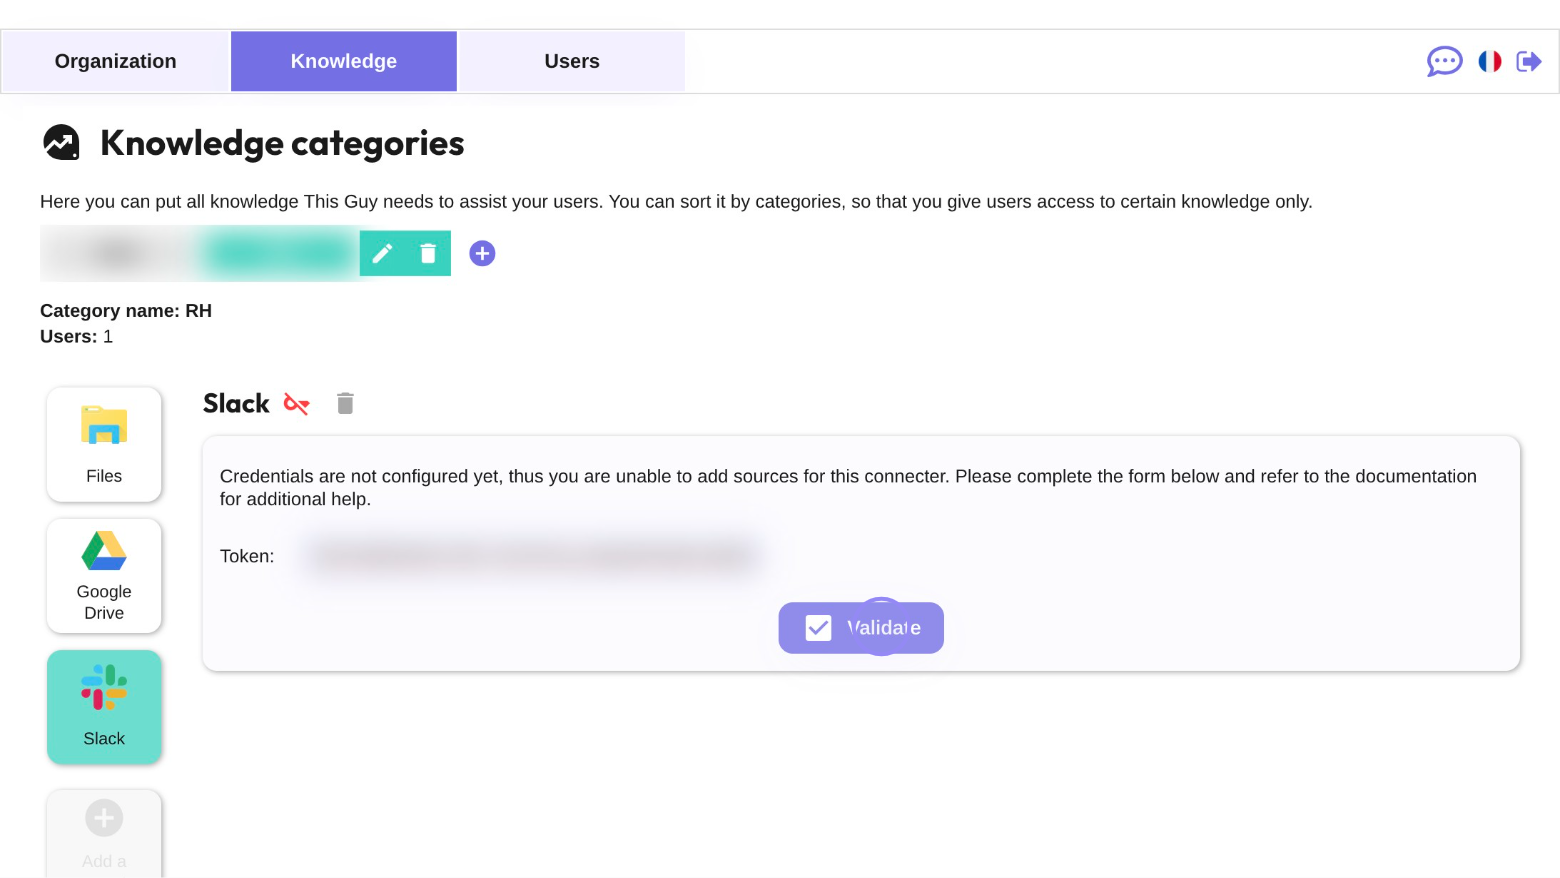
Click on the ‘Validate’ button to confirm the token.